
PlatformIO ESP32 Setup in VS Code: First Project Guide
PlatformIO ESP32 setup starts with Visual Studio Code: install the PlatformIO IDE extension, create a new project with board Espressif ESP32 Dev Module and framework Arduino, then build and upload. Every project setting lives in platformio.ini at the project root. Use a USB data cable and pick the port that appears when you plug the board in.
Quick facts
- Editor: Visual Studio Code with the PlatformIO IDE extension.
- Project file: platformio.ini. It pins the platform, board, framework, and libraries.
- Board for a DevKit V1: esp32dev. Framework for Arduino code: arduino.
- First build downloads the ESP32 platform and toolchain, so allow several minutes.
- Monitor speed: 115200 baud for most ESP32 sketches.
What is PlatformIO and why use it for ESP32?
PlatformIO is a build system and extension that runs inside Visual Studio Code. It manages the compiler, the framework, and the libraries for each project. Arduino IDE hides those details behind menus. PlatformIO writes them into platformio.ini, so a project built today builds the same way next year. That matters when a project grows past one sketch file or when two people share the same code. The trade is a steeper first hour. You learn the project layout and the configuration file before you blink an LED.
PlatformIO also gives you a real code editor. VS Code offers autocomplete, jump to definition, and multi-file projects. Arduino IDE 2 has improved, but VS Code is stronger for large code. PlatformIO supports the Arduino framework and the ESP-IDF framework from the same project file. This guide uses the Arduino framework, so your Arduino sketches run with only small changes. The main change is the file name. Arduino sketches use a .ino file. PlatformIO Arduino projects use src/main.cpp and need #include
How do you install VS Code and PlatformIO?
Download Visual Studio Code from the official VS Code site and install it for your operating system. Open VS Code and press Ctrl+Shift+X on Windows and Linux, or Cmd+Shift+X on macOS, to open Extensions. Search for PlatformIO IDE and install the official extension published by PlatformIO. The extension installs PlatformIO Core in the background on first use. That first install takes a few minutes and downloads the build tools. Wait for the PlatformIO Home screen to open. A new ant-head icon appears in the left activity bar when the install finishes.
PlatformIO Core needs Python 3 on your computer. Most installs already have it, and the extension handles it. If PlatformIO reports a missing Python, install Python 3 from the official Python site and restart VS Code. On Linux, install python3 and python3-venv through your package manager. Do not install PlatformIO Core separately unless the extension install fails. The extension is the supported path, and it keeps Core updated.
How do you create your first ESP32 project?
Click the PlatformIO icon in the activity bar, then click New Project under Quick Access or on the PIO Home screen. Fill in three fields. Name the project esp32-blink. Pick the board that matches your hardware. For a 30-pin DevKit V1, search for Espressif ESP32 Dev Module. For an S3 DevKitC-1, search for the S3 DevKitC-1 entry. Pick Arduino as the framework. Click Finish and wait. PlatformIO creates the project folder and downloads the ESP32 platform in the background. The first project takes the longest. Later projects reuse the download.
Open the project folder and learn the layout. The file platformio.ini holds the configuration. The folder src holds main.cpp, which is your program. The folder include holds project headers. The folder lib holds project libraries. The folder .pio holds build output, and you should not edit it. Open src/main.cpp and replace its contents with the Blink code in this guide. Save the file. The toolbar at the bottom of VS Code holds the build, upload, and monitor buttons.
What goes in platformio.ini?
Open platformio.ini and read it before you change anything. A basic ESP32 project has one environment block. The line platform = espressif32 selects the ESP32 platform. The line board = esp32dev selects the DevKit V1 board definition. The line framework = arduino selects the Arduino framework. Add monitor_speed = 115200 so the Serial Monitor opens at the right baud rate. Add upload_speed = 921600 for faster uploads on a good cable, or leave it out to use the default. Save the file after each edit, because PlatformIO reads it on the next build.
Pin the platform version when a project must stay stable. Pin the platform version only with a version number you have confirmed in the PlatformIO registry for your board, and record that version in your project notes. An unpinned platform can change on the next install and break a build. For a first project, leave the platform unpinned and let PlatformIO pick the current release. Add libraries under lib_deps, one per line, with the library name from the PlatformIO registry. The libraries guide in this series explains lib_deps in full.
How do you build, upload, and monitor?
Click the checkmark icon in the bottom toolbar to build. The first build downloads the compiler and the Arduino framework for ESP32, so it takes several minutes. A successful build ends with SUCCESS in the terminal. Fix any red compiler error before you upload. A missing #include
Connect the board with a USB data cable. Click the right arrow icon to upload. PlatformIO calls esptool, which resets the board and writes the firmware. If the upload stops at Connecting with rows of dots, hold the BOOT button and click Upload again, then release BOOT when the upload starts. Click the plug icon to open the Serial Monitor at the speed in monitor_speed. Press Ctrl+C in the terminal to stop the monitor before the next upload, because the monitor holds the port open.
How do you fix the common PlatformIO errors?
A board not found error usually means the board name in platformio.ini is wrong. Open PIO Home, click Boards, and search for your board to copy the exact board ID. A port not found error means the driver or the cable is at fault. Check Device Manager on Windows for USB-SERIAL CH340 or Silicon Labs CP210x USB to UART Bridge. Install the matching driver and try a known data cable. A build error that names a missing library means lib_deps is missing that library. Add it, save platformio.ini, and build again.
A project that uploads but does nothing may run the wrong board entry. An S3 board built as esp32dev can upload and then fail to run. Match the board entry to the chip on the module shield. A sketch that worked in Arduino IDE but fails in PlatformIO may use a .ino-only feature. The setup and loop functions work the same, but a .ino file lets you skip function declarations and the Arduino.h include. In main.cpp, add the include and declare any function before you call it.
Step-by-step: PlatformIO ESP32 setup and first upload
- Install Visual Studio Code, then install the PlatformIO IDE extension from the Extensions view.
- Click the PlatformIO icon, then New Project. Name it esp32-blink.
- Pick Espressif ESP32 Dev Module as the board and Arduino as the framework, then click Finish.
- Open platformio.ini and confirm platform = espressif32, board = esp32dev, framework = arduino, and monitor_speed = 115200.
- Open src/main.cpp and paste the Blink code from this guide, including #include
. - Connect the board with a USB data cable.
- Click the checkmark icon to build and wait for SUCCESS.
- Click the right arrow icon to upload and wait for the upload to finish.
- Watch the on-board LED blink, then click the plug icon to open the Serial Monitor at 115200 baud.
platformio.ini for each board in this guide
| Board in stock | platformio.ini board value | Framework | Notes |
|---|---|---|---|
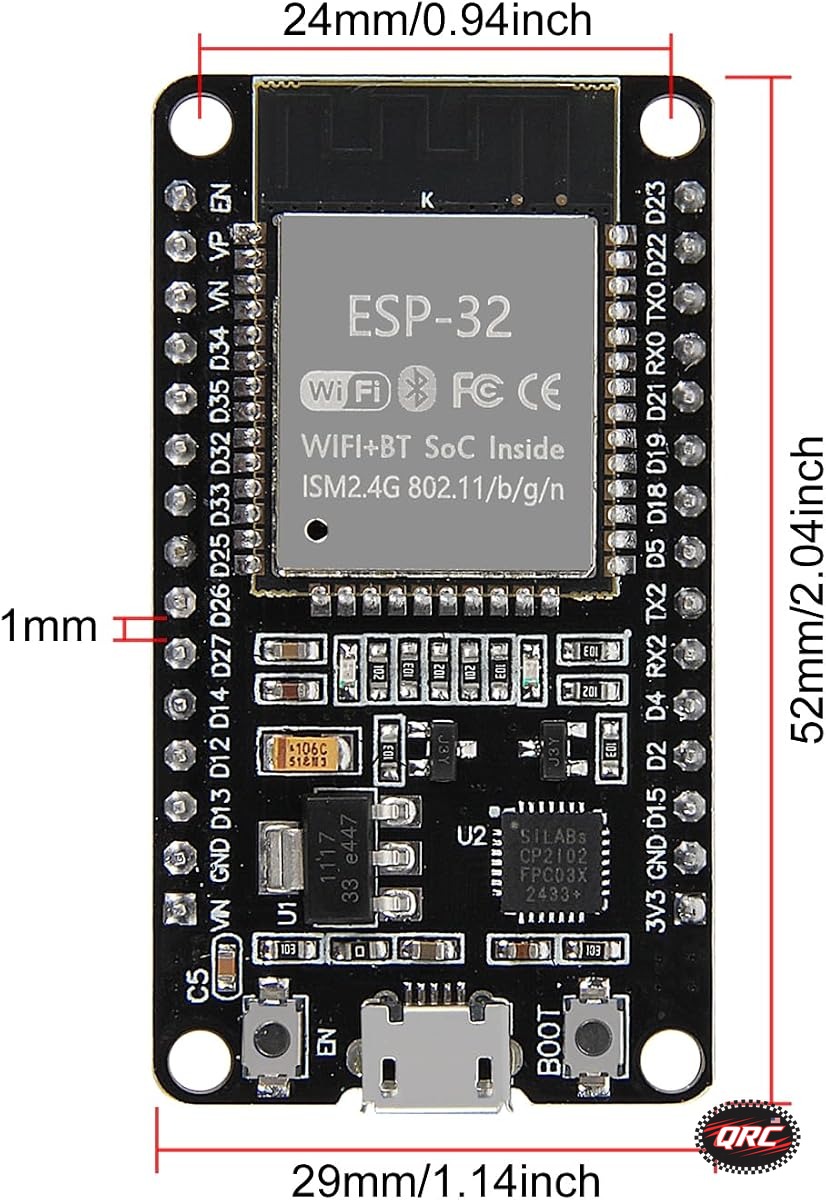
| ESP32 DevKit V1, 30-pin | esp32dev | arduino | Classic WROOM-32 module, GPIO 2 LED |
| ESP32-DevKitC, 38-pin | esp32dev | arduino | Same chip as DevKit V1, narrower board |
| ESP32-S3 DevKitC-1 | esp32-s3-devkitc-1 | arduino | Use the S3 entry, not esp32dev |
| ESP32-C3 SuperMini | esp32-c3-devkitm-1 | arduino | Check the board ID in PIO Home before you build. For Serial output on this board, add build flags -D ARDUINO_USB_MODE=1 and -D ARDUINO_USB_CDC_ON_BOOT=1 |
First code to run
Save this code as src/main.cpp in your PlatformIO project. The Arduino IDE Blink example needs #include
// main.cpp for PlatformIO, Arduino framework
// Board: esp32dev (ESP32 DevKit V1) in platformio.ini
// Library: none. Uses only Arduino.h from the Arduino framework.
#include <Arduino.h>

// LED_BUILTIN is GPIO 2 on a classic DevKit V1 board.
void setup() {
  Serial.begin(115200);          // Start serial at 115200 baud
  pinMode(LED_BUILTIN, OUTPUT);  // Set the on-board LED pin as an output
  Serial.println("ESP32 Blink started");
}

void loop() {
  digitalWrite(LED_BUILTIN, HIGH);  // Turn the LED on
  Serial.println("LED on");
  delay(1000);                      // Wait 1000 ms (1 second)
  digitalWrite(LED_BUILTIN, LOW);   // Turn the LED off
  Serial.println("LED off");
  delay(1000);                      // Wait 1000 ms (1 second)
}
The Serial Monitor in PlatformIO uses the monitor_speed value from platformio.ini. Set it to 115200 to match Serial.begin(115200).
Frequently asked questions
Is PlatformIO better than Arduino IDE for ESP32?
PlatformIO is better for multi-file projects, version pinning, and library management. Arduino IDE is faster for a first Blink sketch and for short tutorials. Pick Arduino IDE to learn, and move to PlatformIO when a project grows past one file.
What is platformio.ini?
platformio.ini is the configuration file at the root of every PlatformIO project. It names the platform, board, framework, upload speed, monitor speed, and libraries. One project can hold several environment blocks for different boards.
Why does my first PlatformIO build take so long?
The first build downloads the ESP32 platform, the compiler toolchain, and the Arduino framework. Later builds reuse those downloads and finish in seconds. A slow connection makes the first build take several minutes.
Can I use my Arduino .ino sketches in PlatformIO?
Yes, with two changes. Rename the file to main.cpp inside the src folder, and add #include
Why does PlatformIO say the board is not connected?
Check the cable first, then the driver. A charge-only cable powers the board but carries no data. A missing CH340 or CP2102 driver leaves no port for PlatformIO to open. The driver fix guide in this series covers both chips.
Parts used in this guide
This guide builds a Blink project for the ESP32 DevKit V1 board. The same steps work for the 38-pin ESP32-DevKitC board linked below.
- ESP32 DevKit V1 Development Board, 30-Pin WROOM-32, WiFi + Bluetooth, Dual-Core
- ESP32-DevKitC-32 Development Board 6-Pack, 38-Pin
Related guides
- ESP32 vs ESP32-S3 vs ESP32-C3 vs ESP32-C6: Which Chip for Your Project
- How to Set Up Arduino IDE for ESP32 Boards
- ESP-IDF First Project: Build and Flash an ESP32
Sources
- PlatformIO ESP32 setup in VS Code
- VS Code, PlatformIO and the ESP32 guide
- PlatformIO ESP32 setup guide
Last updated: 2026-11-21