
ESP-IDF ESP32 First Project: Build and Flash Guide
ESP-IDF ESP32 first project: install ESP-IDF with the Espressif installer for your operating system, open an ESP-IDF terminal, copy the hello_world example, set the target to your chip with idf.py set-target, then run idf.py build and idf.py -p PORT flash monitor. The monitor prints Hello world at 115200 baud.
Quick facts
- ESP-IDF is the Espressif IoT Development Framework, the native C framework for ESP32 chips.
- Main commands: idf.py set-target, idf.py menuconfig, idf.py build, idf.py flash, idf.py monitor.
- Example project: get-started/hello_world, included in every ESP-IDF install.
- Build tools: CMake and Ninja, plus the ESP-IDF toolchain. The installer sets them up.
- Serial monitor baud rate: 115200.
What is ESP-IDF and when should you use it?
ESP-IDF is the official C development framework from Espressif for ESP32 chips. Arduino runs on top of ESP-IDF, but Arduino hides most of it. ESP-IDF exposes the full chip: FreeRTOS tasks, WiFi and Bluetooth stacks, power management, OTA updates, and the partition table. Use ESP-IDF when a project needs a feature that Arduino does not expose, when you need tight control of memory and power, or when you ship a product and need a stable, versioned build. Use Arduino when you need a fast prototype or a short tutorial sketch.
ESP-IDF takes longer to learn. You write C, you configure the project with a menu tool, and you build from a terminal. The reward is control. You pick the exact chip target, you set the flash size and partition table, and you read the real error from the build log. This guide stays on the happy path: install, copy the hello_world example, set the target, build, flash, and read the output. It does not cover WiFi or Bluetooth. Those examples live in the ESP-IDF examples folder after install.
How do you install ESP-IDF?
Use the installer for your operating system from the ESP-IDF getting started page on the Espressif docs site. On Windows, the offline installer is the simplest path. It installs Python, Git, CMake, Ninja, and the toolchain, then it clones ESP-IDF. On Linux and macOS, follow the manual steps on the same docs page: install the prerequisites, clone the ESP-IDF repository, then run the install script. The docs page names the exact prerequisite packages for each system. Follow that page, not a third-party tutorial, when the steps differ. There are 2 install paths: the offline installer on Windows, and the manual steps on Linux and macOS.
Do not install ESP-IDF in a folder path that holds spaces. The build system does not support spaces in the path to ESP-IDF or to a project. Use C:\esp on Windows or ~/esp on Linux and macOS. After install, open the ESP-IDF terminal. On Windows, the installer adds an ESP-IDF PowerShell or Command Prompt shortcut to the Start menu. Use that shortcut, not a plain terminal, because it sets the environment variables that idf.py needs. On Linux and macOS, source the export script in each new terminal before you run idf.py.
How do you start the hello_world project?
Copy the hello_world example out of the ESP-IDF tree before you build it. Never build inside the examples folder, because your changes would mix with the framework source. From the ESP-IDF terminal, go to your esp folder and copy the example with cp -r $IDF_PATH/examples/get-started/hello_world . on Linux and macOS, or xcopy /e /i %IDF_PATH%\examples\get-started\hello_world hello_world on Windows. Open the copied folder and look at the files. The file main/hello_world_main.c holds the program. The file CMakeLists.txt describes the project. The file sdkconfig holds the saved configuration.
Set the target chip before you build. Run cd hello_world, then idf.py set-target esp32 for a DevKit V1 board or idf.py set-target esp32s3 for an S3 DevKitC-1 board. The target must match the chip on your board. A build for the wrong target can still finish, but the flash will not run. Run idf.py menuconfig if you want to change settings, such as the serial port or the flash size. For the first build, accept the defaults and close menuconfig without changes.
How do you build, flash, and monitor?
Run idf.py build from the project folder. The build compiles the application and all ESP-IDF components, then it generates the bootloader, the partition table, and the application binary. The first build takes several minutes because it compiles the whole framework. Later builds reuse the output and finish faster. A successful build ends with Project build complete. Read the last lines of the output if it fails. The first error line names the cause, and a missing target or a path with spaces are the two most common first-build failures.
Connect the board with a USB data cable. Find the serial port name. On Windows it is COM3 or a higher number. On Linux it is /dev/ttyUSB0. On macOS it is a cu.usbserial device. Run idf.py -p PORT flash, with PORT replaced by your port name. The flash step builds first if you skipped the build. Run idf.py -p PORT monitor to read the output, or combine both steps with idf.py -p PORT flash monitor. The monitor prints the boot log, then Hello world. Press Ctrl+] to exit the monitor.
What does the hello_world code do?
The hello_world program prints a greeting and the chip information, then it counts down from 10 to 0, printing Restarting in N seconds once per second, then prints Restarting now and restarts the chip with esp_restart. It uses printf, not Arduino Serial. That is the whole program. It proves the toolchain, the target, the flash, and the monitor all work. Keep this project as your test bed. When a later project fails to flash or boot, rebuild hello_world and flash it. If hello_world runs, the toolchain and the board are fine, and the fault is in the later project.
The program also shows the FreeRTOS pattern that ESP-IDF uses. The main function is app_main, and it runs as a task. A delay uses vTaskDelay, not the Arduino delay function. The countdown ends in a restart, so the greeting prints again after each restart. Read main/hello_world_main.c line by line before you change it. Each function name maps to a page in the ESP-IDF API reference. That habit pays off fast, because ESP-IDF has far more API surface than Arduino.
How is ESP-IDF different from Arduino?
Arduino gives you setup and loop, and it hides the operating system. ESP-IDF gives you app_main, FreeRTOS tasks, and the full API. Arduino code is shorter for a Blink sketch. ESP-IDF code is longer, but it shows every choice. Memory, power, and timing are explicit. Arduino libraries often wrap ESP-IDF calls, so a library that works in Arduino may already use ESP-IDF under the hood. When you need a feature that no Arduino library exposes, ESP-IDF is the next step. Arduino hides 1 thing ESP-IDF exposes: the operating system. When you need to ship a product with OTA updates and a custom partition table, ESP-IDF is the right tool from the start.
Both frameworks use the same compiler and the same flash tool. A board that works in Arduino works in ESP-IDF, and the same USB driver and cable rules apply. The port, the BOOT button sequence, and the brownout rules do not change. What changes is the workflow. Arduino uploads from a menu. ESP-IDF builds and flashes from idf.py. PlatformIO can also build ESP-IDF projects, and the PlatformIO guide in this series covers that path. Pick one workflow per project and stay with it. Mixing Arduino and ESP-IDF builds on the same board wastes time.
Step-by-step: ESP-IDF ESP32 first project build and flash
- Install ESP-IDF with the installer from the ESP-IDF getting started page on the Espressif docs site, into a path with no spaces.
- Open the ESP-IDF terminal from the installer shortcut on Windows, or source the export script on Linux and macOS.
- Copy the hello_world example to your esp folder: cp -r $IDF_PATH/examples/get-started/hello_world . on Linux and macOS.
- Open the copied folder: cd hello_world.
- Set the target chip: idf.py set-target esp32 for a DevKit V1 board, or idf.py set-target esp32s3 for an S3 DevKitC-1 board.
- Build the project: idf.py build. Wait for Project build complete.
- Connect the board with a USB data cable and find the serial port name.
- Flash and monitor: idf.py -p PORT flash monitor, with PORT replaced by your port name.
- Read Hello world in the monitor at 115200 baud, then press Ctrl+] to exit the monitor.
idf.py commands you will use most
| Command | What it does | When to use it |
|---|---|---|
| idf.py set-target esp32 | Sets the chip target | Once per project, before the first build |
| idf.py menuconfig | Opens the configuration menu | To change flash size, port, or features |
| idf.py build | Compiles the project | After any code or config change |
| idf.py -p PORT flash | Writes the build to the board | After a successful build |
| idf.py -p PORT monitor | Reads serial output at 115200 baud | To see boot log and program output |
| idf.py -p PORT flash monitor | Flashes, then monitors | Normal test cycle |
First code to run
This listing shows the key calls in the hello_world example. Run the full example from your ESP-IDF install, not this summary, because the real file holds the complete includes and restart logic.
/* hello_world_main.c - ESP-IDF get-started/hello_world example (summary)
 * File: main/hello_world_main.c in the copied hello_world project
 * Framework: ESP-IDF. Build with: idf.py build
 * Flash with: idf.py -p PORT flash monitor
 * This listing shows the key calls. Read the full file in your project.
 */
#include <stdio.h>
#include "sdkconfig.h"
#include "esp_chip_info.h"

void app_main(void)
{
    /* Print a greeting and chip information at startup */
    printf("Hello world!\n");
    esp_chip_info_t chip_info;
    esp_chip_info(&chip_info);
    printf("This is %s chip with %d CPU core(s)\n",
           CONFIG_IDF_TARGET, chip_info.cores);

    /* Count down from 10, then restart the chip */
    for (int i = 10; i >= 0; i--) {
        printf("Restarting in %d seconds...\n", i);
        vTaskDelay(1000 / portTICK_PERIOD_MS);
    }
    printf("Restarting now.\n");
    fflush(stdout);
    esp_restart();
}
app_main replaces the Arduino setup and loop pattern. It runs as a FreeRTOS task, so delays use vTaskDelay instead of the Arduino delay function.
Frequently asked questions
Do I need Arduino IDE if I use ESP-IDF?
No. ESP-IDF is a separate framework with its own installer, terminal, and build tool. You can keep Arduino IDE installed for other projects, but ESP-IDF does not need it.
Which ESP32 chip should I pick for a first ESP-IDF project?
Use a classic ESP32 DevKit V1 board with the esp32 target. It has the widest example coverage. Move to the esp32s3 target when your project needs the S3 chip on a DevKitC-1 board.
Why does idf.py say the target is not set?
Run idf.py set-target esp32 or idf.py set-target esp32s3 from the project folder before you build. The target is stored in the project, so set it once per project and it stays set.
Can I use Arduino libraries in ESP-IDF?
Not directly. ESP-IDF has its own component system, and Arduino libraries expect the Arduino core. Use the ESP-IDF component manager or port the library code to ESP-IDF calls.
How do I exit the ESP-IDF monitor?
Press Ctrl+] in the monitor terminal. The monitor holds the serial port open, so exit it before you flash again or open another serial tool.
Parts used in this guide
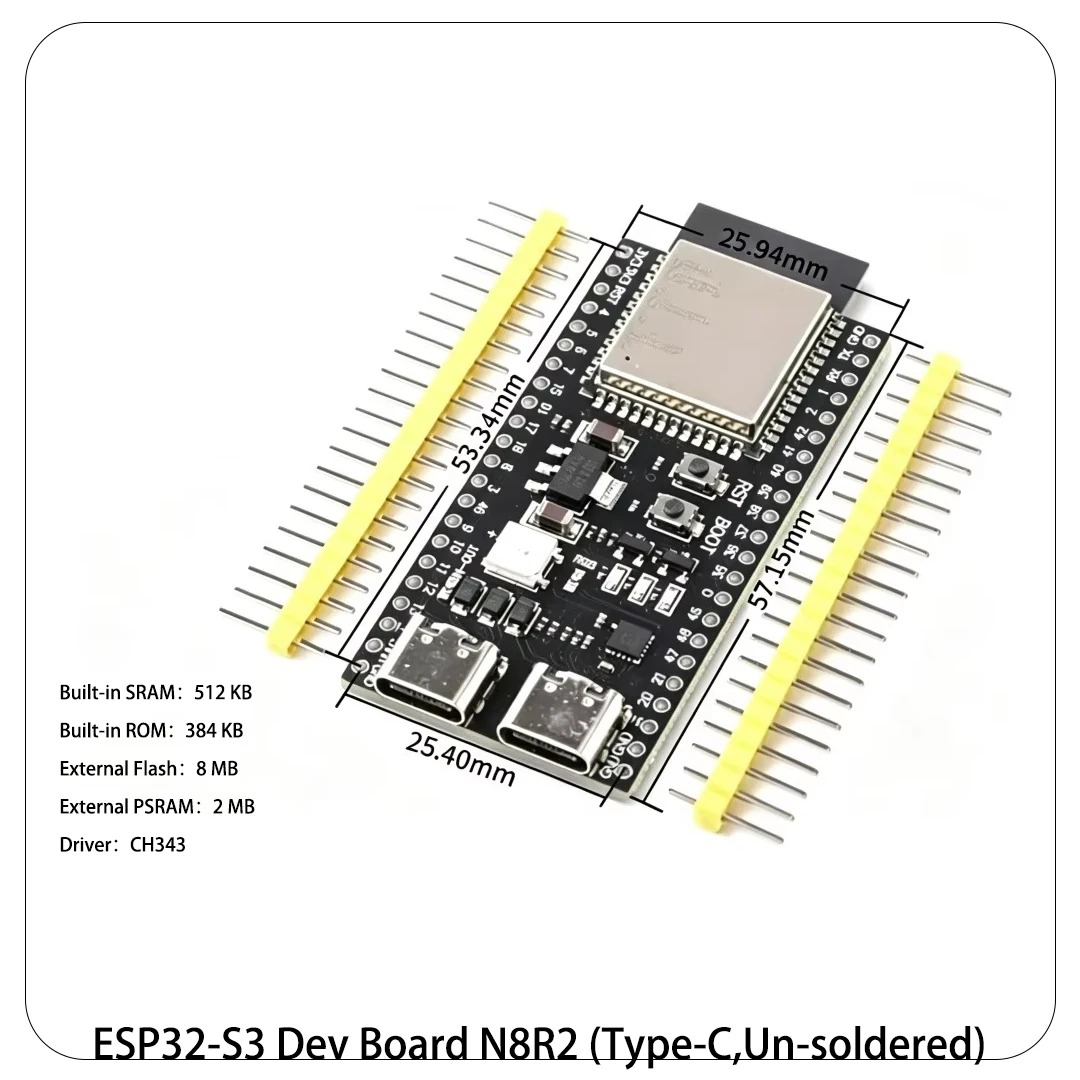
This guide builds hello_world for the S3 DevKitC-1 board and the classic DevKit V1 board linked below. Set the target to match the chip on your board.
- ESP32-S3 Development Board DevKitC-1 N8R2 N16R8
- ESP32 DevKit V1 Development Board, 30-Pin WROOM-32, WiFi + Bluetooth, Dual-Core
Related guides
- ESP32 vs ESP32-S3 vs ESP32-C3 vs ESP32-C6: Which Chip for Your Project
- How to Set Up Arduino IDE for ESP32 Boards
- How to Set Up PlatformIO for ESP32 in VS Code
Sources
Last updated: 2026-11-21