
Install Arduino Libraries in Arduino IDE and PlatformIO
Install Arduino libraries in Arduino IDE from Library Manager: search for the library name and click Install. In PlatformIO, add the library to lib_deps in platformio.ini and build. For a library not in a registry, download the ZIP file and use Sketch, Include Library, Add .ZIP Library in Arduino IDE.
Quick facts
- Arduino IDE: Library Manager installs from the Arduino library registry.
- ZIP install: Sketch, Include Library, Add .ZIP Library, for libraries not in the registry.
- PlatformIO: lib_deps in platformio.ini, one library per line, from the PlatformIO registry.
- Include line: #include
at the top of the sketch. - Error to watch: No such file or directory means the library is missing or the name is wrong. There are 3 install paths in this guide: Library Manager, ZIP, and lib_deps.
What is an Arduino library?
A library is a set of code files that adds a feature to your sketch. A sensor library reads a sensor. A display library draws on a screen. A WiFi library connects to a network. You include the library at the top of the sketch, and you call its functions in setup and loop. Without a library, you would write every sensor command by hand. With a library, you call a short function and the library handles the protocol. Libraries save time, but they also add flash use and RAM use. A large graphics library can add hundreds of kilobytes to a sketch. Check the compile output for the sketch size after you add a library.
Libraries live in a folder on your computer. Arduino IDE keeps them in the libraries folder inside your sketchbook folder. PlatformIO keeps them per project under lib_deps, or in a shared storage folder. The IDE finds a library by its folder name and its header file name. The include line names the header file, not the library name. Those two names often differ. A library named Adafruit SSD1306 has the header Adafruit_SSD1306.h. Copy the include line from the library examples, not from the library name.
How do you install a library in Arduino IDE?
Open Library Manager from the left sidebar icon in Arduino IDE 2, or from Sketch, Include Library, Manage Libraries in IDE 1.8. Type the library name in the search box. Find the exact library in the results and click Install. The IDE downloads the library and its dependencies. Wait for the install to finish before you compile. The search results show the author and the version. Pick the library by the author named in the tutorial you follow, because several libraries can share a name. A wrong library with the right name is a common cause of a compile error.
After the install, open an example from the library to test it. Go to File, Examples, and find the library name near the bottom of the menu. Open the simplest example, pick your board and port, and click Upload. A working example proves the library installed and the wiring is right. If the example fails to compile, read the first error line. A No such file or directory error means the include line names a header that is not installed. A different error that names a function means the library version does not match the tutorial. Install the version the tutorial names.
How do you install a library from a ZIP file?
Download the ZIP file from the library repository or the author page. Do not unzip it first. The IDE unzips the 1 ZIP file itself. In Arduino IDE, go to Sketch, Include Library, Add .ZIP Library. Pick the ZIP file and click Open. The IDE unzips it into the libraries folder and restarts the library list. Open File, Examples and confirm the library appears. A ZIP install is the right path when a library is not in the Arduino registry, or when you need a test version from the author. It is also the path for a library that a tutorial ships as a ZIP file.
Check the ZIP contents before you install it. A good library ZIP holds one folder with a library.properties file and a src folder. A bad ZIP holds a folder inside a folder, and the IDE installs the outer folder without finding the library. If the install seems to work but the examples do not appear, open the libraries folder in your sketchbook and look at the folder name. The folder should hold the .h files directly, or in a src subfolder. Rename or move the folder only when you know the layout is wrong. Delete the bad install and reinstall from a clean ZIP.
How do you install a library in PlatformIO?
Open platformio.ini in your PlatformIO project. Add a lib_deps section under the environment block. Write one library per line, using the name from the PlatformIO registry. A line looks like lib_deps = adafruit/Adafruit SSD1306. Save platformio.ini and click Build. PlatformIO downloads the library and its dependencies into the project storage. The library is per project, so a second project needs its own lib_deps entry. That is a strength, because each project pins its own library set and a change in one project cannot break another.
Pin a library version when a project must stay stable. Add @ followed by a version number after the library name, only after you have confirmed that version exists in the PlatformIO registry. An unpinned library can change on the next build and break a project that worked yesterday. For a first project, leave the version off and let PlatformIO pick the current release. Record the installed version in your project notes after the first successful build. The build log prints the version it used.
How do you fix a library not found error?
Read the exact error line. The compiler prints fatal error: LibraryName.h: No such file or directory when the header is missing. Check three things in order: the include line spelling, the library install, and the board match. The include line must match the header file name exactly, including capital letters. A lowercase ssd1306.h will not find SSD1306.h on Linux. Next, open Library Manager and confirm the library is installed. A library installed for one sketchbook location will not appear if the IDE uses a different sketchbook folder. Check the sketchbook location in Preferences.
Then check the board match. A library written for AVR boards may not compile on ESP32 or Pico. The error for a board mismatch names a missing register or a missing function, not a missing file. Read the library page for the supported boards. Pick a library that lists your chip. A sensor library that supports ESP32 and Arduino Uno is safe for both. A display library that supports only AVR is not. When two libraries share a name, uninstall the wrong one before you install the right one. Two libraries with the same header name can confuse the compiler.
How do you pick the right library version?
Use the version that the tutorial or the project names. A newer version can change a function name or a default and break old example code. A older version can miss a bug fix that your board needs. Open Library Manager, click the library, and use the version dropdown to pick a version. Install it and test the example. If the example works, record the version in your project notes. Record the 1 version number that works. That note saves hours when you rebuild the project on another computer. For PlatformIO, the version goes in lib_deps after the @ sign. For Arduino IDE, the version stays in the Library Manager record.
Update libraries only when you have a reason. A new version can fix a bug, add a board, or close a security issue. It can also break a working project. Update one library at a time, test the project, and note the result. Never update every library at once before a deadline. The Arduino IDE shows an Updates tab in Library Manager when a newer version exists. Review the library changelog before you click Update. A changelog that lists a breaking change is a warning to test the project after the update.
Step-by-step: install Arduino libraries in Arduino IDE and PlatformIO
- Pick the library name from the tutorial or the sensor datasheet. Note the author name to avoid a same-name library.
- In Arduino IDE, open Library Manager from the left sidebar and search for the library name.
- Click Install on the library by the correct author and wait for the install to finish.
- Open File, Examples, find the library name, and open its simplest example.
- Pick your board and port, click Upload, and confirm the example works. Confirm it on 1 board and 1 port before you move on.
- For a ZIP library, use Sketch, Include Library, Add .ZIP Library and pick the ZIP file without unzipping it first.
- In PlatformIO, open platformio.ini and add lib_deps = author/Library Name under the environment block.
- Save platformio.ini, click Build, and confirm the build downloads the library and ends with SUCCESS.
- Add #include
at the top of your sketch, using the header name from the library example.
Install method for each situation
| Situation | Arduino IDE method | PlatformIO method |
|---|---|---|
| Library is in a registry | Library Manager, search and Install | lib_deps in platformio.ini |
| Library is not in a registry | Add .ZIP Library from the ZIP file | lib_deps with a GitHub URL, or a lib folder copy |
| Project must stay stable | Pick a version in Library Manager | Pin the version after @ in lib_deps |
| Library is your own code | Copy the folder into the sketchbook libraries folder | Copy the folder into the project lib folder |
The table covers 4 situations: a library in a registry, a library not in a registry, a project that must stay stable, and a library that is your own code.
First code to run
Install the Adafruit SSD1306 library first, then upload this sketch. It proves the library installed, the include lines are right, and the display answers on I2C.
// Library install test for Arduino IDE and PlatformIO
// Board: ESP32 Dev Module (DevKit V1)
// Library: Adafruit SSD1306 by Adafruit (install it first, see steps above)
// Hardware: 0.96 inch OLED display, I2C, SDA GPIO 21, SCL GPIO 22
// If you have no display, this sketch still proves the include line compiles.
#include <Wire.h>
#include <Adafruit_GFX.h>
#include <Adafruit_SSD1306.h>

// Display size in pixels: 128 wide, 64 tall. I2C address 0x3C is common.
#define SCREEN_WIDTH 128
#define SCREEN_HEIGHT 64
Adafruit_SSD1306 display(SCREEN_WIDTH, SCREEN_HEIGHT, &Wire, -1);

void setup() {
  Serial.begin(115200);
  // Start the display. If begin fails, the wiring or address is wrong.
  if (!display.begin(SSD1306_SWITCHCAPVCC, 0x3C)) {
    Serial.println("SSD1306 not found. Check wiring and I2C address.");
    while (true) { delay(100); }  // Stop here so the error is visible
  }
  display.clearDisplay();
  display.setTextSize(1);
  display.setTextColor(SSD1306_WHITE);
  display.setCursor(0, 0);
  display.println("Library OK");
  display.display();
  Serial.println("SSD1306 library installed and display found.");
}

void loop() {
  delay(1000);  // Nothing to repeat. The display holds the text.
}
The I2C address 0x3C is common for 0.96 inch OLED displays, but some boards use 0x3D. If begin fails, run an I2C scanner sketch to read the real address.
Frequently asked questions
Where does Arduino IDE store libraries?
Arduino IDE stores libraries in the libraries folder inside your sketchbook folder. Check the sketchbook location in File, Preferences. A library in the wrong sketchbook folder will not appear in Library Manager.
Why does the compiler say No such file or directory for a library?
The header file is missing, the include line is misspelled, or the library is installed in the wrong place. Check the spelling and the capital letters first, then confirm the library in Library Manager.
Can I install a library from GitHub in PlatformIO?
Yes. Add the GitHub URL to lib_deps in platformio.ini. PlatformIO clones the repository. Use a tagged release URL when you need a stable version, not the main branch.
Do I need to restart Arduino IDE after installing a library?
No, for a Library Manager install. The IDE picks up the new library at once. For a manual folder copy into the libraries folder, restart the IDE so it rescans the folder.
How do I remove a library I no longer need?
In Arduino IDE 2, open Library Manager, find the library, and click Remove. In PlatformIO, delete the line from lib_deps in platformio.ini and build again. Remove one library at a time and test the project after each removal.
Parts used in this guide
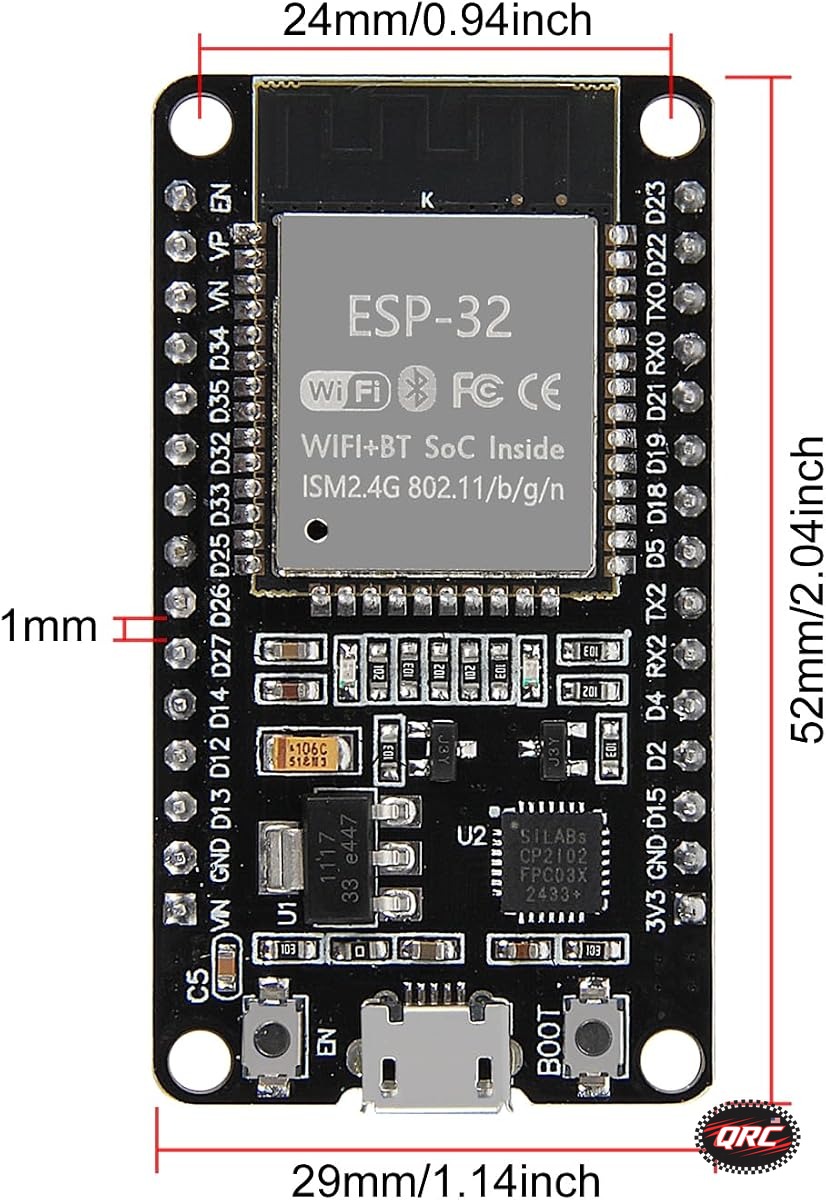
This guide installs libraries for the ESP32 DevKit V1 board linked below. Use the jumper wire set linked below when you connect an I2C display to test a library.
- ESP32 DevKit V1 Development Board, 30-Pin WROOM-32, WiFi + Bluetooth, Dual-Core
- Dupont Jumper Wire Set 120-Piece
Related guides
- ESP32 vs ESP32-S3 vs ESP32-C3 vs ESP32-C6: Which Chip for Your Project
- How to Set Up Arduino IDE for ESP32 Boards
- How to Set Up PlatformIO for ESP32 in VS Code
Sources
Last updated: 2026-11-21