
Posted on

How to Desolder with a Solder Sucker Pump: Full Guide

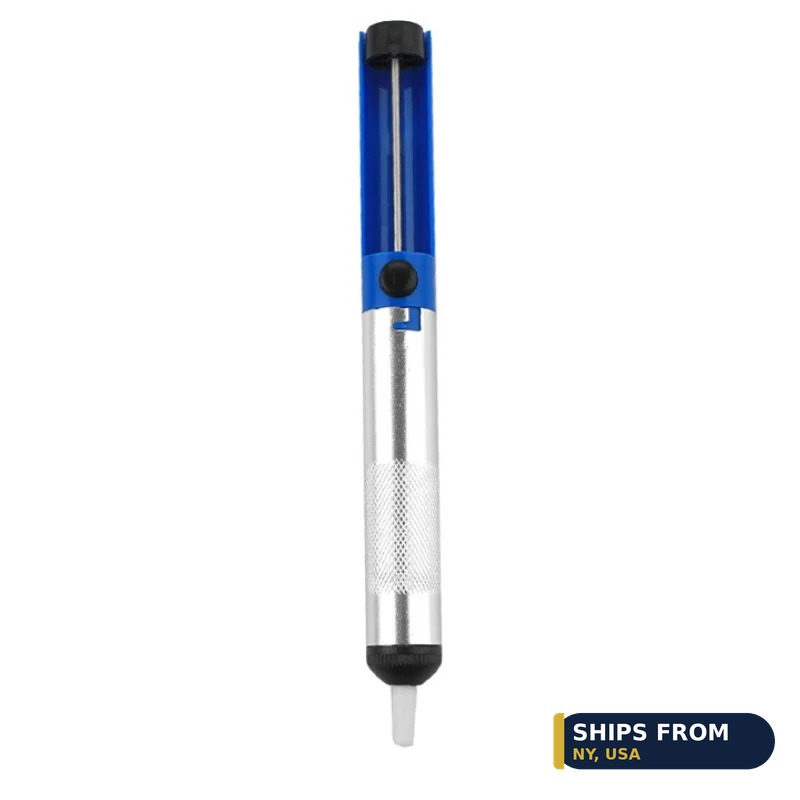
Aluminum desoldering pump solder sucker blue and silver

How to Desolder with a Solder Sucker Pump: Full Guide

To desolder with a solder sucker, prime the plunger, heat the joint with a soldering iron until the solder melts fully, place the nozzle over the joint, and press the release button. The vacuum pulls the molten solder into the pump, clearing the through-hole. The aluminum pump here costs $5.81 for one, or $7.49 for two, with one-handed operation.

Aluminum desoldering pump solder sucker blue and silver
Aluminum desoldering pump with knurled grip, 190 by 20 mm.

Quick facts

Fact Value
Tool Aluminum desoldering pump, solder sucker
Body All aluminum, knurled grip
Seal Single ring, helps prevent air leaks
Size 190 by 20 mm, about 7.5 in long
Colors Blue and silver
Pack 1 pc $5.81, 2 pcs $7.49

What does a desoldering pump do?

A desoldering pump, also called a solder sucker, removes molten solder from circuit boards with vacuum suction.

Press the plunger to load it, place the nozzle over the joint, and press the release button for one-handed operation.

The pump suits through-hole joints and plated holes, where the solder sits in the hole and the pump can pull it clear.

How do you desolder a joint step by step?

Prime the pump by pressing the plunger down until it latches, and add flux to the joint.

Heat the joint with the soldering iron until the solder melts fully, not just on the surface.

Place the nozzle over the molten joint and press the release button right away, before the solder starts to set. Repeat for each pin until the part is free.

What temperature do you use?

For lead-free solder, hold the iron tip between 570F (300C) and 660F (350C).

For lead solder, hold the tip between 520F (270C) and 570F (300C).

Use a chisel or hoof tip, sized to about 60 percent of the pad, so the heat spreads across the joint.

Pump or wick: which tool for which job?

Use the pump for larger solder deposits, through-hole component leads, and clearing plated holes.

Use solder wick for solder bridges, flat pad cleanup, and small amounts of excess solder.

For a stubborn through-hole joint, use the pump first for the bulk solder, then the wick for the residue.

How do you keep the pump working?

Empty the collected solder regularly by pushing the plunger to clear the barrel.

Keep the nozzle clean and unclogged, and replace a worn or melted nozzle tip, because a clogged barrel or cracked nozzle is the most common reason a pump stops pulling.

The pump here disassembles for cleaning, and the single-ring seal helps prevent air leakage for stronger suction.

What did we check on the bench?

We checked the listing states an all-aluminum body, a knurled grip, a single-ring seal, one-handed operation, and a size of 190 by 20 mm.

We checked the listing states a 1 pc option at $5.81 and a 2 pcs option at $7.49.

We counted 7 images on the desoldering pump listing.

How the options compare

Pack Quantity Price
1 pc 1 pump $5.81
2 pcs 2 pumps $7.49

How do you desolder a through-hole part?

  1. Secure the board on a stable, heat-resistant surface and ventilate the work area.
  2. Prime the pump and add flux to the joint.
  3. Heat the joint until the solder melts fully.
  4. Place the nozzle over the joint and press the release button.
  5. Repeat for each pin, then empty the pump barrel before the next joint.

Parts that fit this guide

Shipped fast and securely from our secure facility in New York, providing fast, high quality USA shipping.

Aluminum Desoldering Pump Solder Sucker ($5.81)

Aluminum desoldering pump solder sucker from $5.81. An all-aluminum pump with a knurled grip, single-ring seal, and one-handed operation, in 1 pc and 2 pcs options.

Shop the full range: Tools & Soldering at Quality RC Parts. See also: Related guide.

Read the companion version of this guide on MTSUAV.

Frequently asked questions

Can I use a solder sucker on surface-mount parts?

Not well. The pump suits through-hole joints and plated holes. Surface-mount solder sits under the part lead, where the pump nozzle cannot reach it.

What if the solder will not clear?

Add a little fresh solder first. More molten solder transfers heat better and clears the hole more completely than a thin, oxidized joint.

How do I clean the pump?

Push the plunger to empty the barrel over a bin, keep the nozzle clean, and disassemble the pump for cleaning when the suction drops.

1 pc or 2 pcs?

One pump covers the bench. The 2 pcs option at $7.49 keeps a spare pump or a second bench covered.

Sources

Last updated: November 11, 2026.

Posted on

TP4056 Charging Module: LiPo and Li-ion Basics Guide

TP4056 5V micro USB 1A lithium battery charging module

TP4056 Charging Module: LiPo and Li-ion Basics Guide

The TP4056 is a 5V micro USB charging module for single lithium cells, charging at 1A and stopping at 4.2V. The single module costs $1.49, and the 5-pack costs $14.99. It charges one cell only, never a series pack, and the charge current is set by a resistor on the board.

TP4056 5V micro USB 1A lithium battery charging module
TP4056 charging module with 5V micro USB input and 1A charge current.

Quick facts

Fact Value
Module TP4056
Input 5V micro USB
Charge current 1A
Stop voltage 4.2V
Cells Single lithium cell only
Packs Single $1.49, 5-pack $14.99

What does the TP4056 module do?

The TP4056 is a constant-current, constant-voltage linear charger for single-cell lithium-ion batteries.

The module takes 5V in over micro USB and charges the cell at 1A, with the charge voltage fixed at 4.2V.

The charge current is set by a single resistor on the board, and the chip ends the charge cycle when the current drops to one tenth of the set value.

What is the charge cycle?

The TP4056 charges in two phases: constant current first, then constant voltage at 4.2V as the cell fills.

A deeply discharged cell below 2.9V gets a trickle charge first, until the voltage rises enough for full-current charging.

The chip ends the charge when the current falls to one tenth of the set value, so the cell is not held at charge current past full.

What are the limits?

The TP4056 charges a single cell only. It is not a series-pack charger, and it does not balance multi-cell packs.

The 4.2V stop voltage suits cells that terminate at 4.2V. Cells with a different termination voltage need a charger set for that voltage.

Match the charge current to the cell: the module is set for 1A, which suits cells rated for a 1A charge.

Single module or 5-pack?

The single module at $1.49 suits a first build or a spare on the bench.

The 5-pack at $14.99 suits stocking the bench with one module per charging spot, so several cells can charge at once on separate modules.

The 5-pack is the bulk option for the single module, and the single module is the try-one option beside the 5-pack.

What did we check on the bench?

We checked both listings state the TP4056 module, 5V micro USB input, 1A charge current, and lithium cells.

We checked the single module listing states a quantity of 1, and the 5-pack listing states a quantity of 5.

We counted 1 image on each listing.

How the options compare

Option Quantity Input Charge current Price
Single module 1 5V micro USB 1A $1.49
5-pack 5 5V micro USB 1A $14.99

How do you charge a cell on a TP4056 in 5 steps?

  1. Connect the cell to the module battery pads, positive to positive and negative to negative.
  2. Plug the module into a 5V USB supply over micro USB.
  3. Check the charge starts and the cell voltage rises toward 4.2V.
  4. Leave the cell on a non-flammable surface and do not leave it charging unattended.
  5. Remove the cell when the charge ends, and check the resting voltage before use.

Parts that fit this guide

Shipped fast and securely from our secure facility in New York, providing fast, high quality USA shipping.

TP4056 5V Micro USB 1A Lithium Battery Charging Module (1 Pack) ($1.49)

TP4056 charging module, single pack, at $1.49. A 5V micro USB 1A module for bench charging single cells and small DIY packs.

TP4056 5V Micro USB 1A Lithium Battery Charging Module (5 Pack) ($14.99)

TP4056 charging modules, 5-pack, at $14.99. Five 5V micro USB 1A modules for bench charging single cells and small DIY packs.

Shop the full range: Power Distribution & BECs at Quality RC Parts. See also: Related guide.

Read the companion version of this guide on MTSUAV.

Frequently asked questions

Can the TP4056 charge a 2S or 3S pack?

No. It charges a single cell only. Multi-cell packs need a balance charger that watches each cell.

What voltage does it stop at?

4.2V. The charge voltage is fixed, and the chip ends the charge when the current drops to one tenth of the set value.

Can I change the charge current?

The current is set by a resistor on the board. The module as sold charges at 1A.

How many cells can I charge at once?

One cell per module. The 5-pack gives five modules, so five cells can charge at once on separate modules.

Sources

Last updated: November 11, 2026.
Posted on

DC Power Filter Board: Clean Power for FPV Video Feeds

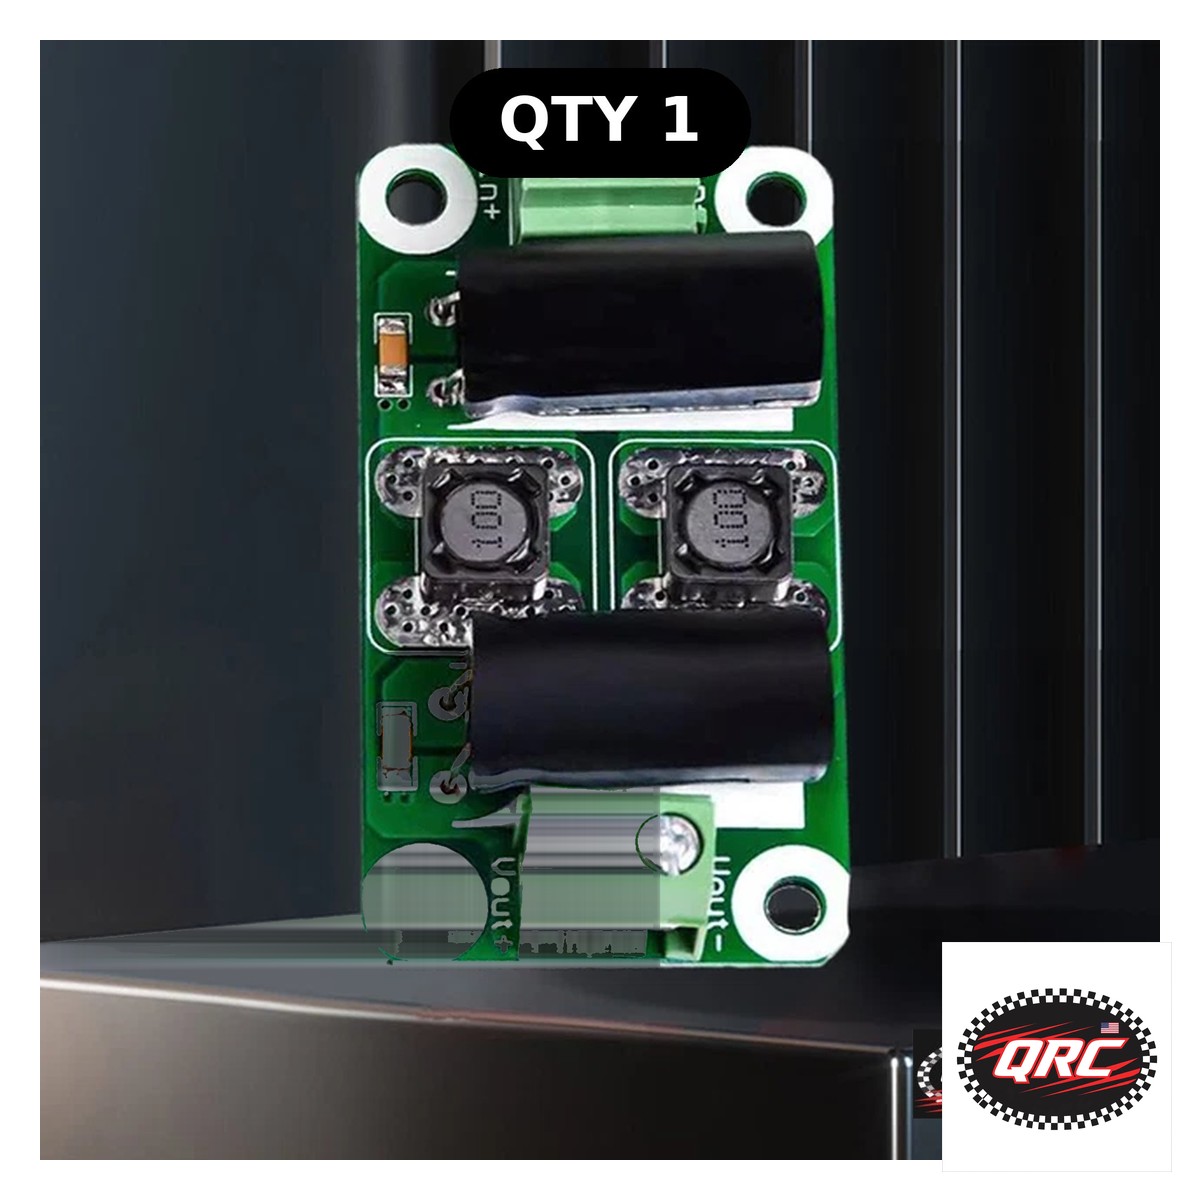
DC power filter board 0-25V 0-50V EMI suppression module

DC Power Filter Board: Clean Power for FPV Video Feeds

A DC power filter board cleans up DC power lines with LC differential common-mode filtering, cutting switching noise and ripple. It comes in 0-25V and 0-50V versions at 2A, 3A, or 4A, from $4.99. Wire it inline on the power feed to a camera, video transmitter, or power amp, and pick the rating that covers your voltage and current.

DC power filter board 0-25V 0-50V EMI suppression module
DC power filter board in 0-25V and 0-50V versions, 2A to 4A.

Quick facts

Fact Value
Filter type LC differential common-mode
Voltage versions 0-25V and 0-50V
Current ratings 2A, 3A, 4A
Price From $4.99 to $5.99
Wiring Series for stronger filtering, parallel for more current
Uses FPV video feeds, power amps, vehicle electronics

What does a DC power filter do?

A DC power filter board cleans up DC power lines by cutting switching noise and ripple in low-voltage DC circuits.

The LC differential common-mode filter blocks high-frequency noise on the power line, so the load sees cleaner DC.

In an FPV build, that means the camera and video transmitter power feeds carry less ESC switching noise, which shows up as lines in the video.

How does LC filtering work?

An LC filter pairs an inductor with a capacitor: the inductor blocks high-frequency AC ripple, and the capacitor shunts the remaining ripple to ground.

Direct current passes through, while noise above the cutoff frequency is attenuated.

The board can be wired in series for stronger filtering, or in parallel for more current, to match the build.

Which voltage and current rating do you pick?

Pick the voltage version that covers your pack: a 4S LiPo peaks at 16.8V, which fits the 0-25V version, and a 6S LiPo peaks at 25.2V, which needs the 0-50V version.

Pick the current rating that covers the load: 2A, 3A, or 4A, with the 2A versions at $4.99 and the 3A and 4A versions at $5.99.

Running a filter above its current rating or voltage range defeats the filtering, so match the rating to the circuit, not to the price.

Where do you wire it in an FPV build?

Wire the filter inline between the battery power source and the camera or video transmitter power input.

Power the camera and video transmitter from a regulated BEC output when the flight controller offers one, and add the filter where the power feed still carries noise.

Keep the camera and video transmitter grounds on the same ground pad, twist the signal and ground wires together, and keep power wires clear of the ESC and motor wires.

What did we check on the bench?

We checked the listing states 0-25V and 0-50V versions, 2A, 3A, and 4A current options, and LC differential common-mode filtering.

We checked the listing states series wiring for stronger filtering and parallel wiring for more current.

We counted 1 image on the filter board listing.

How the options compare

Version Current Price
0-25V 2A $4.99
0-25V 3A $4.99
0-25V 4A $5.99
0-50V 2A $4.99
0-50V 3A $5.99
0-50V 4A $5.99

How do you fit a DC power filter in 4 steps?

  1. Measure the circuit voltage and current, and pick the version and rating that covers both.
  2. Wire the filter inline on the power feed to the camera, video transmitter, or power amp.
  3. Wire a second filter in series for stronger filtering, or in parallel for more current, when one board is not enough.
  4. Power the build and check the video feed for lines before and after the filter.

Parts that fit this guide

Shipped fast and securely from our secure facility in New York, providing fast, high quality USA shipping.

DC Power Filter Board 0-25V/0-50V 2A/3A/4A EMI Suppression Module ($4.99)

DC power filter board from $4.99. An LC differential common-mode filter board in 0-25V and 0-50V versions at 2A, 3A, or 4A.

Switch Mode UBEC 3A BEC (2-6S LiPo) ($10.99)

Switch mode UBEC 3A BEC at $10.99. A regulated BEC for 2-6S LiPo packs, to power a receiver or video gear from a clean output.

Shop the full range: Power Distribution & BECs at Quality RC Parts. See also: Related guide.

Read the companion version of this guide on MTSUAV.

Frequently asked questions

Do I need a filter if my flight controller has a BEC?

A filtered BEC output is often enough. Add an external filter when the video feed still shows lines, or when the flight controller has no clean BEC rail.

Can I use the 0-25V version on 6S?

No. A 6S pack peaks at 25.2V, above the 0-25V range. Use the 0-50V version for 6S builds.

Does the filter replace a capacitor?

No. A low-ESR capacitor on the ESC power pads and an LC filter on the camera feed solve different parts of the noise problem, and builds often use both.

What happens if I exceed the current rating?

The filter cannot do its job above its rating. Pick the 2A, 3A, or 4A version that covers the load current, or wire boards in parallel for more current.

Sources

Last updated: November 11, 2026.
Posted on

Micro FPV Frames: 1.6 Inch to 2.5 Inch Builds Guide

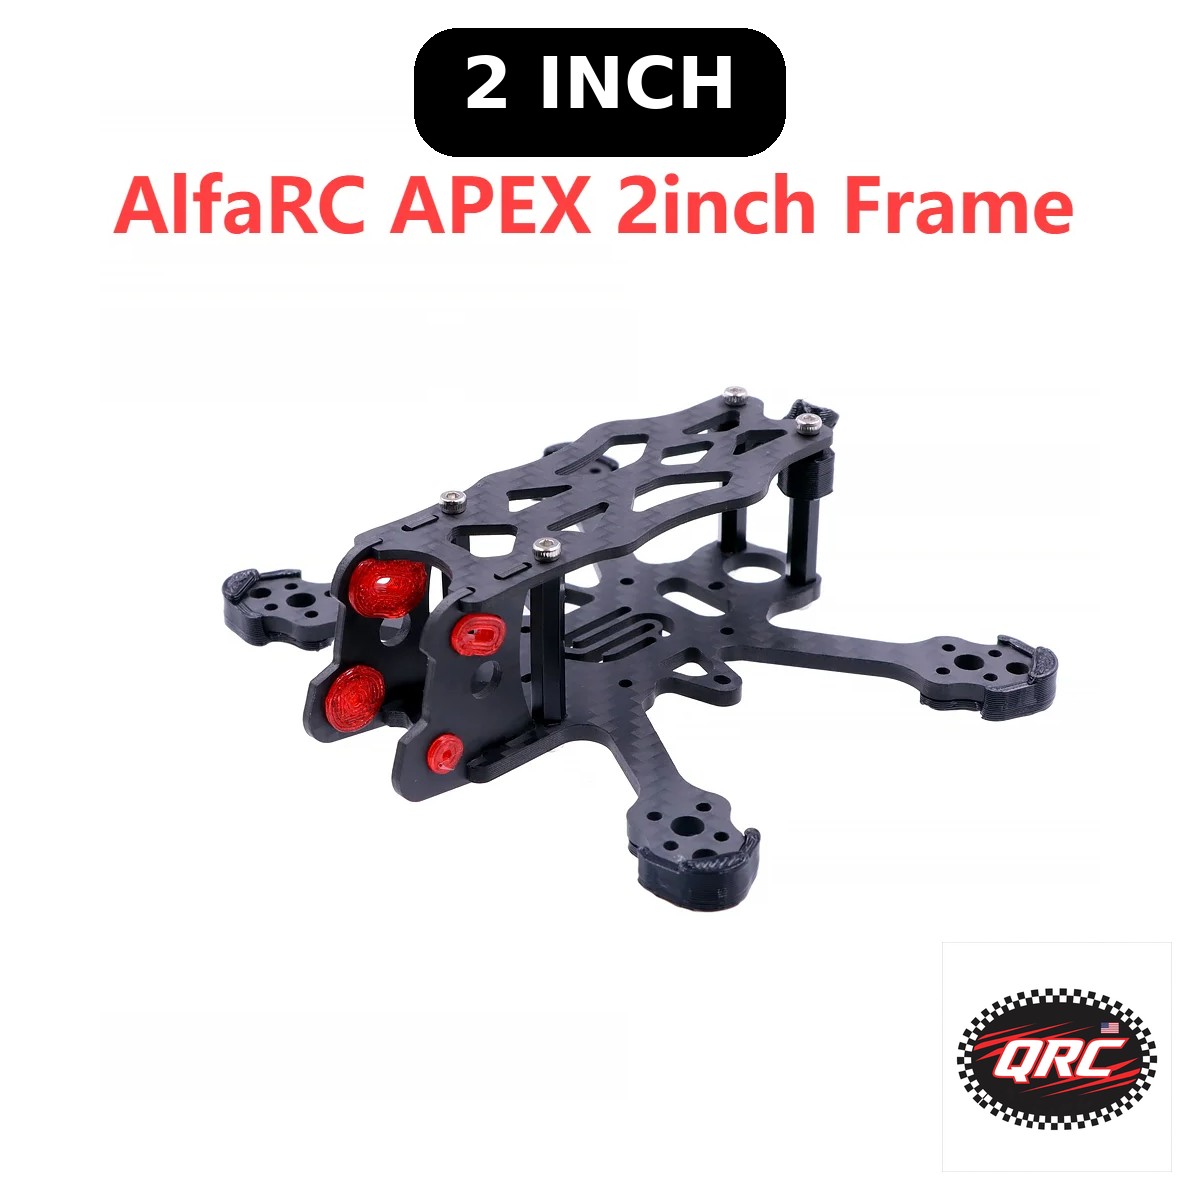
APEX 2 inch FPV racing frame kit carbon fiber O4 air unit

Micro FPV Frames: 1.6 Inch to 2.5 Inch Builds Guide

Micro FPV frames run from a 1.6 inch carbon kit at $15.74 to a 2 inch APEX frame at $19.57 and frame plates from $8.15. The APEX fits an O4 digital air unit and 1103 to 1206 motors. The plates fit a toothpick F4 12A AIO board and 110X motors. Match the frame, motors, and stack mounting before you build.

APEX 2 inch FPV racing frame kit carbon fiber O4 air unit
APEX 2 inch FPV racing frame kit in 3K carbon fiber, 95 mm wheelbase.

Quick facts

Fact Value
1.6 inch kit $15.74, carbon, 3D printed parts
APEX 2 inch $19.57, 95 mm wheelbase, 18 g
Frame plates From $8.15, 2 inch and 2.5 inch
APEX motors 1103 to 1206, 9 by 9 mm
Plate motors 110X, 9 mm 4-hole mount
APEX camera 14 mm, Nano series and O4 air unit

What is the 1.6 inch micro frame for?

The 1.6 inch micro frame is a carbon fiber kit with 3D printed parts and full mounting hardware.

It gives a tiny, light base for indoor and backyard FPV builds.

Check the motor mount pattern and the stack mounting against your parts before you build, because the listing states the size and material, not the motor range.

What does the APEX 2 inch frame fit?

The APEX is a 95 mm wheelbase frame in 3K carbon fiber, with 2.5 mm bottom plates, 1.5 mm top plates, and 22 mm of internal height.

It fits the O4 digital air unit with a 14 mm camera, 2 inch props, and 1103 to 1206 motors on 9 by 9 mm mounts.

The flight controller mounts at 25.5 by 25.5, 26.5 by 26.5, or 20 by 20 mm, and the frame hardware alone weighs 18 g.

What do the 2 inch and 2.5 inch plates fit?

The carbon fiber frame plates fit toothpick builds running an F4 12A AIO flight controller and 110X motors.

The 2 inch plate is an 85 mm true-X plate, 1.5 mm thick, with a 26 by 26 mm stack mount and a 9 mm 4-hole motor mount.

The 2 inch plate costs $8.15 and the 2.5 inch plate costs $9.63, each sold as 1 piece with a 0.6 mm chamfer on both sides.

How do you match motors to a micro frame?

Toothpick guides pair 1102 to 1103 motors with 2 inch builds, and 1204 motors with 2.5 inch builds.

The APEX covers 1103 to 1206, so it spans both sizes, while the plates cover 110X motors on a toothpick AIO board.

Match the motor mount pattern first: 9 by 9 mm on the APEX, and 9 mm 4-hole on the plates.

What did we check on the bench?

We checked the APEX listing states 95 mm, 3K carbon, O4 air unit fit, 1103 to 1206 motors, and 18 g frame hardware.

We checked the plates listing states 85 mm true-X for the 2 inch plate, 26 by 26 mm stack mounting, and 110X motors.

We counted 1 image on the 1.6 inch kit listing, 17 on the APEX listing, and 9 on the plates listing.

How the options compare

Frame Size Wheelbase Motors Price
1.6 inch micro kit 1.6 inch Not stated Not stated $15.74
APEX 2 inch 2 inch 95 mm 1103 to 1206 $19.57
Frame plate 2 inch 2 inch 85 mm true-X 110X $8.15
Frame plate 2.5 inch 2.5 inch Not stated 110X $9.63
IX2 V2 2.5 inch 2.5 inch 126 mm Not stated $17.37

How do you plan a micro build in 5 steps?

  1. Pick the frame size: 1.6 inch for the smallest builds, 2 inch for the APEX, or 2.5 inch for the plates and the IX2 V2.
  2. Match the motors to the frame: 1103 to 1206 on the APEX, 110X on the plates.
  3. Match the flight controller mounting: 25.5, 26.5, or 20 mm on the APEX, 26 by 26 mm on the plates.
  4. Pick the camera: 14 mm Nano series or O4 digital air unit on the APEX.
  5. Check the stack height, the prop clearance, and the full parts list before you order.

Parts that fit this guide

Shipped fast and securely from our secure facility in New York, providing fast, high quality USA shipping.

1.6 Inch Micro Carbon Frame Kit ($15.74)

1.6 inch micro carbon frame kit at $15.74. A carbon fiber micro frame with 3D printed parts and full mounting hardware for indoor and backyard builds.

APEX 2 Inch FPV Racing Frame Kit, O4 Digital Air Unit Compatible, 1103-1206 Motors ($19.57)

APEX 2 inch FPV racing frame kit at $19.57. A 95 mm 3K carbon frame that fits the O4 digital air unit and 1103 to 1206 motors.

2 Inch / 2.5 Inch Carbon Fiber Frame Plate for Toothpick F4 12A AIO, 110X Motor ($8.15)

2 inch and 2.5 inch carbon fiber frame plates from $8.15. Plates for toothpick builds with an F4 12A AIO board and 110X motors.

IX2 V2 2.5-Inch FPV Frame Kit, 126mm Wheelbase, 3K Carbon Fiber ($17.37)

IX2 V2 2.5-inch FPV frame kit at $17.37. A 126 mm wheelbase frame in 3K carbon fiber.

Shop the full range: FPV Drone Frames at Quality RC Parts. See also: Related guide.

Read the companion version of this guide on MTSUAV.

Frequently asked questions

What motors fit the APEX 2 inch frame?

1103 to 1206 motors on 9 by 9 mm mounts. The frame also fits 2 inch props and a 14 mm camera.

What flight controller fits the frame plates?

A toothpick F4 12A AIO flight controller, with a 26 by 26 mm stack mount and 110X motors.

Does the APEX fit a digital air unit?

Yes. It fits the O4 digital air unit with a 14 mm camera, in the Nano series size.

What is the difference between the 2 inch and 2.5 inch plates?

The 2 inch plate is an 85 mm true-X plate at $8.15. The 2.5 inch plate costs $9.63. Both fit the same AIO board and 110X motors.

Sources

Last updated: November 11, 2026.
Posted on

ARF Balsa Planes: Sportster, Purple Lollipop, Red Baron

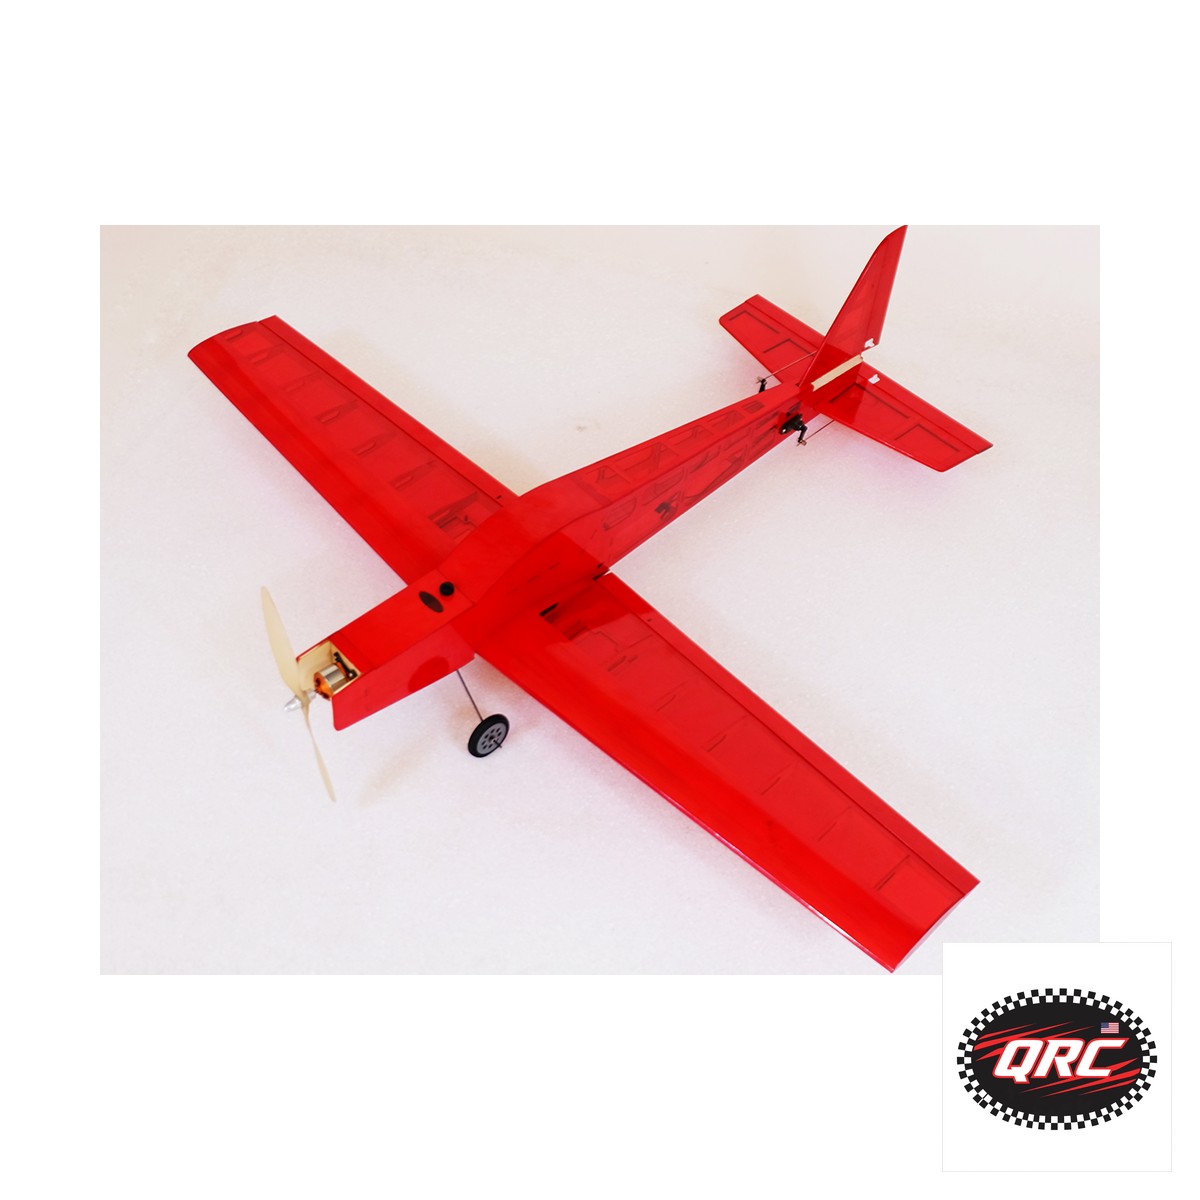
37in Sportster ARF electric plane balsa with brushless motor

ARF Balsa Planes: Sportster, Purple Lollipop, Red Baron

ARF means almost ready to fly: the airframe arrives built, and you fit the electronics. The 37in Sportster costs $78.00 with a brushless motor included, the 40in Purple Lollipop costs $48.00 as an airframe only, and the 44in Red Baron P-51 costs $130.80 with a brushless motor included. All three need an ESC, servos, a radio, and a flight battery.

37in Sportster ARF electric plane balsa with brushless motor
37in Sportster ARF electric plane in balsa, with a brushless motor included.

Quick facts

Fact Value
Sportster 37in, balsa, motor included, $78.00
Purple Lollipop 40in, balsa wing, fiberglass fuselage, $48.00
Red Baron P-51 44in, fiberglass fuselage, balsa wing, $130.80
Motor included Sportster and Red Baron only
What you add ESC, servos, linkages, radio, battery, charger
Radio 4 or more channels with a compatible receiver

What does ARF mean?

ARF stands for almost ready to fly. The airframe arrives mostly built, and you add the control and power system electronics before the first flight.

Common items you add are servos, a motor or engine, an ESC, a receiver, batteries, and a transmitter.

ARF suits hobbyists who want a build experience and their own choice of electronics in the airframe.

How do the three planes compare?

The Sportster is a 37in sport plane in balsa wood, set up for electric power, with a brushless motor included for $78.00.

The Purple Lollipop is a 40in sport plane with a balsa wing and fiberglass fuselage, sold as an airframe only for $48.00, with no motor or electronics included.

The Red Baron is a 44in P-51 Mustang style warbird with a fiberglass fuselage and balsa wing, set up for electric power, with a brushless motor included for $130.80.

What do you still need for each plane?

The Sportster and the Red Baron need an ESC, servos, and linkages, plus a 4 or more channel transmitter and compatible receiver, a flight battery, and a charger.

The Purple Lollipop needs all of that plus a brushless motor and ESC, because it ships as an airframe only with no motor or electronics.

Check the listing for each plane before you order, because the included items differ between the three.

How do you set up the first flight?

Check three things before the first flight: the center of gravity, that every control surface moves the right way with no slop, and that the wing is not warped.

Start on a simulator with a USB transmitter until take-off, a rectangular circuit, and landing feel routine.

After the first take-off, trim the plane so it flies straight and level with the sticks centered, and stand behind or beside the propeller when the battery is connected.

What did we check on the bench?

We checked the Sportster listing states 37in, balsa, and a brushless motor included.

We checked the Purple Lollipop listing states 40in, balsa wing, fiberglass fuselage, and airframe only.

We checked the Red Baron listing states 44in, fiberglass fuselage, balsa wing, and a brushless motor included.

How the options compare

Plane Wingspan Construction Motor included Price
Sportster 37in Balsa Yes $78.00
Purple Lollipop 40in Balsa wing, fiberglass fuselage No $48.00
Red Baron P-51 44in Fiberglass fuselage, balsa wing Yes $130.80

How do you finish an ARF plane in 5 steps?

  1. Unpack the airframe and check the wing, fuselage, and hardware against the listing.
  2. Fit the motor and ESC, or fit the motor first on the airframe-only Purple Lollipop.
  3. Install the servos and linkages, and set each control surface to move the right way.
  4. Install the receiver, bind the transmitter, and fit the flight battery.
  5. Check the center of gravity, trim the plane, and fly the first circuit with an experienced pilot beside you.

Parts that fit this guide

Shipped fast and securely from our secure facility in New York, providing fast, high quality USA shipping.

37in Sportster ARF Electric Plane with Brushless Motor (Balsa) ($78.00)

37in Sportster ARF electric plane at $78.00. A balsa sport plane set up for electric power, with a brushless motor included.

40in Purple Lollipop ARF Sport Plane (Balsa/Fiberglass) ($48.00)

40in Purple Lollipop ARF sport plane at $48.00. A balsa wing and fiberglass fuselage airframe, with no motor or electronics included.

44in Red Baron P-51 ARF Electric Warbird with Brushless Motor (Fiberglass) ($130.80)

44in Red Baron P-51 ARF electric warbird at $130.80. A fiberglass fuselage and balsa wing warbird with a brushless motor included.

Shop the full range: RC Planes at Quality RC Parts. See also: Related guide.

Read the companion version of this guide on MTSUAV.

Frequently asked questions

What does ARF mean?

Almost ready to fly. The airframe arrives mostly built, and you add the motor, ESC, servos, receiver, battery, and transmitter before flying.

Which plane includes a motor?

The Sportster and the Red Baron include a brushless motor. The Purple Lollipop ships as an airframe only with no motor or electronics.

What radio do I need?

A 4 or more channel transmitter with a compatible receiver. All three planes list the same radio requirement.

What should I check before the first flight?

The center of gravity, that every control surface moves the right way with no slop, and that the wing is not warped.

Sources

Last updated: November 11, 2026.
Posted on

ESP32-CAM vs ESP32-S3-CAM: Which Camera Board to Pick

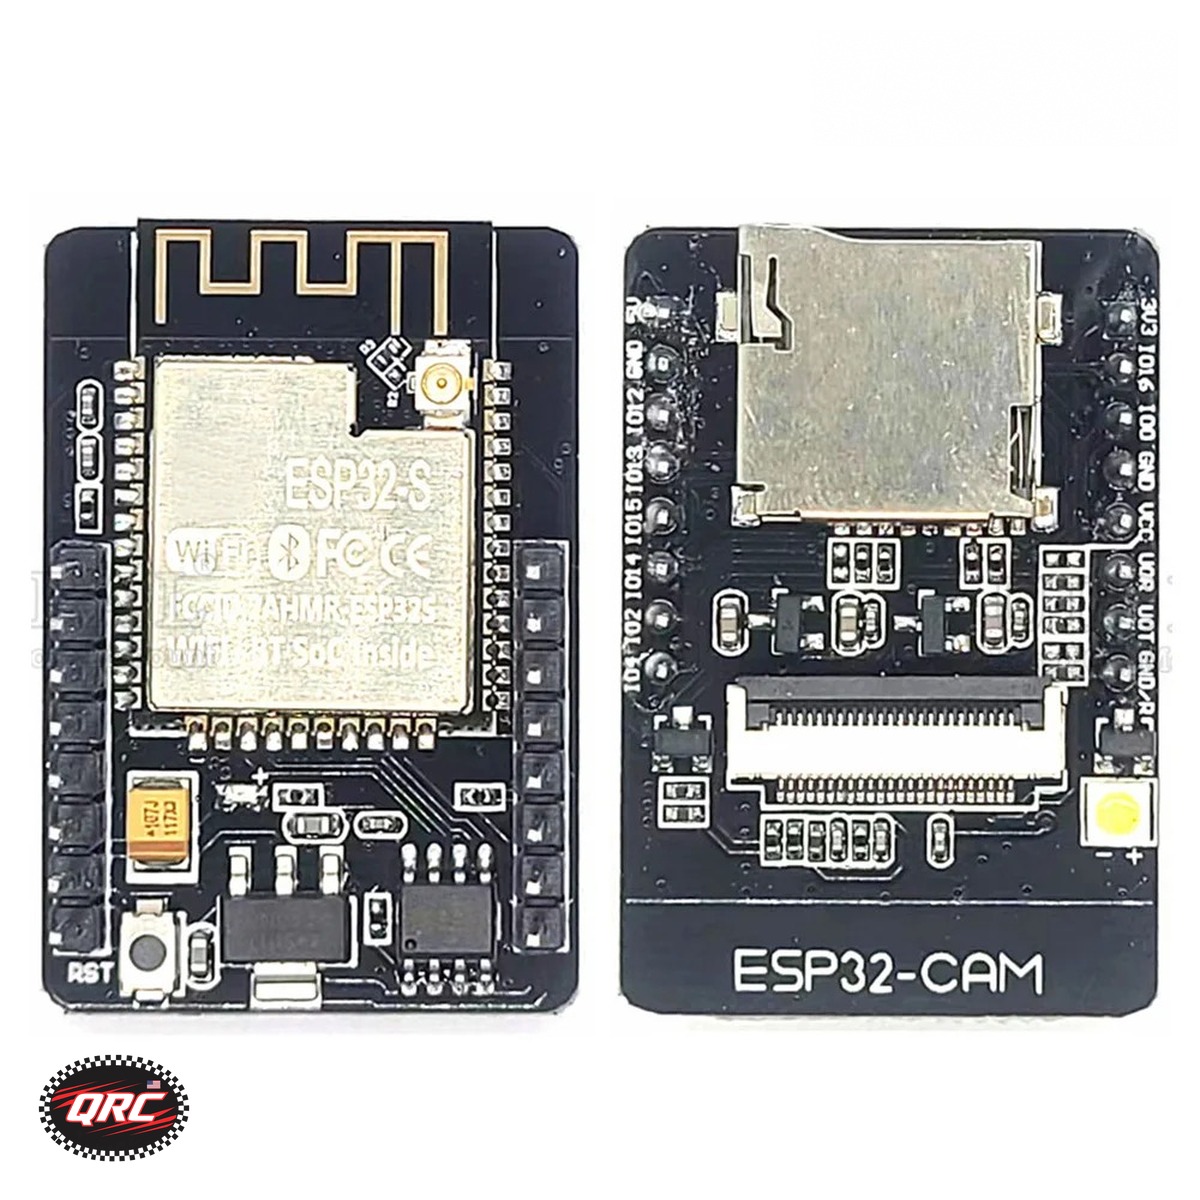
ESP32-CAM development board with OV2640 camera module fitted

ESP32-CAM vs ESP32-S3-CAM: Which Camera Board to Pick

The ESP32-CAM costs $25.99 with an OV2640 camera fitted, 4MB PSRAM, and a micro USB port. The ESP32-S3-CAM starts at $11.97 for the board only, with 16MB flash, 8MB PSRAM, dual USB-C ports, and a choice of OV2640 2MP or OV5640 5MP camera. Pick the CAM for a WiFi camera, and the S3-CAM for more memory and the 5MP option.

ESP32-CAM development board with OV2640 camera module fitted
ESP32-CAM board with the OV2640 camera module fitted.

Quick facts

Fact Value
ESP32-CAM OV2640 fitted, 4MB PSRAM, $25.99
S3-CAM board only $11.97, no camera
S3-CAM OV2640 $23.12, 2MP camera
S3-CAM OV5640 $29.99, 5MP camera
S3-CAM memory 16MB flash, 8MB PSRAM
S3-CAM USB Dual USB-C, UART and OTG

What does the ESP32-CAM give you?

The ESP32-CAM runs an ESP32 dual-core processor at up to 240 MHz, with 520KB SRAM and 4MB PSRAM.

The OV2640 camera module comes fitted, with 2.4GHz WiFi, Bluetooth and BLE, a micro USB interface, and a TF card slot.

The board measures about 39.8 by 27 mm and supports UART, SPI, I2C, PWM, ADC, and DAC, with STA, AP, and STA plus AP WiFi modes.

What does the ESP32-S3-CAM add?

The ESP32-S3-CAM runs the ESP32-S3 N16R8 module with 16MB flash and 8MB PSRAM, double the PSRAM of the ESP32-CAM.

It carries dual USB-C ports for USB-UART and USB-OTG, plus a TF card slot and a camera connector.

Pick the board only at $11.97, with an OV2640 2MP camera at $23.12, or with an OV5640 5MP camera at $29.99.

OV2640 or OV5640: which camera?

The OV2640 is a 2MP camera, and the OV5640 is a 5MP camera, so the OV5640 captures more detail per frame.

Both cameras fit the S3-CAM camera connector, and the ESP32-CAM ships with the OV2640 fitted.

The board-only S3-CAM at $11.97 includes no camera module, so choose a camera option when the build needs one.

What projects fit each board?

Use the ESP32-CAM for WiFi video streaming, stills, IoT cameras, doorbell cameras, robot vision, and timelapse projects.

Use the S3-CAM for WiFi video streaming, IoT cameras, image recognition, and ESP32-S3 development, with 5-packs and 10-packs for classrooms and multi-camera builds.

The 5-pack with OV2640 costs $73.62, the 5-pack with OV5640 costs $77.52, the 10-pack with OV2640 costs $137.07, and the 10-pack with OV5640 costs $146.07.

What did we check on the bench?

We checked the ESP32-CAM listing states OV2640 fitted, 4MB PSRAM, dual-core to 240 MHz, and a board size of about 39.8 by 27 mm.

We checked the S3-CAM listing states N16R8, 16MB flash, 8MB PSRAM, dual USB-C, and OV2640 or OV5640 options.

We counted 1 image on the ESP32-CAM listing and 10 on the S3-CAM listing.

How the options compare

Board Camera Memory USB Price
ESP32-CAM OV2640 fitted, 2MP 4MB PSRAM Micro USB $25.99
S3-CAM board only No camera 16MB flash, 8MB PSRAM Dual USB-C $11.97
S3-CAM OV2640 OV2640, 2MP 16MB flash, 8MB PSRAM Dual USB-C $23.12
S3-CAM OV5640 OV5640, 5MP 16MB flash, 8MB PSRAM Dual USB-C $29.99
S3-CAM 5-pack OV2640 OV2640, 2MP 16MB flash, 8MB PSRAM Dual USB-C $73.62
S3-CAM 5-pack OV5640 OV5640, 5MP 16MB flash, 8MB PSRAM Dual USB-C $77.52

How do you pick a camera board in 4 steps?

  1. Decide if the build needs a camera fitted or a board to add a camera to.
  2. Pick the ESP32-CAM for a fitted OV2640 camera and a micro USB port.
  3. Pick the S3-CAM for 8MB PSRAM, dual USB-C, and the OV5640 5MP option.
  4. Pick the pack size: single board, 5-pack, or 10-pack for classrooms and multi-camera builds.

Parts that fit this guide

Shipped fast and securely from our secure facility in New York, providing fast, high quality USA shipping.

ESP32-CAM Development Board with OV2640 Camera Module, 4MB PSRAM ($25.99)

ESP32-CAM development board at $25.99. It ships with the OV2640 camera fitted, 4MB PSRAM, WiFi, Bluetooth, a micro USB port, and a TF card slot.

ESP32-S3-CAM Development Board N16R8, Board, OV2640 or OV5640 Camera, 1/5/10-Pack ($11.97)

ESP32-S3-CAM development board from $11.97. It runs the N16R8 module with 16MB flash, 8MB PSRAM, dual USB-C, and a choice of OV2640 or OV5640 camera.

NodeMCU ESP8266 Development Board with 0.96″ OLED Display, ESP-12E, Micro USB ($11.37)

NodeMCU ESP8266 development board from $11.37. It pairs an ESP-12E board with a 0.96 inch OLED display and micro USB.

Shop the full range: ESP32 & ESP8266 at Quality RC Parts. See also: Related guide.

Read the companion version of this guide on MTSUAV.

Frequently asked questions

Does the S3-CAM board-only option include a camera?

No. The board-only option at $11.97 includes no camera module. Choose the OV2640 or OV5640 option when the build needs a camera.

What is the difference between the OV2640 and the OV5640?

The OV2640 is a 2MP camera and the OV5640 is a 5MP camera. Both fit the S3-CAM camera connector.

How much PSRAM does each board have?

The ESP32-CAM has 4MB PSRAM. The ESP32-S3-CAM has 8MB PSRAM with 16MB flash.

Can I buy S3-CAM boards in bulk?

Yes. The S3-CAM comes in single boards, 5-packs, and 10-packs for classrooms and multi-camera builds.

Sources

Last updated: November 11, 2026.
Posted on

DS800 Radio Setup and Binding Guide for the F-08A Receiver

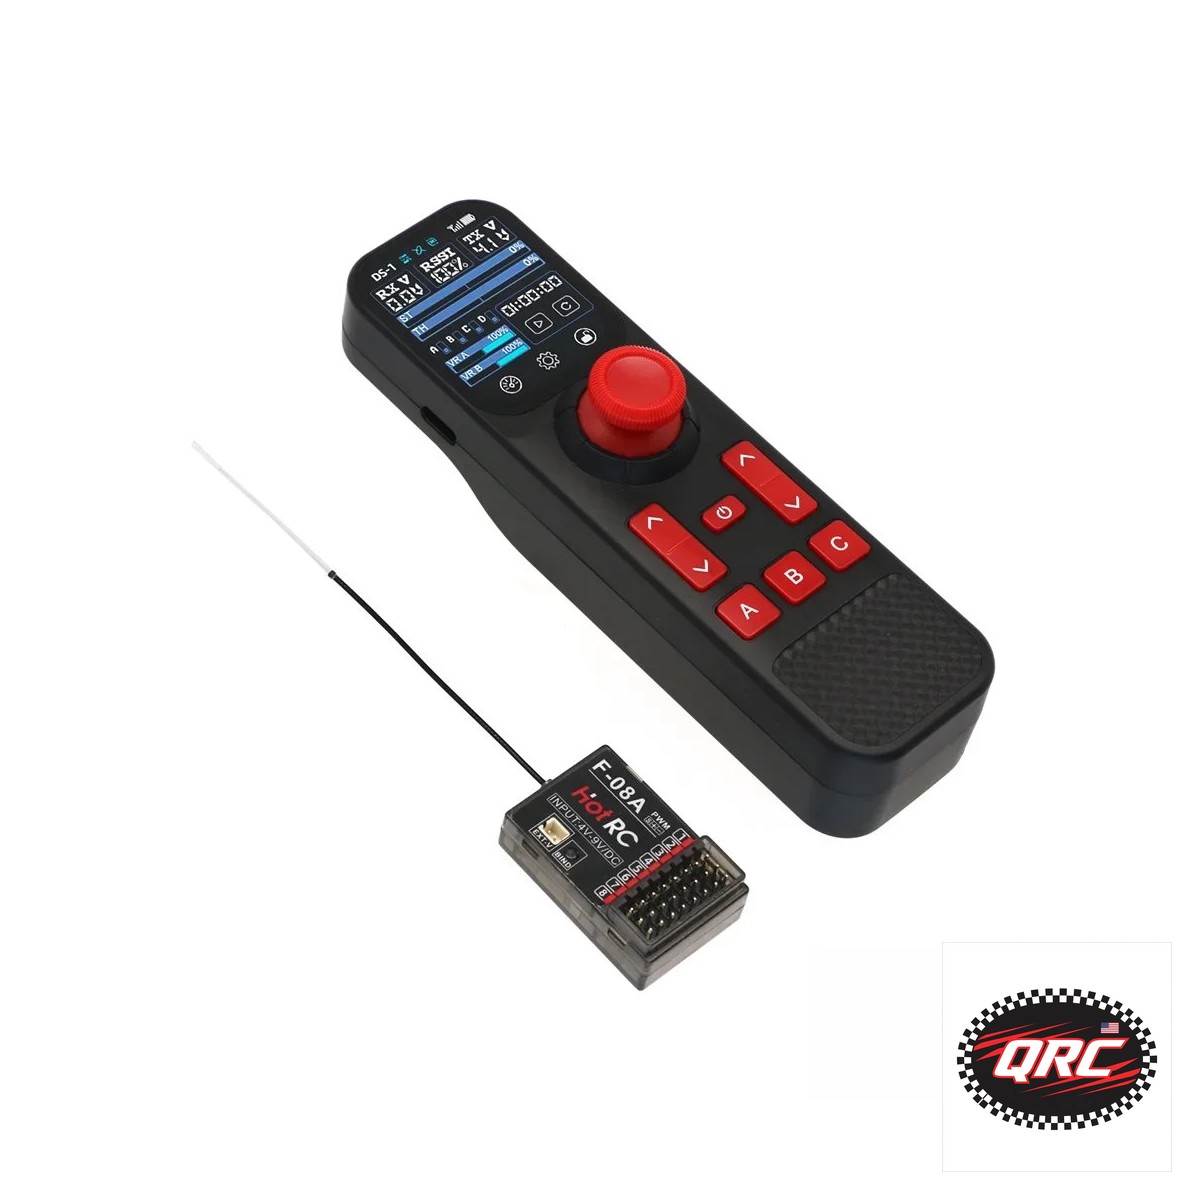
DS800 8-channel 2.4GHz radio transmitter with F-08A receiver

DS800 Radio Setup and Binding Guide for the F-08A Receiver

The DS800 is an 8-channel 2.4GHz radio for cars and boats, sold with the F-08A receiver for $75.99, or as the F-08A receiver only for $21.14. To bind, hold the receiver BIND button while powering it on, power on the transmitter, and start the bind from the touchscreen menu. The receiver LED turns solid when the bind holds.

DS800 8-channel 2.4GHz radio transmitter with F-08A receiver
DS800 radio system with the F-08A receiver.

Quick facts

Fact Value
Channels 8
Frequency 2.4GHz
Receiver F-08A, 8-channel PWM
Receiver power DC 4V to 9V
Set price $75.99 transmitter plus receiver
Receiver only $21.14

What comes with the DS800?

The DS800 is an 8-channel 2.4GHz radio system for RC cars and boats, with a 2.0-inch color touchscreen transmitter and an F-08A receiver.

The full set costs $75.99, and the F-08A receiver only costs $21.14 as a spare or for a second model.

The transmitter runs on a built-in 1500mAh rechargeable lithium battery and charges over the included USB-C cable, so charge it before the first bind.

What does the F-08A receiver give you?

The F-08A is an 8-channel PWM receiver with ports 1 to 8, a BIND button, and an EXT.V port for voltage return.

It runs on DC 4V to 9V, measures 43 by 24 by 13 mm, and weighs 9 g.

The F-08A has no gyro. The gyro version, the F-08AT, suits ground and boat use only, and the F-10A is not a DS800 spare, so buy the F-08A when you need a second receiver.

How do you bind the F-08A to the DS800?

Power both the transmitter and the receiver off, then connect the receiver to a DC 4V to 9V power source.

Press and hold the BIND button on the F-08A while powering it on. The receiver LED flashes rapidly in binding mode.

Power on the DS800 transmitter, open the Binding Settings menu on the touchscreen, and start the bind. The receiver LED turns solid when the bind holds.

How do you confirm the bind and wire the model?

Power cycle both the transmitter and the receiver to confirm the bind holds after a restart.

Connect servos to the PWM ports 1 to 8, with signal, positive, and negative in the order the port labels show.

Connect the return line to the voltage return interface if you want battery voltage and signal readings back at the transmitter.

What did we check on the bench?

We checked the listing states 8 channels, 2.4GHz, the F-08A receiver, and RC cars and boats.

We counted 1 image on the DS800 listing.

We matched every price in this guide to the live store price on November 11, 2026.

How the options compare

Option What you get Price
DS800 set Transmitter plus F-08A receiver $75.99
F-08A receiver only Spare receiver or second model $21.14
DS-600 receiver only F-06A receiver for the 6-channel set $18.53

How do you bind the DS800 in 6 steps?

  1. Power off the transmitter and the receiver.
  2. Connect the F-08A receiver to a DC 4V to 9V power source.
  3. Hold the BIND button on the receiver while powering it on, until the LED flashes rapidly.
  4. Power on the DS800 transmitter.
  5. Open the Binding Settings menu on the touchscreen and start the bind.
  6. Power cycle both units and check the receiver LED turns solid.

Parts that fit this guide

Shipped fast and securely from our secure facility in New York, providing fast, high quality USA shipping.

DS800 8CH 2.4GHz Radio System Transmitter with F-08A Receiver ($21.14)

DS800 8-channel 2.4GHz radio system from $21.14. The full transmitter plus F-08A receiver set costs $75.99, and the F-08A receiver only costs $21.14.

DS-600 6CH 2.4GHz Radio System with F-06A Receiver ($18.53)

DS-600 6-channel 2.4GHz radio system from $18.53. A 6-channel set with the F-06A receiver.

FS-i6X 10CH 2.4GHz AFHDS 2A RC Transmitter with Receiver Options ($32.99)

FS-i6X 10-channel 2.4GHz transmitter from $32.99. A 10-channel radio with receiver options on AFHDS 2A.

Shop the full range: Radio Transmitters at Quality RC Parts. See also: Related guide.

Read the companion version of this guide on MTSUAV.

Frequently asked questions

Does the DS800 work for aircraft?

The listing covers RC cars and boats. The F-08A receiver has no gyro, and the gyro version suits ground and boat use, so follow the listing and the manual for your model type.

What if the receiver LED keeps flashing?

The receiver is still in binding mode. Power both units off and run the bind steps again, holding the BIND button until the LED flashes rapidly before you power on the transmitter.

Can I buy just the receiver?

Yes. The F-08A receiver only costs $21.14, as a spare or for a second model. The full set with the transmitter costs $75.99.

What voltage does the receiver need?

DC 4V to 9V. Connect it to your model power source or ESC receiver lead at that range.

Sources

Last updated: November 11, 2026.

Posted on

JST-XH Balance Leads: How to Balance-Charge LiPo Safely

JST-XH balance extension leads 20 cm for LiPo charging

JST-XH Balance Leads: How to Balance-Charge LiPo Safely

A JST-XH balance extension lead adds 20 cm of 22AWG wire between your LiPo battery and the charger, so the short lead on the battery never strains. Pick the lead that matches your pack: 1S through 6S, from $7.37. Connect the main lead and the balance lead together, check every cell on a checker, and balance-charge at 1C.

JST-XH balance extension leads 20 cm for LiPo charging
JST-XH balance extension leads, 20 cm, in 1S to 6S sizes.

Quick facts

Fact Value
Lead length 20 cm of 22AWG wire
Pack 5 leads
Sizes 1S, 2S, 3S, 4S, 5S, 6S
Price From $7.37 to $10.65
Checker 1-8S, 6-pack for $29.99
Discharger 3-in-1 checker, balancer, discharger for $12.00

What is a balance lead?

A LiPo battery with more than one cell has two connectors: a main discharge lead and a smaller balance lead.

The balance lead lets the charger watch each cell and keep the cells even while charging.

The connector is JST-XH, and you can read the cell count from the wire count: a 5-pin lead means a 4S pack, and a 7-pin lead means a 6S pack.

Why extend the balance lead?

Battery balance leads are short, so plugging straight into the charger strains the battery lead and the charger balance port.

A 20 cm extension puts the connection where you can reach it, with no pull on the battery wiring.

The pack holds 5 leads, so one pack covers the bench and the field bag.

How do you match the lead to the battery?

Match the lead to the cell count: a 3S battery needs the 3S lead, and a 6S battery needs the 6S lead.

The 1S lead costs $7.37, the 2S lead costs $7.77, the 3S lead costs $8.09, the 4S lead costs $8.77, the 5S lead costs $9.97, and the 6S lead costs $10.65.

A wrong-size lead will not fit the balance port, so check the cell count on the battery label before you order.

What do you check before and after charging?

Plug the checker into the balance lead to read total voltage, each cell voltage, and remaining capacity.

The 6-pack checker reads 1-8S packs in LiPo, Li-ion, LiMn, and Li-Fe chemistries, and its low-voltage buzzer sounds before a weak cell turns into a damaged pack.

After flying, use the 3-in-1 unit to check, balance, or discharge packs for storage, with the LCD showing cell voltages and the front-panel buttons switching modes.

What did we check on the bench?

We checked the listing states 20 cm, 22AWG, a pack of 5, and options from 1S to 6S.

We counted 1 image on the balance lead listing, 1 on the checker listing, and 1 on the 3-in-1 listing.

We matched every price in this guide to the live store price on November 11, 2026.

How the options compare

Lead Cells Wires Price
1S lead 1 2 $7.37
2S lead 2 3 $7.77
3S lead 3 4 $8.09
4S lead 4 5 $8.77
5S lead 5 6 $9.97
6S lead 6 7 $10.65

How do you balance-charge with an extension lead?

  1. Read the cell count on the battery label and pick the matching lead.
  2. Plug the extension lead into the battery balance lead, then into the charger balance port.
  3. Connect the main discharge lead to the charger.
  4. Set the charger to balance-charge at 1C for your pack capacity.
  5. Check the cell voltages on the checker before and after the charge, and never leave a charging pack unattended.

Parts that fit this guide

Shipped fast and securely from our secure facility in New York, providing fast, high quality USA shipping.

JST-XH 1S-6S Balance Extension Leads, 20cm, 5 Pieces ($7.37)

JST-XH balance extension leads from $7.37. A pack of 5 leads in 1S to 6S sizes, 20 cm of 22AWG wire each.

LiPo Battery Voltage Checker 1-8S with Low Voltage Buzzer Alarm, 6-Pack ($29.99)

LiPo battery voltage checker 6-pack at $29.99. It reads 1-8S packs with per-cell voltage, total voltage, capacity, and a low-voltage buzzer alarm.

3-in-1 Battery Voltage Checker Balancer and Discharger ($12.00)

3-in-1 battery voltage checker, balancer, and discharger at $12.00. One unit checks pack voltage, balances cells, and discharges packs for storage, with an LCD and front-panel buttons.

Related parts: 2S-6S JST-XH Balance Charging Adapter Board: 2S-6S JST-XH balance charging adapter board for balance-charging through a board instead of direct leads..

Shop the full range: Batteries & Chargers at Quality RC Parts. See also: Related guide.

Read the companion version of this guide on MTSUAV.

Frequently asked questions

How do I know which lead size my battery needs?

Read the cell count on the battery label. A 3S battery needs the 3S lead, and a 6S battery needs the 6S lead. You can also count the balance lead pins and subtract one.

Do I connect both leads to the charger?

Yes. Connect the main discharge lead and the balance lead together. The balance lead lets the charger watch each cell and keep them even.

What charge rate should I use?

Charge at 1C unless the battery maker states otherwise. 1C in amps equals the pack capacity in mAh divided by 1000.

What is the 3-in-1 unit for?

It checks pack voltage, balances cells, and discharges packs for storage in one unit, with an LCD display and front-panel mode buttons.

Sources

Last updated: November 11, 2026.

Posted on

USA Warehouse Microcontrollers: What Is in Stock Now

ESP32 DevKit V1 30-pin WROOM-32 development board

USA Warehouse Microcontrollers: What Is in Stock Now

Four microcontroller boards sit in stock at the NY warehouse right now: the ESP32 DevKit V1 from $11.99, the ESP32-S2 Mini from $11.16, the ESP32 SuperMini from $9.99, and the RP2040 Pro Micro at $8.37. Each board ships from NY, USA in 1 to 2 business days.

ESP32 DevKit V1 30-pin WROOM-32 development board
ESP32 DevKit V1, the 30-pin WROOM-32 bench board in this roundup.

Quick facts

Fact Value
Boards in stock 4: DevKit V1, S2 Mini, SuperMini, RP2040 Pro Micro
DevKit V1 From $11.99, 30 pins, WiFi and Bluetooth
S2 Mini From $11.16, 27 pins, WiFi, USB-C
SuperMini From $9.99, C3, C6, S3, H2
RP2040 Pro Micro $8.37, 16MB flash, USB-C, QMK
Shipping From NY, USA in 1-2 business days

Which boards are in stock?

Four boards are in stock: the ESP32 DevKit V1, the ESP32-S2 Mini, the ESP32 SuperMini, and the RP2040 Pro Micro.

The SuperMini starts at $9.99, the DevKit V1 at $11.99, the S2 Mini at $11.16, and the RP2040 Pro Micro at $8.37.

All four ship from NY, USA in 1 to 2 business days.

Which board has WiFi and Bluetooth?

The DevKit V1, S2 Mini, and SuperMini C3, C6, and S3 carry WiFi, and the DevKit V1, SuperMini C3, C6, and S3 carry Bluetooth.

The S2 Mini runs WiFi on the ESP32-S2FN4R2 chip with 4MB flash and 2MB PSRAM.

The SuperMini H2 uses Zigbee and Thread instead of WiFi, and the RP2040 Pro Micro has no wireless radio.

Which board fits a small build?

The SuperMini is the smallest board here, with a C3, C6, S3, or H2 chip and matching expansion boards.

The S2 Mini measures 25.5 by 34.3 mm and fits D1 Mini shields.

The RP2040 Pro Micro is a compact USB-C board with a Pro Micro pinout for keyboards and macropads.

What can you add to a microcontroller build?

Add a TFT LCD display module from $5.83 in eight sizes from 0.96 to 2.8 inch, with SPI and 65K color.

Add a 5V active buzzer 6-pack for $7.49 when your build needs lost-model beeps or warning tones.

Add a HiLetgo SFM-27 alarm buzzer 5-pack for $13.47 when your project needs a 95dB panel alarm.

What did we check on the bench?

We checked each listing states its chip, pin count, and wireless radio.

We counted 11 images on the DevKit V1 listing, 5 on the S2 Mini listing, 14 on the SuperMini listing, and 7 on the RP2040 Pro Micro listing.

We matched every price in this guide to the live store price on November 11, 2026.

How the options compare

Board Chip Wireless Size Price
ESP32 DevKit V1 WROOM-32 dual-core WiFi and Bluetooth Full-size 30-pin From $11.99
ESP32-S2 Mini ESP32-S2FN4R2 WiFi 25.5 by 34.3 mm From $11.16
ESP32 SuperMini C3, C6, S3, or H2 WiFi, Bluetooth, Zigbee, Thread Compact SuperMini From $9.99
RP2040 Pro Micro RP2040 dual-core Cortex-M0+ None Compact Pro Micro $8.37

How do you pick a board from this roundup?

  1. List what the project needs: WiFi, Bluetooth, Zigbee, USB OTG, or pin count.
  2. Pick the DevKit V1 for the bench, the S2 Mini for a D1 Mini shield, the SuperMini for the smallest build, or the RP2040 Pro Micro for a keyboard.
  3. Check the listing for the chip and USB version before you order.
  4. Add a display or buzzer from the list above when the build needs one.

Parts that fit this guide

In-stock parts ship from the New York, USA warehouse in 1-2 business days. Prices below are the live store prices we verified on November 11, 2026.

ESP32 DevKit V1 Development Board, 30-Pin WROOM-32, WiFi + Bluetooth ($11.99)

ESP32 DevKit V1 from $11.99. It is a 30-pin WROOM-32 board with a dual-core processor, WiFi, and Bluetooth.

ESP32-S2 Mini Development Board, WiFi, 4MB Flash, 2MB PSRAM, USB-C ($11.16)

ESP32-S2 Mini from $11.16. It is a 25.5 by 34.3 mm WiFi board with 4MB flash, 2MB PSRAM, and USB-C.

ESP32 SuperMini Development Board, C3 / C6 / S3 / H2 + Expansion Boards, WiFi + Bluetooth ($9.99)

ESP32 SuperMini from $9.99. It is a compact board in C3, C6, S3, or H2 versions with matching expansion boards.

RP2040 Pro Micro Development Board, 16MB Flash, USB-C, QMK Compatible ($8.37)

RP2040 Pro Micro at $8.37. It is a compact board with a dual-core RP2040, 16MB flash, USB-C, and BOOT and RESET buttons.

Related parts: TFT LCD Display Module, IPS SPI, 0.96-2.8 inch, ST7735/ST7789/ILI9341: TFT LCD display module, an IPS SPI screen in eight sizes for Arduino, ESP32, and Raspberry Pi projects.; 5V Active Buzzer Beeper Tracker, 9 x 5.5mm, for FPV Racing Drone PDB Flight Controller, 6-Pack: 5V active buzzer 6-pack, a 9 by 5.5 mm buzzer for FPV PDB and flight controller pads.; HiLetgo SFM-27 95dB Alarm Buzzer, 3-24V, Continuous Beep, 5-Pack: HiLetgo SFM-27 alarm buzzer, 95dB continuous beep on 3 to 24V..

Shop the full range: ESP32 & ESP8266 at Quality RC Parts. See also: Related guide.

Frequently asked questions

Which board is the cheapest in stock?

The RP2040 Pro Micro at $8.37. The ESP32 SuperMini starts at $9.99, the S2 Mini at $11.16, and the DevKit V1 at $11.99.

Which board fits a keyboard build?

The RP2040 Pro Micro. It runs QMK firmware and has a Pro Micro pinout for custom keyboards and macropads.

Which board fits a D1 Mini shield?

The ESP32-S2 Mini. It fits D1 Mini shields and starts at $11.16 for a 1-pack.

Do these boards ship from the USA?

Yes. All four ship from NY, USA in 1 to 2 business days.

Sources

Last updated: November 11, 2026.
Posted on

TFT LCD Displays for Arduino and ESP32 Projects

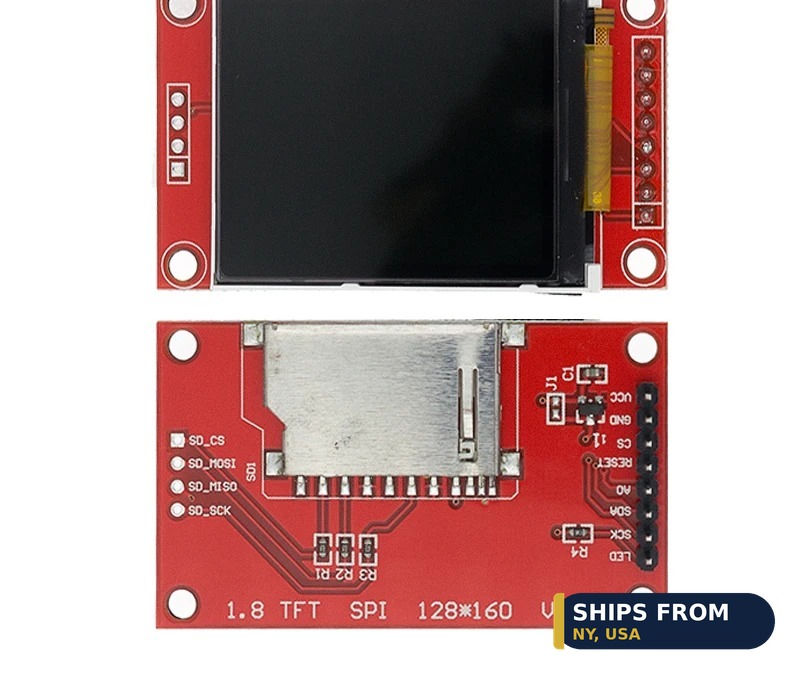
TFT LCD display module IPS SPI small screen

TFT LCD Displays for Arduino and ESP32 Projects

These IPS TFT LCD modules run on SPI at 3.3V with 65K color, in eight sizes from 0.96 to 2.8 inch. The 0.96 inch module uses an ST7735S driver at 80 by 160 pixels, the 1.3 inch uses ST7789 at 240 by 240, and the 2.0 to 2.8 inch modules use ILI9341 at 240 by 320. Prices start at $5.83.

TFT LCD display module IPS SPI small screen
TFT LCD display module with SPI interface in sizes from 0.96 to 2.8 inch.

Quick facts

Fact Value
Interface SPI, 3.3V power
Color 65K, IPS
Sizes 8 sizes, 0.96 to 2.8 inch
Drivers ST7735, ST7789, ILI9341
Pins GND, VCC, SCL, SDA, RES, DC, CS, BLK
Price From $5.83

Which driver chip runs each size?

The 0.96 inch module uses an ST7735S driver at 80 by 160 pixels.

The 1.3 inch module uses an ST7789VW driver at 240 by 240 pixels.

The 2.0, 2.4, and 2.8 inch modules use an ILI9341 driver at 240 by 320 pixels.

How do you wire a TFT module to a board?

Wire the module over SPI: GND, VCC, SCL, SDA, RES, DC, CS, and BLK.

Power it at 3.3V, not 5V, because the modules run on 3.3V power.

The 1.8 inch module adds an SD card slot.

Which size fits which project?

Pick the 0.96 inch module for a small status readout at $5.83.

Pick the 1.3 inch module for a square 240 by 240 display at $7.17.

Pick the 2.0 to 2.8 inch modules for a larger readout at 240 by 320 pixels, from $9.72.

What boards pair with these displays?

These modules suit Arduino, Raspberry Pi, and ESP32 boards with an SPI bus.

The ESP32 DevKit V1 starts at $11.99 with 30 pins and WiFi, and the RP2040 Pro Micro costs $8.37 with USB-C.

Match the 3.3V power rail on your board to the module before you wire it.

What did we check on the bench?

We checked the listing states 8 sizes, SPI, 65K color, 3.3V power, and an operating range of -20 to +70C.

We counted 5 images on the TFT display listing.

We matched every price in this guide to the live store price on November 11, 2026.

How the options compare

Size Resolution Driver Price
0.96 inch 80×160 ST7735S $5.83
1.3 inch 240×240 ST7789VW $7.17
1.44 inch 128×128 ST7735 $7.21
1.77 inch 160×128 ST7735 $6.92
1.8 inch 128×160 ST7735, SD slot $6.87
2.0 inch 240×320 ILI9341 $9.72
2.4 inch 240×320 ILI9341 $9.72
2.8 inch 240×320 ILI9341 $10.92

How do you wire a TFT module in 5 steps?

  1. Pick the size and driver from the table above.
  2. Connect GND and VCC to your board, with VCC at 3.3V.
  3. Connect SCL, SDA, RES, DC, CS, and BLK to your SPI pins.
  4. Load the driver library for your chip: ST7735, ST7789, or ILI9341.
  5. Power the board and check the screen lights with the test sketch.

Parts that fit this guide

In-stock parts ship from the New York, USA warehouse in 1-2 business days. Prices below are the live store prices we verified on November 11, 2026.

TFT LCD Display Module, IPS SPI, 0.96-2.8 inch, ST7735/ST7789/ILI9341 ($5.83)

TFT LCD display module from $5.83. It is an IPS SPI module in eight sizes from 0.96 to 2.8 inch with ST7735, ST7789, or ILI9341 drivers.

ESP32 DevKit V1 Development Board, 30-Pin WROOM-32, WiFi + Bluetooth ($11.99)

ESP32 DevKit V1 from $11.99. It is a 30-pin WROOM-32 board with WiFi and Bluetooth for driving a TFT over SPI.

Related parts: RP2040 Pro Micro Development Board, 16MB Flash, USB-C, QMK Compatible: RP2040 Pro Micro, a compact USB-C board with 16MB flash for small display projects..

Shop the full range: Displays at Quality RC Parts. See also: Related guide.

Frequently asked questions

Does the module run on 5V?

No. These modules run on 3.3V power. Wire VCC to a 3.3V rail on your board.

Which driver do I load for a 2.4 inch screen?

Load the ILI9341 driver. The 2.0, 2.4, and 2.8 inch modules all use ILI9341 at 240 by 320 pixels.

What is the SD slot on the 1.8 inch module for?

It holds an SD card for images or data on the same board. The 1.8 inch module uses an ST7735 driver at 128 by 160 pixels.

Can an ESP32 drive these displays?

Yes. The ESP32 DevKit V1 starts at $11.99 and drives a TFT over SPI with 30 pins and WiFi on board.

Sources

Last updated: November 11, 2026.