
Microcontrollers for beginners are not just for students. Plenty of makers pick up their first board after 50, with a workshop full of tools and a lifetime of fixing things. If you can wire a lamp, solder a joint, or rebuild a small engine, you can program a microcontroller. This guide starts from zero, skips the jargon, and gets you to a working project in a weekend.
Microcontrollers for beginners: what one actually is
A microcontroller is a tiny computer on a single board. You connect a sensor or a motor to its pins, write a short program on your computer, and send it to the board over USB. The board then runs that program on its own, every time you power it on. No operating system, no screen, no fan. It reads a button, turns on a light, or drives a motor. That is all there is to it. The rest is practice, and practice is just small projects that build on each other.
Start with the UNO R3
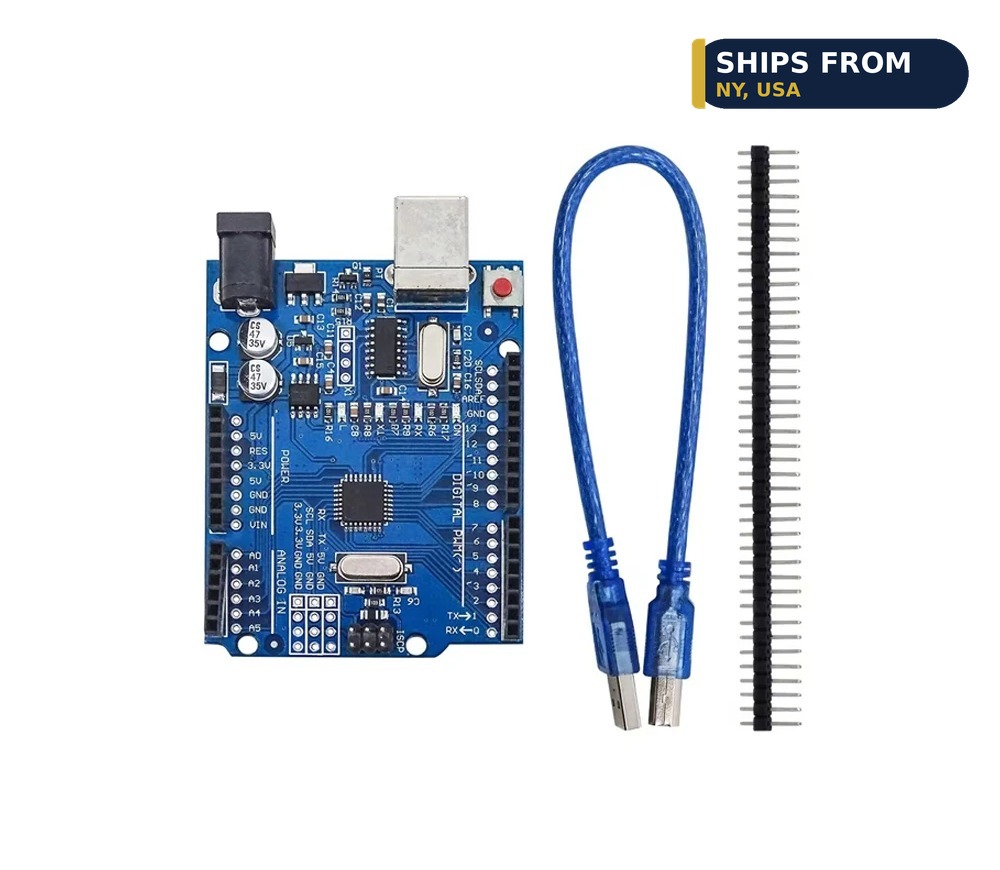
The UNO R3 Compatible Development Board costs $9.27 and is the best first board for a simple reason: almost every beginner tutorial is written for it. It uses the ATmega328P chip and connects over USB or Type-C with a CH340G chip. Plug it in, open the free Arduino software, load the Blink example, and the built-in light blinks. That is your first program, and it takes ten minutes. From there, the examples walk you through buttons, sensors, and motors one step at a time. You do not need to learn programming first. You learn it by changing one number in an example and watching what happens.
A second board when you want more
Once the UNO R3 feels easy, two boards are worth a look. The RP2040-Zero Microcontroller Board costs $7.11, is Pico compatible, and connects over USB-C with 2MB of flash. It is small, cheap, and fast, which makes it a good pick for projects you want to tuck inside an enclosure. The RP2040 Pro Micro Development Board costs $8.37 and packs 16MB of flash with USB-C and QMK compatibility. If you want wireless control from your phone, the ESP32-S3 Development Board DevKitC-1 costs $10.12 and adds WiFi and Bluetooth, with a 44 pin layout and a Type-C USB connection. Buy the second board when a project asks for it, not before.

-
UNO R3 Compatible Development Board, ATmega328P CH340G, USB / Type-C
Price range: $9.27 through $10.64Select options This product has multiple variants. The options may be chosen on the product pageConfiguration
Your first three projects
Project one is a blinking light, which teaches you how to load code. Project two is a button that turns the light on and off, which teaches you how the board reads the real world. Project three is a temperature sensor that prints readings to your computer, which teaches you how the board reports data. Each project uses the same three skills: connect a part, load an example, and change one thing. Do them in order, in one weekend, and you will understand more than a month of reading about it. Keep notes on what worked, because you will reuse those notes on every project after.
Tools you already own
You do not need a new bench to start. A computer with a USB port, a small screwdriver, and a pair of pliers cover the first month of projects. A soldering iron helps once you want permanent connections, and the Plusivo 60W Soldering Iron Kit costs $13.99 with adjustable temperature from 200 to 450C. A breadboard and a bag of jumper wires let you test circuits without soldering anything, which is the right way to learn. Buy tools when a project needs them, and buy them once.
Learning at your own pace
There is no deadline on learning this, and no test at the end. Work in short sessions, one example at a time, and stop when you have had enough for the day. If a step does not work, walk away and come back to it fresh. Most problems turn out to be a loose wire or a wrong pin number, not a lack of talent. Keep a notebook by the bench and write down what each example does in your own words. That notebook becomes your reference, and it grows more useful with every project. The makers who stick with it are not the ones who learn fastest. They are the ones who keep showing up, one small project at a time.
Where to go from here
The best next step is a project with a purpose. Automate a workshop light, build a temperature alarm for a greenhouse, or put a sensor on a bird feeder. A project that solves a real problem keeps you going through the learning curve. Browse the Microcontrollers category to compare boards, and start with the UNO R3 and one small project. The board is nine dollars, the software is free, and the first blinking light is ten minutes away.
Ships from our secure NY warehouse in the USA
Quality RC Parts is a USA shop, and every order ships from our secure NY warehouse. Orders leave in 1 to 2 business days with tracking sent by email, and shipping is free on orders over $100. No overseas wait, no customs. We are a working repair shop, and we stand behind every part we sell.