If you buy parts from Quality RC Parts and know another hobbyist who does too, the referral program pays you both. You share a link, your friend orders, and you each get points. No forms, no codes to remember.
How it works
Your personal referral link is on the Refer & Earn page when you are signed in. It looks like this: qualityrcparts.com/?ref=yourcode. Share it by email, text, or social media — there are share buttons right on the page.
When a friend clicks your link and creates an account, they are linked to you. When they place their first order and it is completed, the rewards land:
You earn 100 points, worth $5 off a future order.
Your friend earns 50 points, on top of the 50-point signup bonus every new account gets. That is 100 points total for them, enough for their first $5 reward right away.
What counts
Rewards are paid on your friend’s first completed order, not at signup. If they sign up and never order, nobody earns anything.
Your link tracks clicks for 30 days. If your friend clicks and orders within that window, it counts.
If a friend clicks more than one person’s link, the last link clicked wins.
One account per person. Referral rewards are for real new customers, and accounts that look like duplicates do not earn.
Tracking your referrals
The Refer & Earn page shows your clicks, signups, and completed referrals, plus the points you have earned from them. Your referral history and your points balance are also on the My Points page.
Using your referral points
Referral points are ordinary points. They go into the same balance as your shopping and review points, and you redeem them the same way: 100 points for a $5-off coupon on the My Points page. One completed referral covers a full $5 reward by itself.
A note on the rules
Referring yourself, creating extra accounts to collect referral points, or using someone else’s link for your own order does not earn rewards. Referral points, like all points, expire after 12 months of inactivity, and they are taken back if the friend’s order is refunded. If a referral you expected does not show up, send us a message with your friend’s order number and we will look into it.
Rewards at Quality RC Parts work like this: you earn points when you shop, and you spend them for money off a future order. This guide walks through each step, from creating your account to using your first $5 reward.
Step 1: Create an account
Go to the My Account page and fill in your email address to sign up. We email you a one-time code to confirm the address is yours. Enter the code and your account is ready.
Creating an account earns you a 50-point signup bonus right away. That is halfway to your first $5 reward. You also need an account to earn points on orders, write reviews for points, and use referral links, so this is the step that unlocks the rest.
If you already have an account, just sign in. Your points balance is on the My Points page.
Step 2: Shop and earn 1 point per $1
Make sure you are signed in before you order. Every $1 you spend on parts earns 1 point, calculated on the parts total after discounts, before shipping and tax. A $120 order of parts earns 120 points, and points are added when the order is completed.
Guest orders do not earn points. If you checked out as a guest, create an account with the same email address and your points can be linked to your account.
Step 3: Earn extra points with reviews
After a verified purchase, you can write a review of the product and earn 25 points per product, once per product. Reviews do not need a photo, but a short note about what the part fitted and how it performed goes a long way.
Reviews are worth doing for more than points: they tell other hobbyists whether a part actually fits their car, and that helps them spend confidently. A review also earns you points faster than shopping alone.
Step 4: Redeem 100 points for $5 off
When your balance hits 100 points, go to the My Points page and redeem them. You get a coupon code worth $5 off. Enter it at checkout like any other coupon, and the discount reduces your order total.
The details:
Redemption is in 100-point steps. 100 points is $5 off, 200 is $10, up to $25 off one order.
The order must be at least $15 before the coupon applies.
The coupon is good for 30 days and can be used once.
It cannot be combined with another coupon code on the same order.
If you are short a few points, a small order or a review is usually enough to get you over the line.
Step 5: Refer friends and earn 100 points each
Your referral link is on the Refer & Earn page. When a friend signs up through your link and places their first order, you earn 100 points and they earn 50. The full rules are in our referral guide.
Keeping your points
Points expire after 12 months of inactivity, so check in at least once a year. Your balance and full history are always on the My Points page. If points from an order are missing, or a reward did not arrive, send us a message with your order number and we will fix it.
Every order at Quality RC Parts earns you points, and points turn into money off your next order. There is no card to carry and nothing to sign up for beyond your account. If you buy parts here, you are already earning.
Here is the program in plain terms: you earn 1 point for every $1 you spend on parts. When you reach 100 points, you can turn them into a $5-off coupon. Points add up across orders, and there are a few other ways to earn on top of shopping.
How you earn points
Shopping: 1 point per $1. Points are earned on the parts total of your order, after any discount, not counting shipping or tax. A $47 parts order earns 47 points. Points land on your account when the order is completed.
Creating an account: 50 points. The first time you create an account, you get a 50-point signup bonus. That is halfway to your first $5 reward before you have bought anything. When you create your account, we email you a one-time code to confirm your address. Enter the code and your account is ready.
Writing a review: 25 points. After a verified purchase, write a review of a product you bought and you earn 25 points, once per product. Reviews have to be approved first, and they have to be for a product you actually bought from us.
Referring a friend: 100 points. Share your referral link and when a friend creates an account through it and places their first order, you earn 100 points and your friend earns 50 points on top of their signup bonus. There is a full guide to referrals below.
How you redeem points
When your balance reaches 100 points, you can redeem them for a $5-off coupon from your My Points page. The coupon applies at checkout. A few rules apply:
100 points = $5 off. You can redeem in 100-point steps, up to $25 off a single order.
The order has to be at least $15 before the coupon applies.
A reward coupon is good for 30 days after you generate it, and it can only be used once.
A reward coupon cannot be combined with another coupon code on the same order.
Your balance, your points history, and the redeem button are all on the My Points page when you are signed in.
Refer a friend, you both earn
Your referral link is on the Refer & Earn page. Share it with a friend. When they create an account through your link and place their first order, you get 100 points and they get 50 points. The link tracks clicks for 30 days, and rewards are paid when the friend’s first order is completed, not at signup. Full details are in our referral guide.
The fine print
Points expire after 12 months of inactivity, so they do not sit forever on an account nobody uses. Points are tied to your account and cannot be transferred to another account or turned into cash. One account per person. Orders placed as a guest do not earn points, so if you want the points, sign in or create an account at checkout. If an order is refunded, the points earned on it are taken back.
Questions about your balance or a missing reward? Send us a message and we will sort it out.
Buy RC parts USA is a search more hobbyists are making, and the reason is simple: ordering overseas is slow, and slow kills a build. A part that takes a month to arrive means a month of not flying, not driving, and not finishing the project. Buying from a USA shop means the part shows up in days, with tracking, support, and no customs. Here is how the two options actually compare.
Shipping speed: days against weeks
A USA shop ships in 1 to 2 business days, and the part is at your door in under a week. An overseas order can take two to six weeks, and that is before customs holds, address problems, or a lost package. If you need a motor, a receiver, or a spool of filament to finish a build this weekend, overseas shipping is not an option. It is a delay. Hobbyists buy from a USA shop because the build stays on schedule, and the weekend stays a build weekend instead of a waiting weekend.
No customs, no surprises at the door
Overseas orders can stop at customs, and when they do, you pay fees, fill out forms, and wait longer. A USA order has no customs, no import fees, and no surprise charges at delivery. The price you pay at checkout is the price you pay, and the part arrives without a second bill. That matters most on small orders, where a customs fee can cost more than the part itself. Buying from a USA shop keeps the total honest.
Tracking is the other half of the story. A USA order ships with tracking sent by email, so you can see where the part is and when it arrives. An overseas order often ships with tracking that stops updating the moment the package leaves the country, and then you are guessing for weeks. When a build depends on a part, knowing where it is matters as much as the part itself. A USA shop tells you when the order leaves, and you can plan the build around a real delivery date instead of a guess.
Real support from a working repair shop
A USA shop run by a working repair tech can answer a fit question before you buy, because the tech builds and repairs the same parts. That is worth more than a lower sticker price. If a part does not fit, you find out before you order, not after it arrives from overseas. If it fails, you talk to a person in the same time zone, not a ticket queue on the other side of the world. Quality RC Parts is a working repair shop, and every part we sell is one we would use on our own bench.
The price is closer than it looks
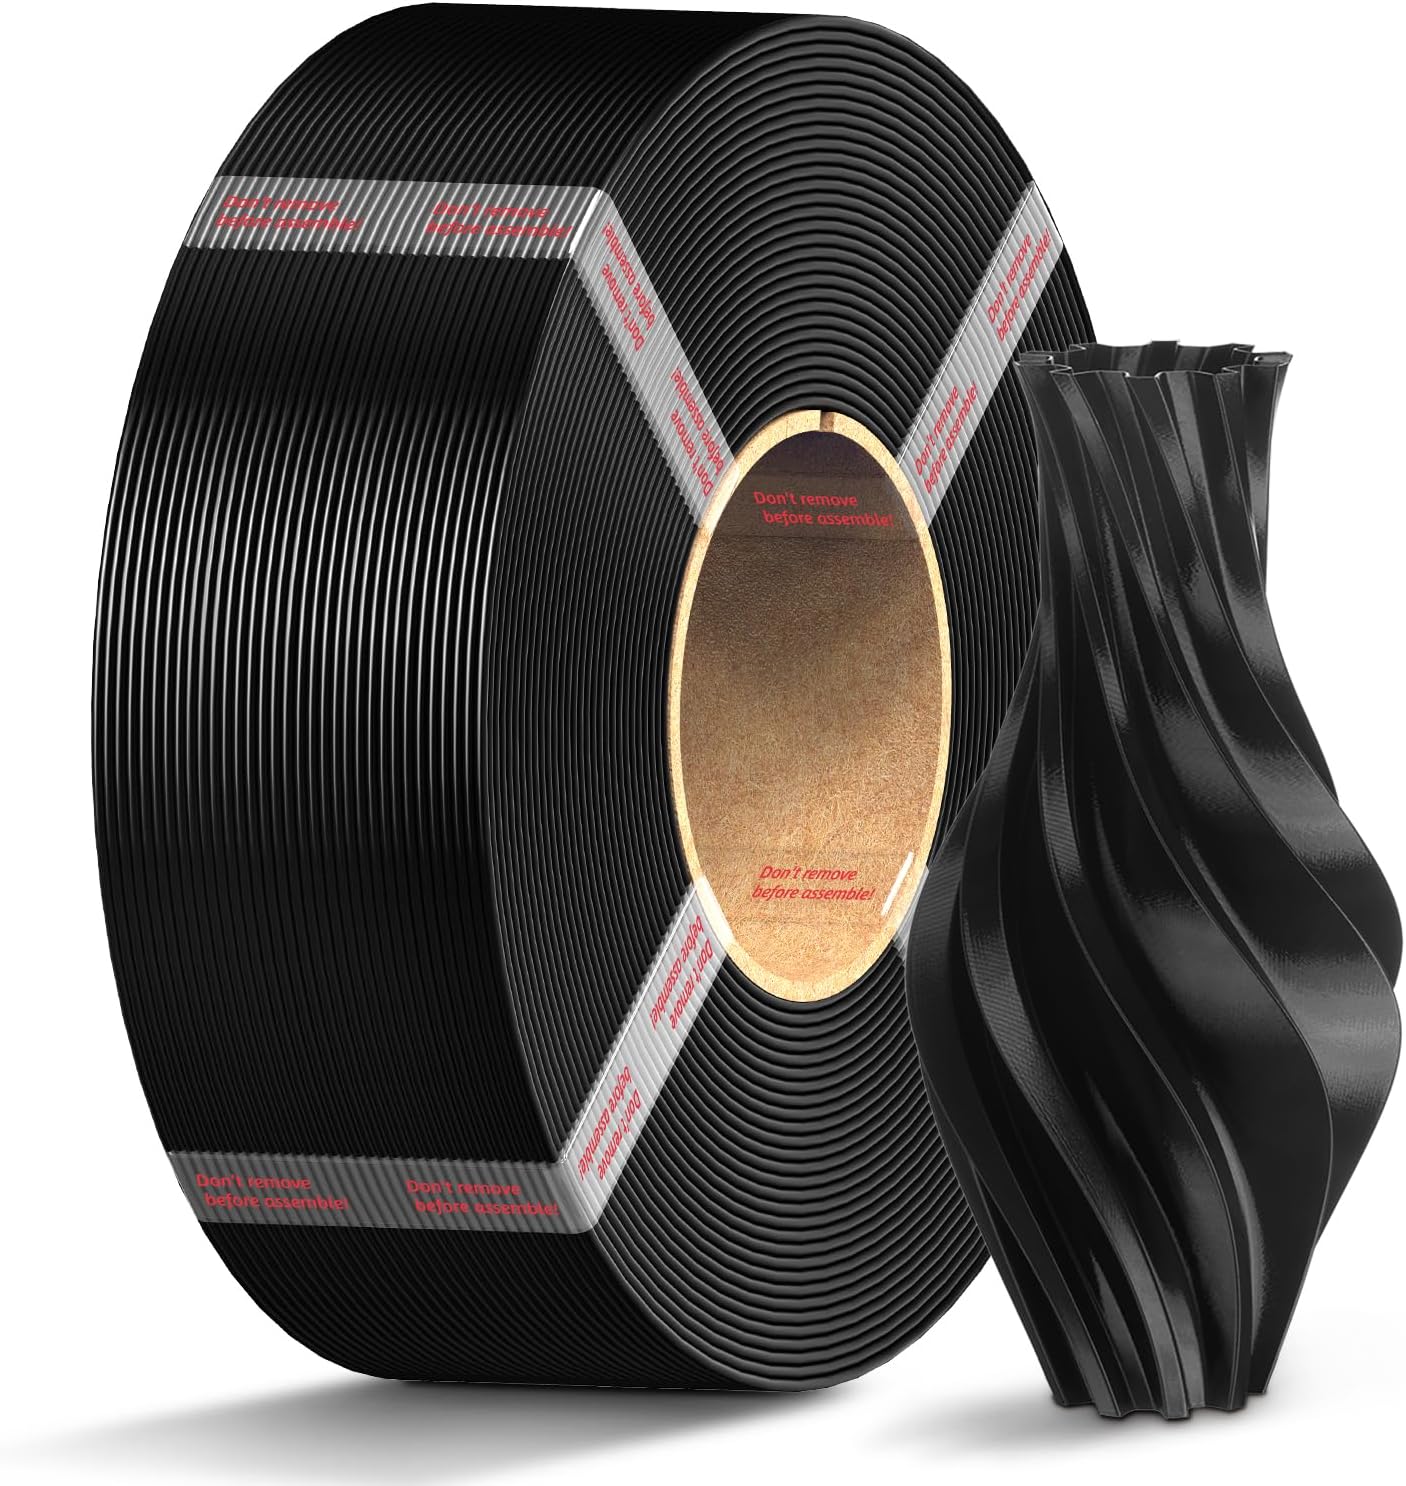
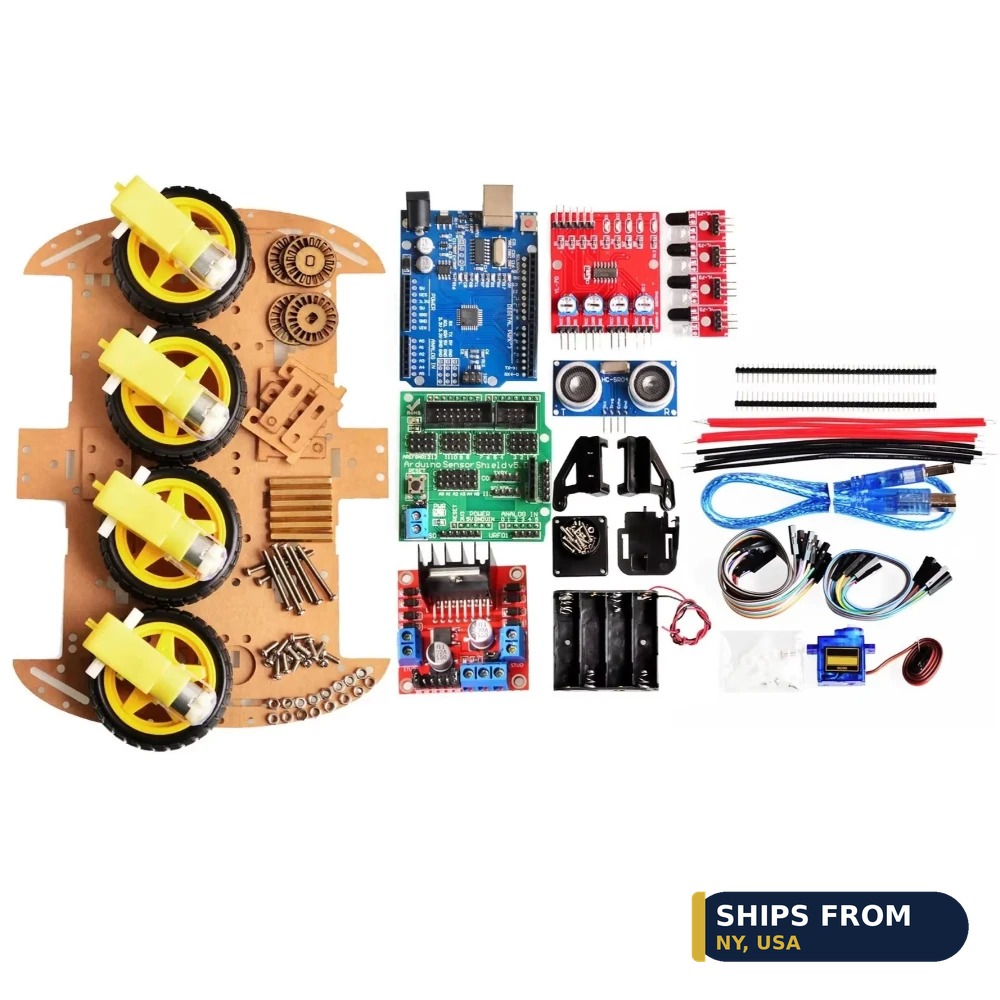
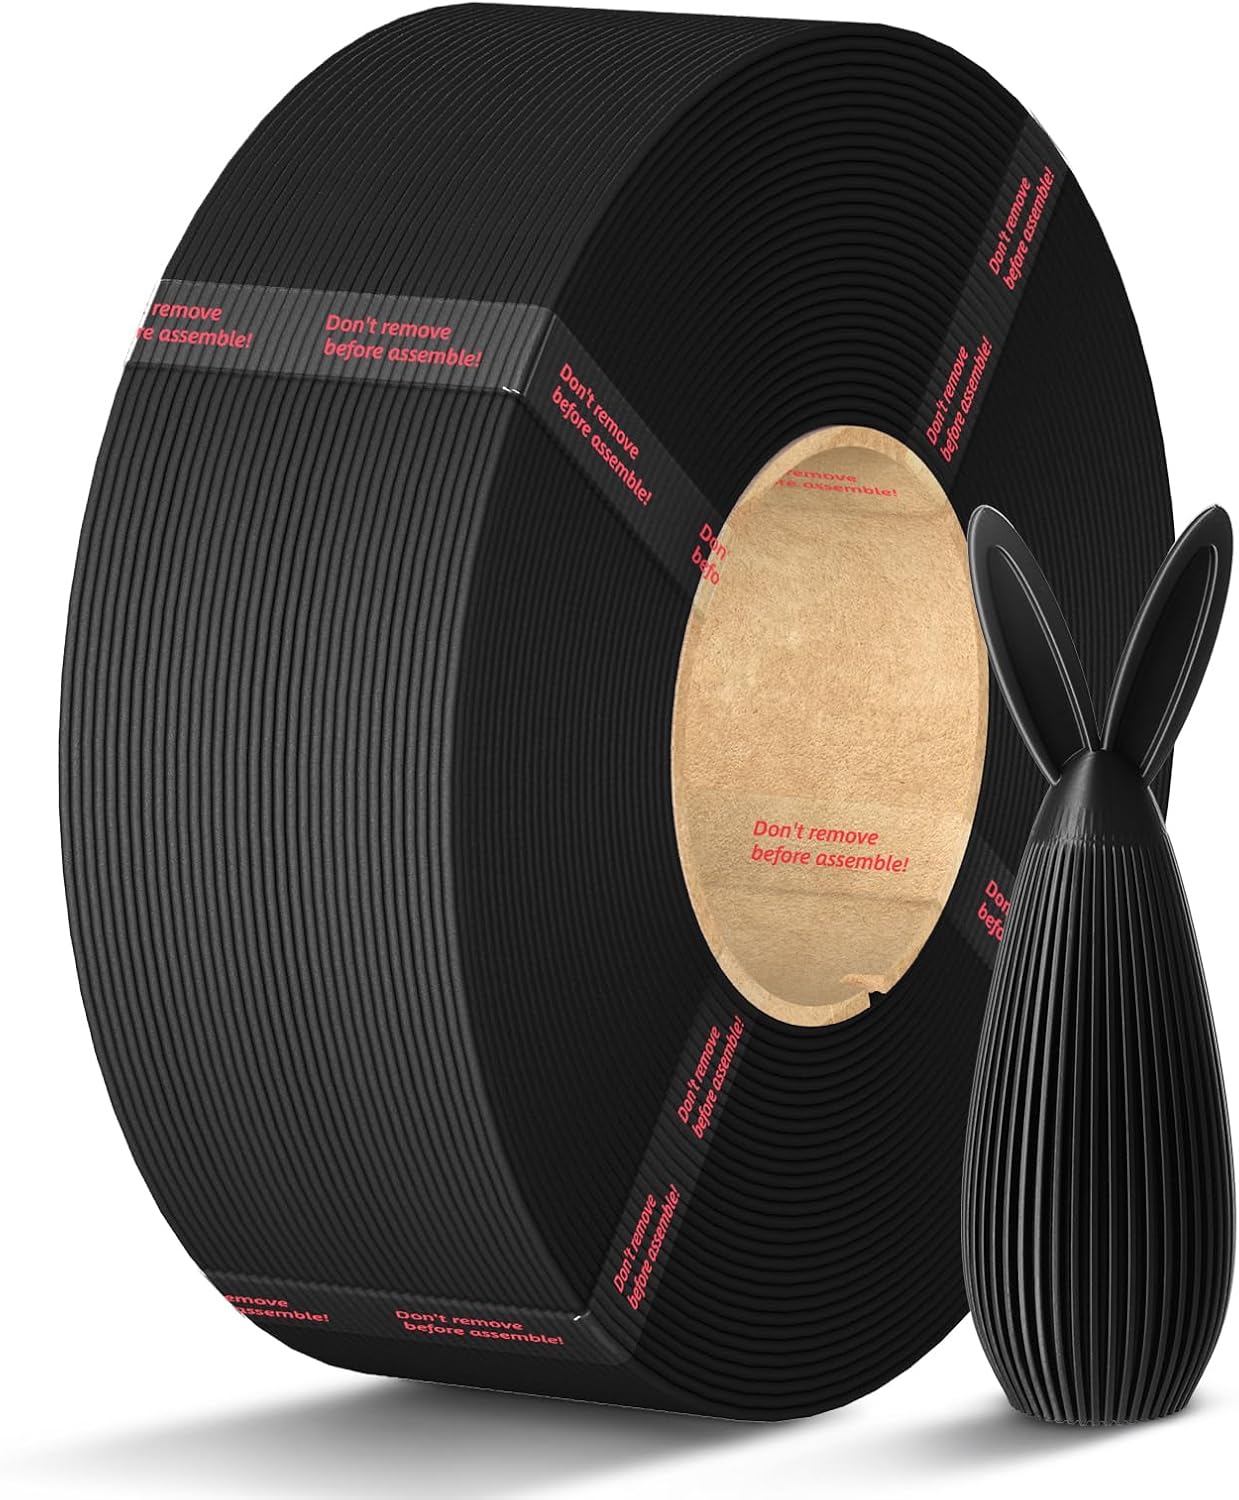
Overseas parts look cheaper until you add shipping, wait time, and the cost of a failed part you cannot return. A Anycubic PLA Filament Refill costs $19.99 for 1KG from a USA shop, and it arrives in days with tracking. A UNO R3 Compatible Development Board costs $9.27, and a Mecanum Wheel 4WD Robot Car Chassis Kit costs $47.11, both in stock and ready to ship. When the overseas part is wrong, late, or broken, you buy it twice. The USA part costs less in the end because you only buy it once.
Select options
This product has multiple variants. The options may be chosen on the product page
Returns and warranty without the wait
Returning a part overseas means international shipping, a long wait, and often no refund at all. Returning a part to a USA shop means a domestic label and an answer in days. That is the difference between a bad purchase and a fixed one. Before you order anything, check the shop’s returns policy and read it in plain language. A shop that stands behind its parts says so up front, and a shop that does not will make you find out the hard way.
How to buy RC parts USA from a shop you trust
Start with the parts you need now, not the parts you might need someday. Check that the part is in stock, check that the shop lists real specs, and check that shipping is fast and tracked. Browse the Robotics category, the Microcontrollers category, and the 3D Printer Filament category to find what your build needs. Every order ships from our secure NY warehouse in the USA, with tracking by email and free shipping on orders over $100. Buy the part, build the thing, and fly it this weekend instead of next month.
Ships from our secure NY warehouse in the USA
Quality RC Parts is a USA shop, and every order ships from our secure NY warehouse. Orders leave in 1 to 2 business days with tracking sent by email, and shipping is free on orders over $100. No overseas wait, no customs. We are a working repair shop, and we stand behind every part we sell.
Gifts for drone pilots are easy to get wrong. A pilot does not need another gadget that sits on a shelf. They need the parts that break, wear out, or upgrade the drone they already fly. This guide lists gifts for drone pilots that get used: receivers, power parts, landing gear, and filament for printed spares, all at real prices.
The parts pilots actually ask for
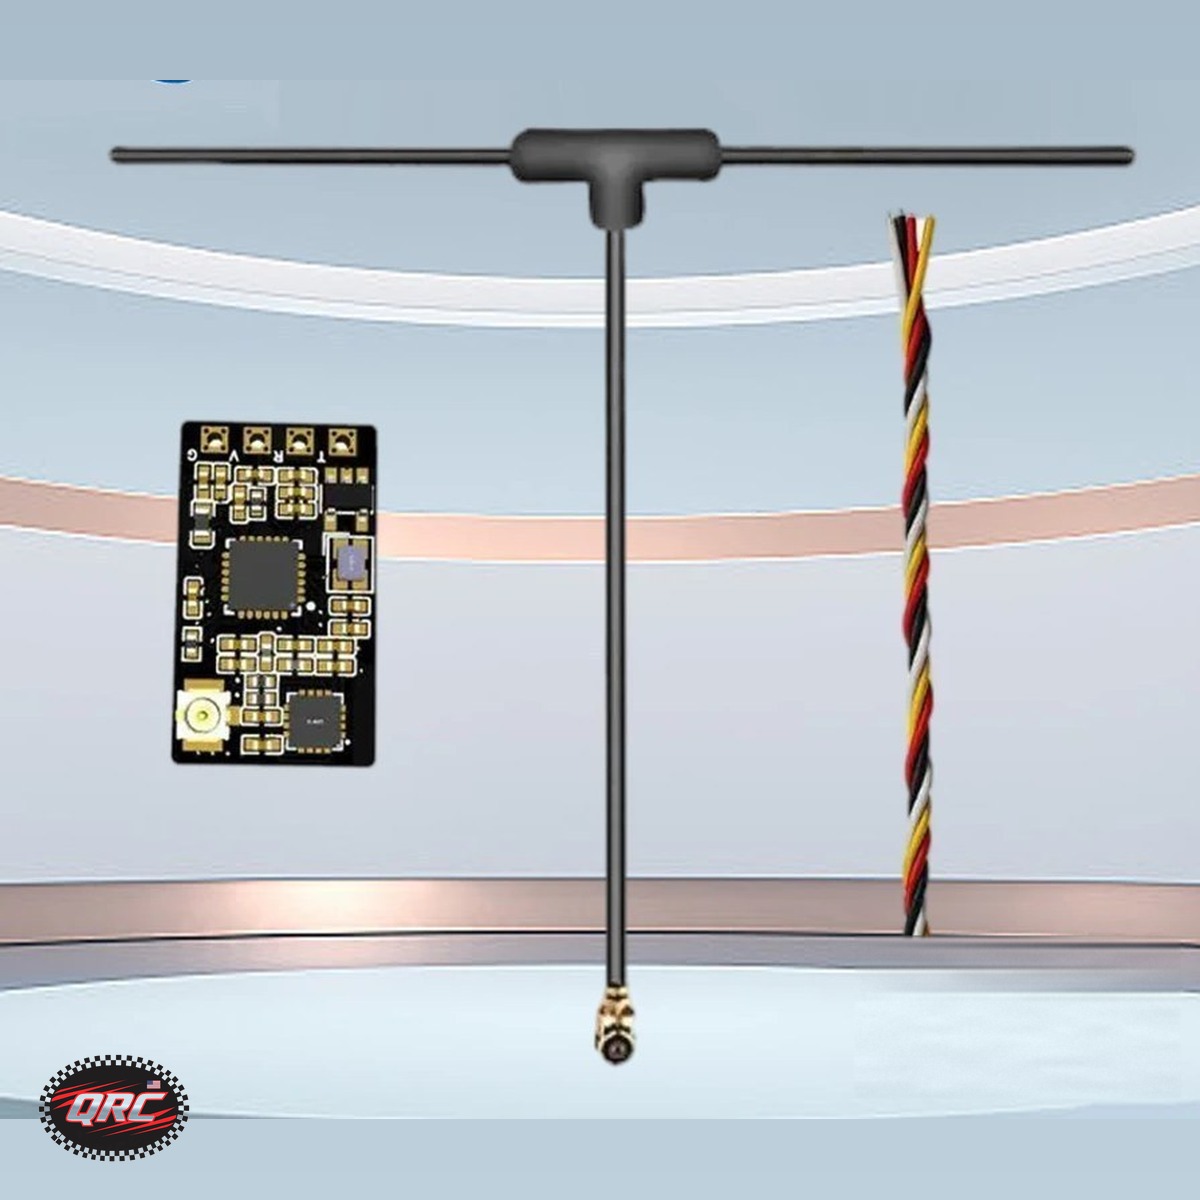
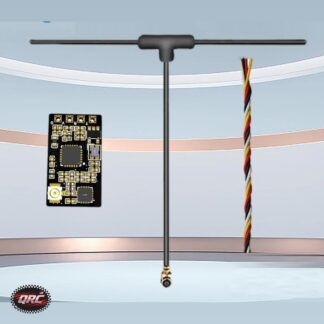
Start with the parts that fail first. The 2.4G ExpressLRS ELRS Receiver costs $18.57 and is built for FPV freestyle and long range drones, which makes it a solid gift for any pilot flying ExpressLRS. Power parts are just as welcome: the 15A High-Voltage UBEC costs $27.99 and handles 6 to 12S LiPo, which covers most large builds. These are the parts pilots keep spares of, so a new one never goes to waste.
Landing gear and protection
Small drones break landing gear first, because every rough landing goes straight through the legs. The DJI Neo 2 Landing Gear Frame costs $10.95 and adds height and protection for the Neo 2, which keeps the camera and body off the ground on uneven surfaces. It is a cheap gift that saves a much more expensive repair. If the pilot you are buying for flies a different drone, look for the parts that protect it: prop guards, landing gear, and camera mounts are always a safe bet, because they are the first parts to wear out.
Filament for printed spares
A pilot with a 3D printer can print their own spares, which makes filament a great gift. PLA+ filament costs $24.99 for a 1KG spool and is tougher than standard PLA, less brittle, and holds up better under impact, which is exactly what drone mounts and brackets need. For parts that need to flex instead of snap, Anycubic PETG Filament Refill costs $18.79 for 1KG, with impact resistance twice that of standard PLA. Note that the PETG is a refill coil only and needs a reusable spool. A spool of PLA+ and a spool of PETG cover almost every printed spare a pilot will need.
Gifts for drone pilots: FPV extras that earn their keep
FPV pilots have their own list of extras that always run out. Heat shrink tubing, zip ties, spare propellers, and a fresh receiver are the items that disappear fastest from a bench. The ExpressLRS receiver at $18.57 is a good example: it is small, it fits most freestyle and long range builds, and pilots keep spares because a damaged receiver grounds the drone. A Mini Heat Gun for Heat Shrink at $20.99 pairs with it, because every receiver install ends with heat shrink. These are not exciting gifts, and that is the point. A pilot opens the box, nods, and puts the part straight on the bench. That is a gift that worked.
Gifts for drone pilots: what not to buy
Skip the novelty items. A pilot does not need a drone shaped mug, a poster, or a gadget that only works with one model they do not own. Skip batteries unless you know the exact model and connector, because the wrong battery is useless. Skip cheap no name parts that fail in the air, because a failure in flight costs a drone. Buy parts from a shop that stands behind them, buy the parts that match the drone they fly, and buy consumables when you are unsure. Filament, glue sticks, and heat shrink never go wrong, because they get used up no matter what drone is on the bench.
Put together a pilot gift box
A good gift box has one main part and two consumables. Start with the ELRS receiver or the UBEC, add a spool of PLA+ filament, and finish with a Creality glue stick at $7.99 to keep first layers stuck. The whole box costs less than a single drone repair, and every item in it gets used. Browse the 3D Printer Filament category to pick the colors they print most, and order in time for the holidays. If you are not sure which colors to pick, black and white are the safe choice, because every pilot prints mounts and brackets in black, and white is easy to see in the air and on the bench.
Ships from our secure NY warehouse in the USA
Quality RC Parts is a USA shop, and every order ships from our secure NY warehouse. Orders leave in 1 to 2 business days with tracking sent by email, and shipping is free on orders over $100. No overseas wait, no customs. We are a working repair shop, and we stand behind every part we sell.
This RC hobby gift guide covers real gear for RC and drone hobbyists, at prices that work for stocking stuffers and big gifts alike. Every item here is something a hobbyist actually uses: parts that break, tools that get picked up daily, and filament that turns into printed spares. Skip the gimmicks and buy something that gets used the week it arrives.
Small gifts under $15 that get used
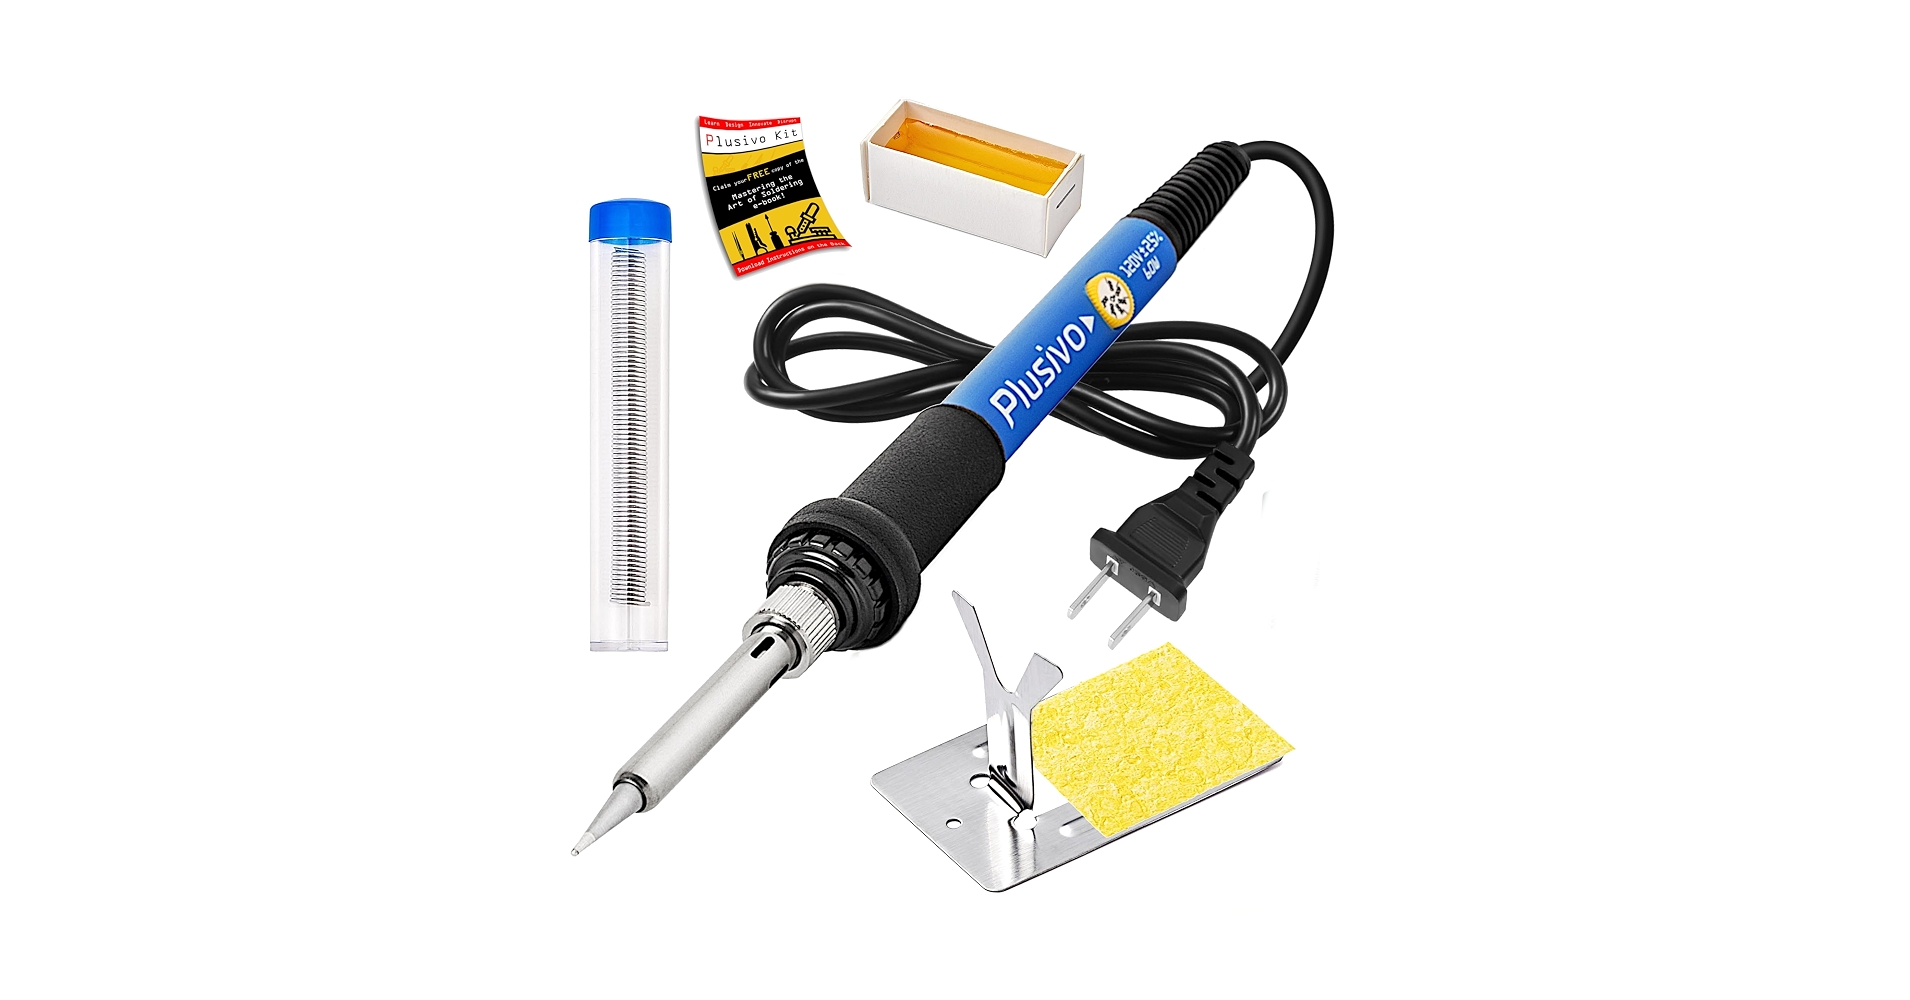
Small gifts are the easiest win, because hobbyists burn through consumables. A Creality 3D printer glue stick costs $7.99 for a 21g stick and stops warping on PLA, ABS, PETG, PC, PA, and TPU. A DJI Neo 2 Landing Gear Frame costs $10.95 and protects a small drone on rough landings. The Plusivo 60W Soldering Iron Kit costs $13.99, with adjustable temperature from 200 to 450C, and it is the tool every bench needs. Any one of these fits in a stocking and gets used within days.
Stocking stuffers for RC and drone hobbyists
A stocking stuffer should be small, useful, and gone within a month. Heat shrink tubing, a pack of zip ties, a small parts organizer, or a spare set of propellers all fit. A glue stick is another good one: the Creality glue stick is $7.99, and there is also a bed adhesion glue stick at $9.99 for 21g, so you can pick the one that fits the budget. The rule for stocking stuffers is simple. If it gets used up, it is a good gift. If it sits on a shelf, it is not. Consumables always win, because no hobbyist ever says they have too much filament, too much solder, or too many zip ties.
Mid range gifts: filament and tools
Filament is a gift that keeps giving, because every spool becomes a dozen printed parts. Anycubic PLA Filament Refill costs $19.99 for 1KG and is the easiest filament to print. Note that it is a refill coil only and needs a reusable spool. For tougher parts, Anycubic PLA+ Filament Refill costs $24.99 for 1KG and has twice the toughness of standard PLA. A Mini Heat Gun for Heat Shrink costs $20.99 and is the right tool for heat shrink tubing, which every RC and drone build uses. Pair a spool with a heat gun and you have a gift that covers a whole winter of bench work.
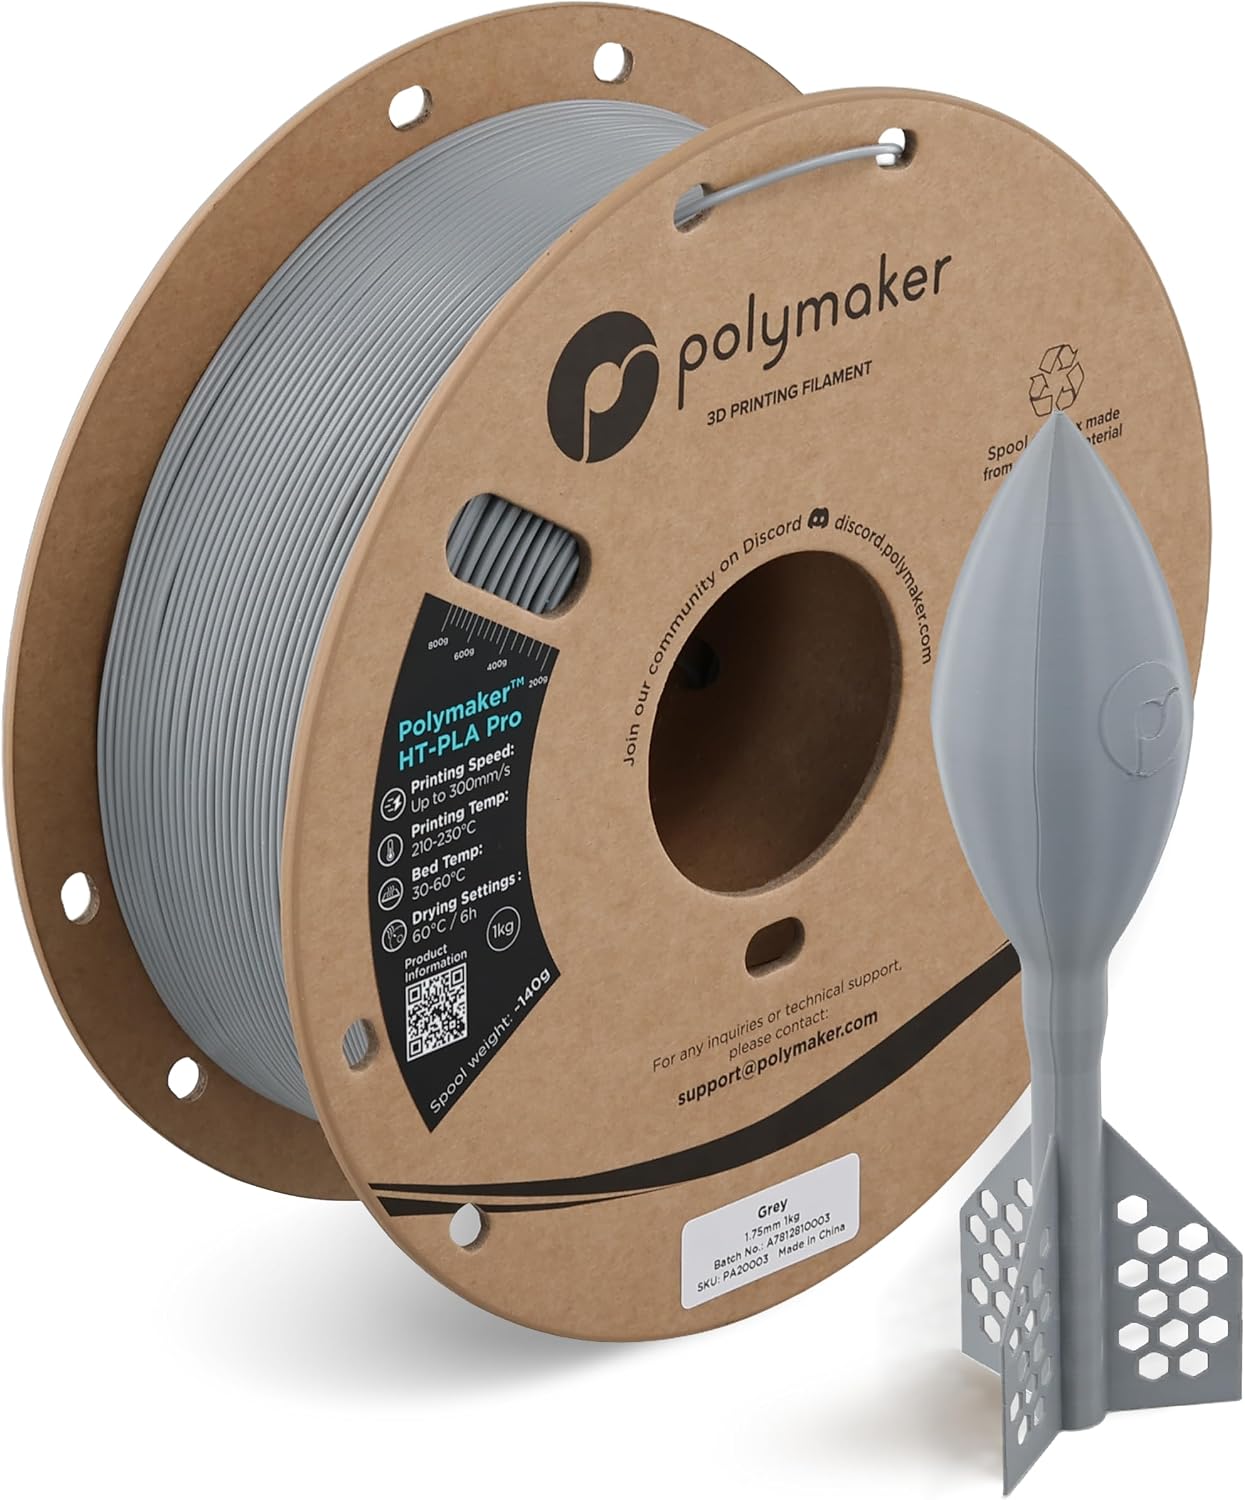
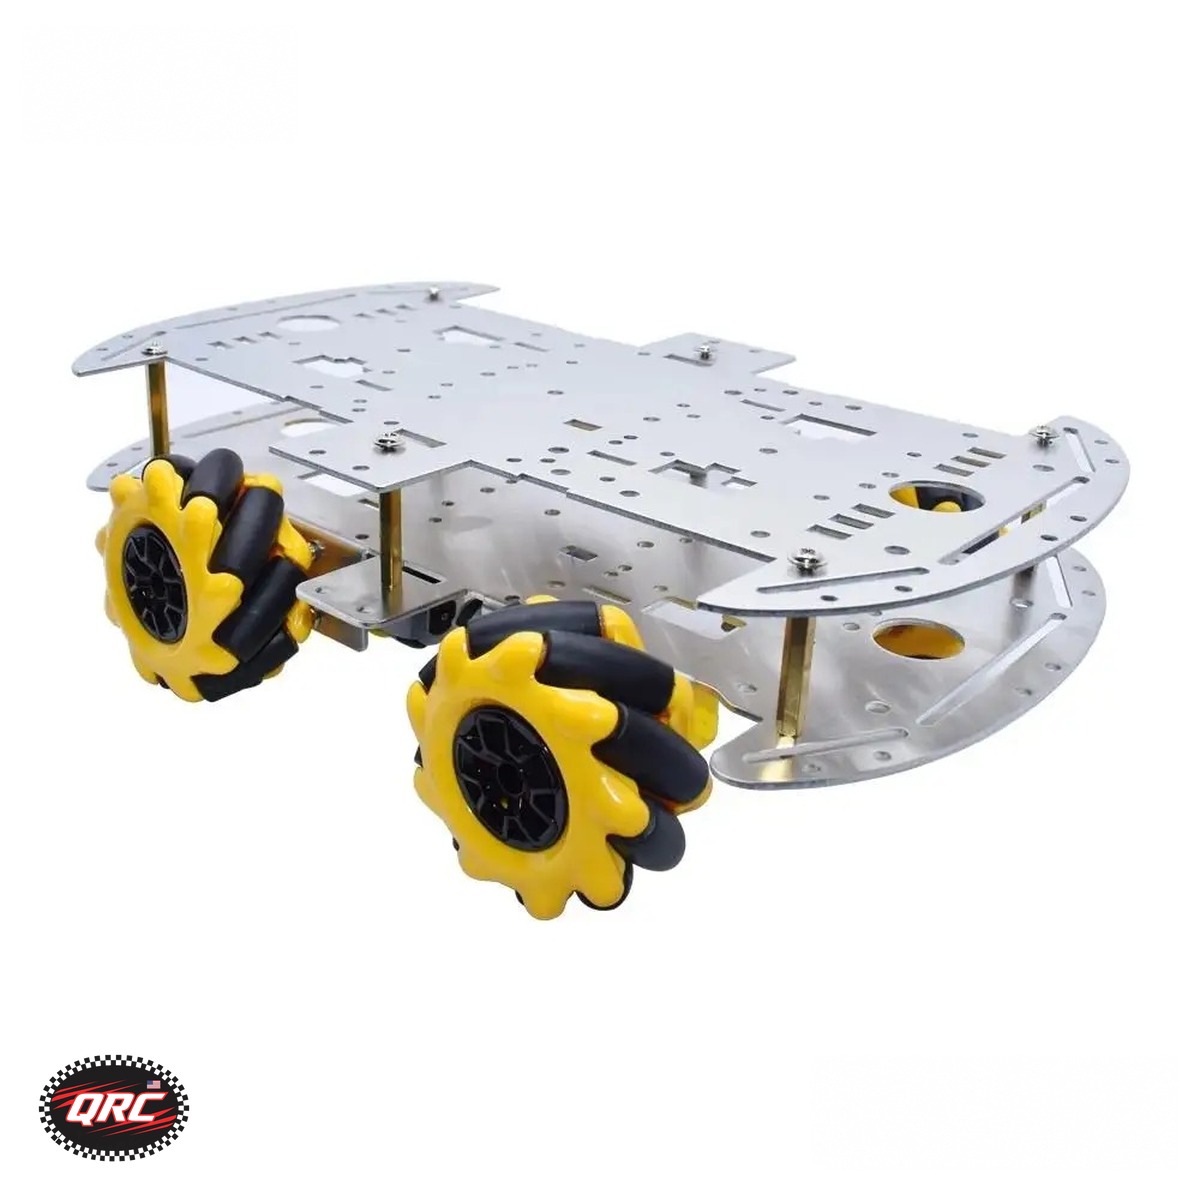
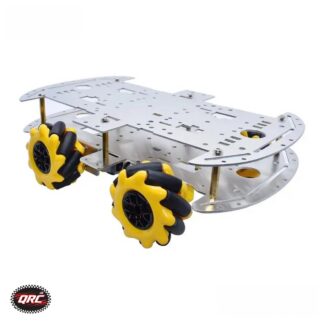
For a bigger gift, go with something that upgrades the whole hobby. Polymaker HT-PLA Pro Filament costs $29.99 for a 1KG spool and adds heat resistance to PLA toughness, which is what functional drone parts and enclosures need. A robot kit is another strong pick: the Mecanum Wheel 4WD Robot Car Chassis Kit costs $47.11, built from aluminum alloy with 60mm omni wheels, and it gives a hobbyist a whole new project to build. If you are not sure what they need, a gift that covers a category they already buy is safer than a gadget they have never asked for.
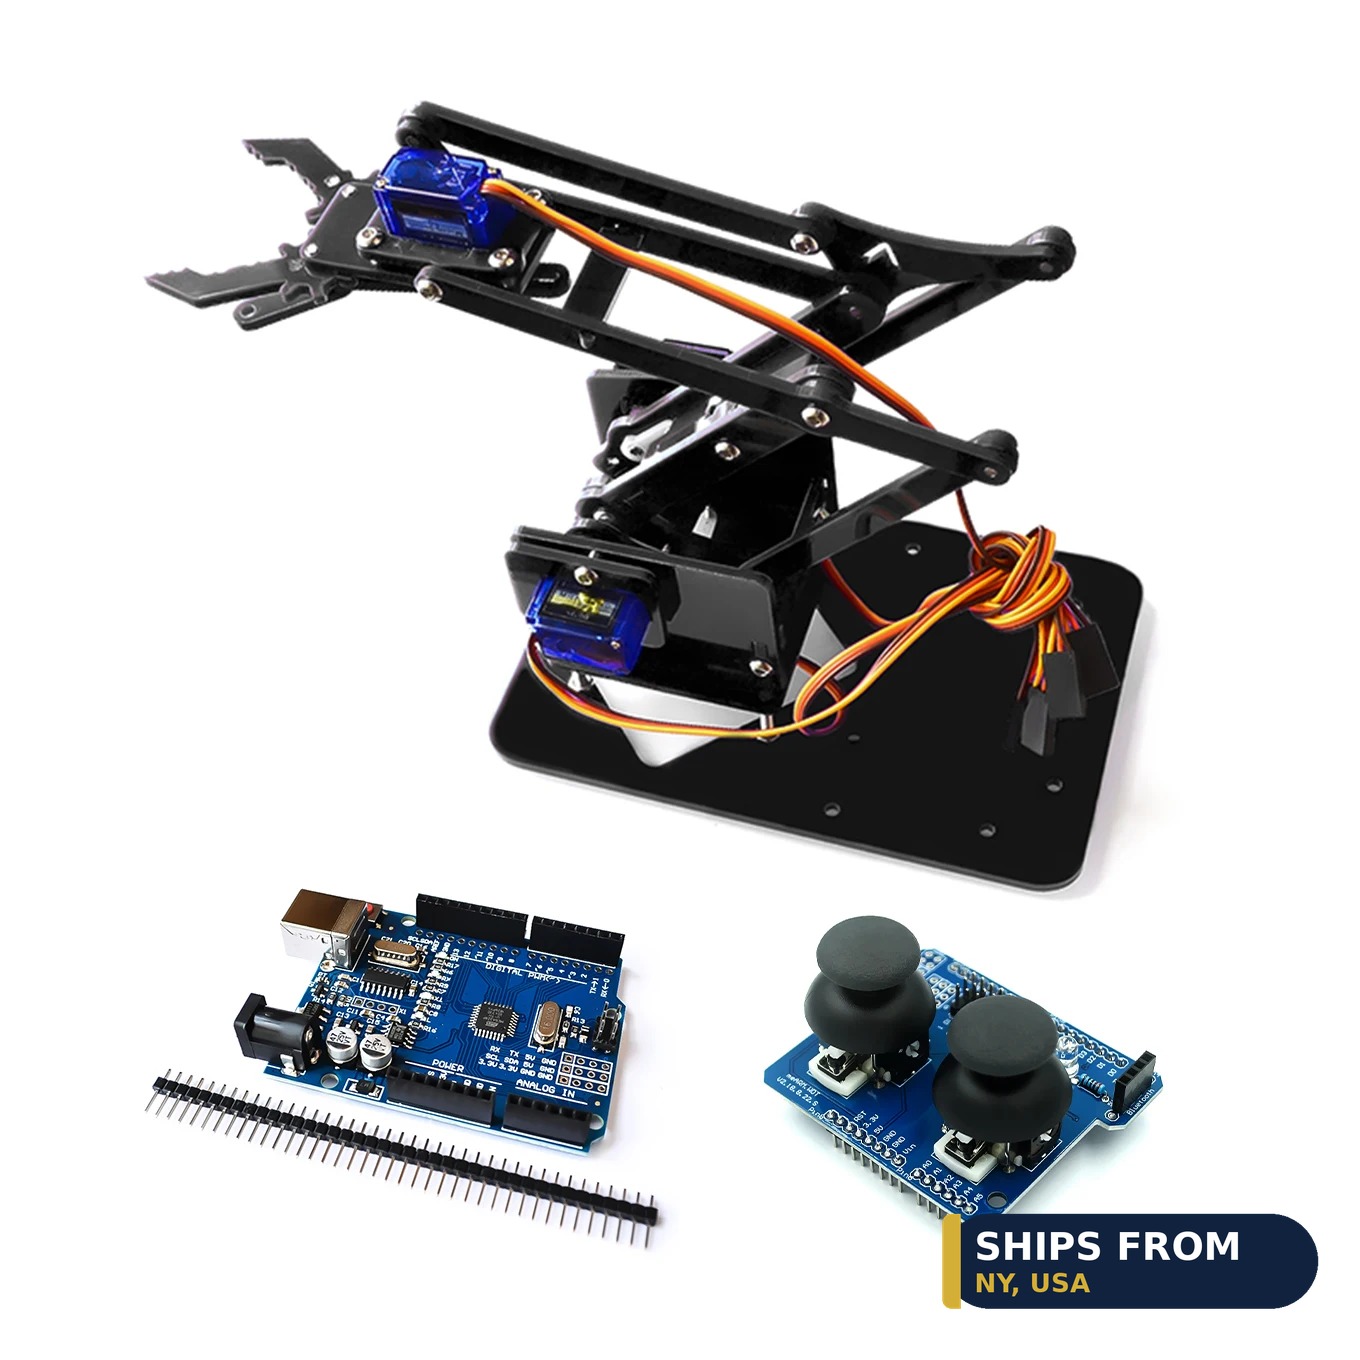
A robot kit also makes a great shared gift, because it is a project, not just a part. Give the chassis kit to a parent and a child, or to two friends, and they build it together over the holidays. The 4-DOF Acrylic Robot Arm Kit with Claw costs $18.00 and pairs with any of the car chassis kits, so it works as an add-on gift for someone who already owns a robot car. A gift that turns into an afternoon of building is worth more than a gift that turns into a drawer full of packaging.
How to use this RC hobby gift guide
Match the gift to what they already own. A drone pilot needs spares and power parts. An RC car driver needs tools and hardware. A 3D printer owner needs filament and bed adhesion. If you know their printer, buy filament in the colors they print most. If you know their drone, buy the landing gear or the receiver that fits it. And if you are stuck, consumables are always safe: filament, glue sticks, and solder get used up, so they never sit on a shelf. Browse the 3D Printer Filament category and the Robotics category to find something at your budget, and order early so it ships from the USA in time for the holidays.
Ships from our secure NY warehouse in the USA
Quality RC Parts is a USA shop, and every order ships from our secure NY warehouse. Orders leave in 1 to 2 business days with tracking sent by email, and shipping is free on orders over $100. No overseas wait, no customs. We are a working repair shop, and we stand behind every part we sell.
Microcontrollers for beginners are not just for students. Plenty of makers pick up their first board after 50, with a workshop full of tools and a lifetime of fixing things. If you can wire a lamp, solder a joint, or rebuild a small engine, you can program a microcontroller. This guide starts from zero, skips the jargon, and gets you to a working project in a weekend.
Microcontrollers for beginners: what one actually is
A microcontroller is a tiny computer on a single board. You connect a sensor or a motor to its pins, write a short program on your computer, and send it to the board over USB. The board then runs that program on its own, every time you power it on. No operating system, no screen, no fan. It reads a button, turns on a light, or drives a motor. That is all there is to it. The rest is practice, and practice is just small projects that build on each other.
Start with the UNO R3
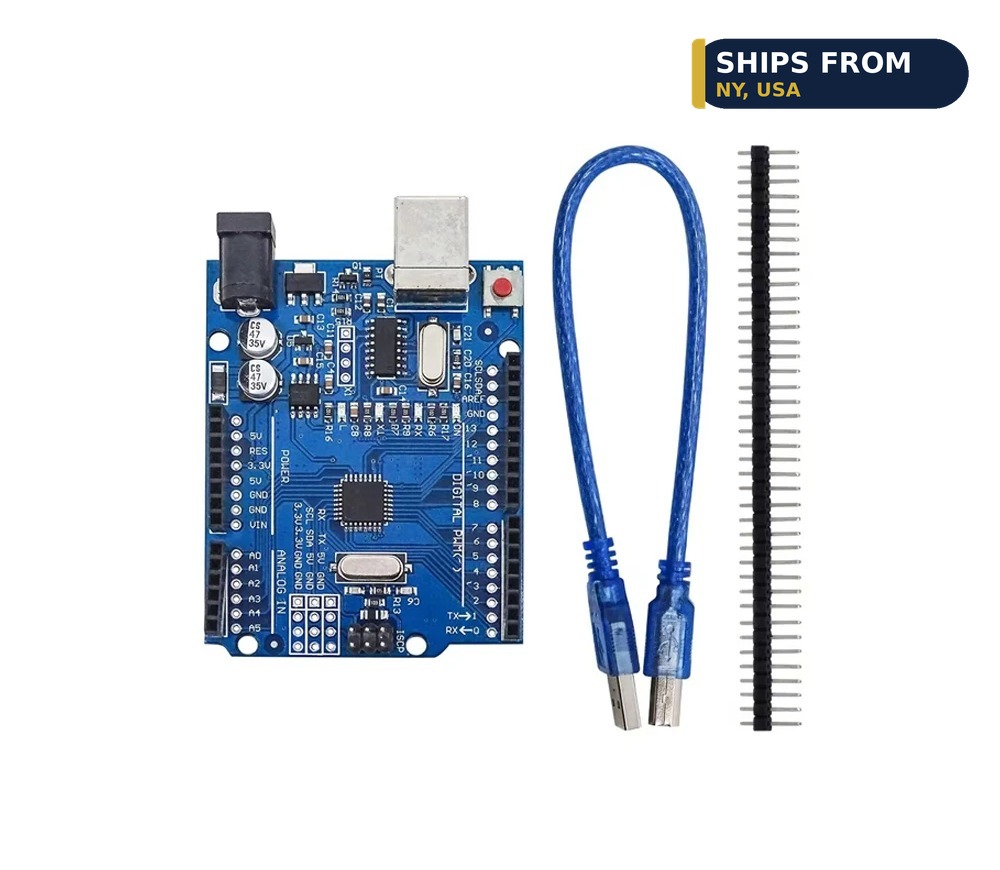
The UNO R3 Compatible Development Board costs $9.27 and is the best first board for a simple reason: almost every beginner tutorial is written for it. It uses the ATmega328P chip and connects over USB or Type-C with a CH340G chip. Plug it in, open the free Arduino software, load the Blink example, and the built-in light blinks. That is your first program, and it takes ten minutes. From there, the examples walk you through buttons, sensors, and motors one step at a time. You do not need to learn programming first. You learn it by changing one number in an example and watching what happens.
A second board when you want more
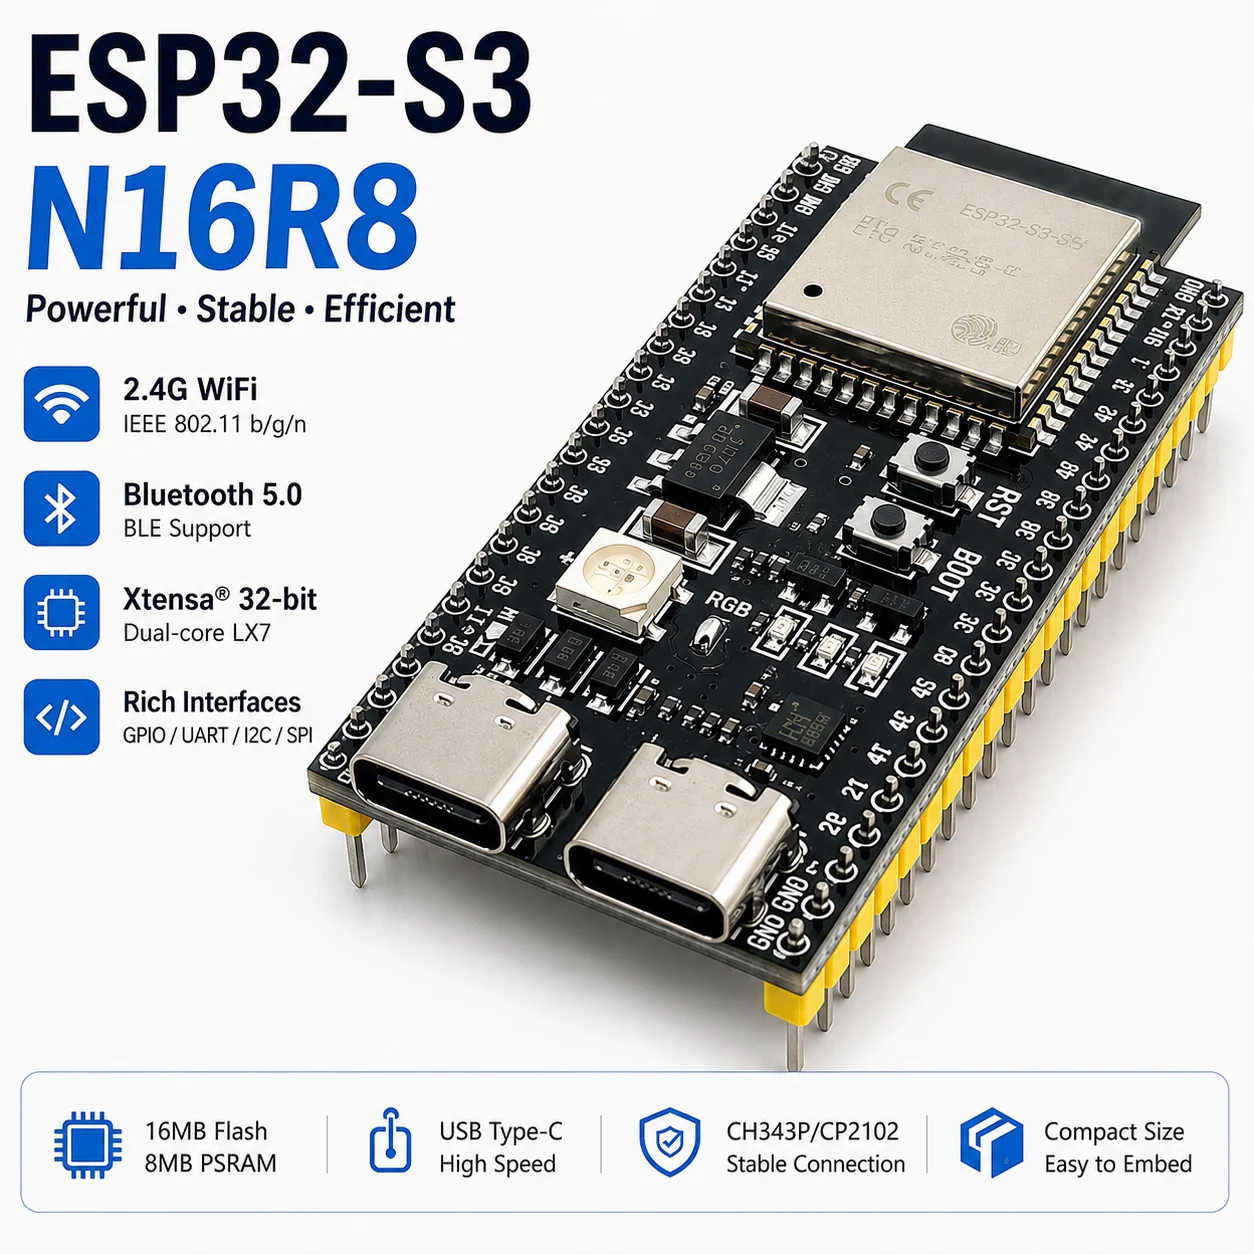
Once the UNO R3 feels easy, two boards are worth a look. The RP2040-Zero Microcontroller Board costs $7.11, is Pico compatible, and connects over USB-C with 2MB of flash. It is small, cheap, and fast, which makes it a good pick for projects you want to tuck inside an enclosure. The RP2040 Pro Micro Development Board costs $8.37 and packs 16MB of flash with USB-C and QMK compatibility. If you want wireless control from your phone, the ESP32-S3 Development Board DevKitC-1 costs $10.12 and adds WiFi and Bluetooth, with a 44 pin layout and a Type-C USB connection. Buy the second board when a project asks for it, not before.
Select options
This product has multiple variants. The options may be chosen on the product page
Your first three projects
Project one is a blinking light, which teaches you how to load code. Project two is a button that turns the light on and off, which teaches you how the board reads the real world. Project three is a temperature sensor that prints readings to your computer, which teaches you how the board reports data. Each project uses the same three skills: connect a part, load an example, and change one thing. Do them in order, in one weekend, and you will understand more than a month of reading about it. Keep notes on what worked, because you will reuse those notes on every project after.
Tools you already own
You do not need a new bench to start. A computer with a USB port, a small screwdriver, and a pair of pliers cover the first month of projects. A soldering iron helps once you want permanent connections, and the Plusivo 60W Soldering Iron Kit costs $13.99 with adjustable temperature from 200 to 450C. A breadboard and a bag of jumper wires let you test circuits without soldering anything, which is the right way to learn. Buy tools when a project needs them, and buy them once.
Learning at your own pace
There is no deadline on learning this, and no test at the end. Work in short sessions, one example at a time, and stop when you have had enough for the day. If a step does not work, walk away and come back to it fresh. Most problems turn out to be a loose wire or a wrong pin number, not a lack of talent. Keep a notebook by the bench and write down what each example does in your own words. That notebook becomes your reference, and it grows more useful with every project. The makers who stick with it are not the ones who learn fastest. They are the ones who keep showing up, one small project at a time.
Where to go from here
The best next step is a project with a purpose. Automate a workshop light, build a temperature alarm for a greenhouse, or put a sensor on a bird feeder. A project that solves a real problem keeps you going through the learning curve. Browse the Microcontrollers category to compare boards, and start with the UNO R3 and one small project. The board is nine dollars, the software is free, and the first blinking light is ten minutes away.
Ships from our secure NY warehouse in the USA
Quality RC Parts is a USA shop, and every order ships from our secure NY warehouse. Orders leave in 1 to 2 business days with tracking sent by email, and shipping is free on orders over $100. No overseas wait, no customs. We are a working repair shop, and we stand behind every part we sell.
If you are looking for STEM projects for kids, 3D printing and robotics can turn into real skills. Start here. The best STEM projects for kids end with something that moves: a robot car that drives, an arm that grabs, a part that was designed on screen and printed the same day. A child who prints a part, bolts it to a robot chassis, and drives it across the room learns design, electronics, and problem solving in one afternoon. This guide is for parents and educators who want projects kids actually finish, with gear that works the first time.
Why 3D printing and robotics work for STEM
Most school projects end as posters. A 3D printing and robotics project ends as a machine. Kids design a part on screen, print it, and test it on a real robot. When it breaks, they redesign it and print it again. That loop is the engineering process, and it teaches more than a worksheet ever will. It also holds attention, because the result moves, grabs, or drives. Start with one small project, not a full course. A single working robot does more for a child’s interest than a shelf of unused kits.
STEM projects for kids: start with a robot car
The best first project is a robot car. The Smart Robot Car Chassis Kit costs $48.22 and comes with a speed encoder and battery box for Arduino, in 2WD or 4WD. Assembly is screws and brackets, no soldering, and the speed encoder lets kids measure how fast each wheel turns. Pair it with a UNO R3 Compatible Development Board at $9.27 and the car can follow a line, avoid a wall, or drive a pattern on the floor. The whole build fits in a single class period or a Saturday afternoon, and the car works the same day.
Print the parts the robot needs
A 3D printer turns the robot into a design project. Kids can print sensor mounts, bumper brackets, a phone holder, or a custom body for the car. Anycubic PLA Filament Refill costs $19.99 for 1KG and is the easiest filament to print, which matters when the printer is shared. Note that it is a refill coil only and needs a reusable spool. For parts that take hits, PLA+ filament costs $24.99 for 1KG and is tougher than standard PLA, less brittle, and holds up better under impact. Print the first version in PLA, then reprint the parts that break in PLA+. That is a lesson in material choice that no lecture can match.
Add a robot arm for the second project
Once the car drives, give it a job. The 4-DOF Acrylic Robot Arm Kit with Claw costs $18.00 and comes unassembled, with SG90 servos and UNO and rocker options. Kids assemble the arm, mount it on the car, and program the claw to pick up a small object. It teaches servos, angles, and sequencing, and it turns a car into a machine with a purpose. The arm is also a good group project, because one child can build while another writes the code.
Select options
This product has multiple variants. The options may be chosen on the product page
Keep the first layer stuck
Nothing kills a kid’s interest faster than a print that lifts off the bed halfway through. A Creality 3D printer glue stick costs $7.99 for a 21g stick and holds the first layer flat on PLA, ABS, PETG, PC, PA, and TPU. A thin layer on a cold plate is all it takes, and residue washes off with water. There is also a bed adhesion glue stick at $9.99 for 21g. Keep one in the classroom or the workshop and the printer just works, which keeps the focus on the project instead of the printer.
Safety and supervision
A few simple rules keep the project safe and fun. An adult should supervise the 3D printer, because the nozzle and the bed get hot enough to burn. Keep small screws and servo parts away from younger children, and keep the workspace tidy so parts do not roll off the table and get lost. Teach kids to let the print bed cool before removing a part, and to wash their hands after handling a glue stick. These are the same rules as any workshop: hot things stay untouched, small parts stay on the table, and everyone cleans up when the build is done. With those rules in place, kids can run the project themselves, which is the point.
STEM projects for kids to finish in a weekend
Pick projects with a clear finish line. Day one, build the car and drive it. Day two, print a part and bolt it on. Week two, add the arm and pick something up. Each step ends with a working machine, so kids stay motivated through the next step. Browse the Robotics category and the 3D Printer Filament category to plan the next project, and let the kids pick what the robot does next. Choice is what turns a school assignment into a hobby.
Ships from our secure NY warehouse in the USA
Quality RC Parts is a USA shop, and every order ships from our secure NY warehouse. Orders leave in 1 to 2 business days with tracking sent by email, and shipping is free on orders over $100. No overseas wait, no customs. We are a working repair shop, and we stand behind every part we sell.
Arduino vs ESP32 vs RP2040 is the first choice every robot builder faces. All three run robots, all three are cheap, and all three have huge communities. The right pick depends on what your robot needs to do. This guide compares them on price, power, pins, and wireless, so you can pick the right dev board for your robot the first time.
Arduino vs ESP32 vs RP2040 at a glance
Arduino is the classic starter board. The UNO R3 Compatible Development Board costs $9.27, uses the ATmega328P chip, and connects over USB or Type-C with a CH340G chip. Most beginner tutorials, example code, and shields are written for Arduino first. If you are new, this is the easiest board to get working. ESP32 is the wireless board. The ESP32-S3 Development Board DevKitC-1 costs $10.12, with WiFi and Bluetooth built in, a 44 pin layout, and a Type-C USB connection. It is the pick when your robot needs a phone app, a web page, or a wireless link. RP2040 is the value board. The RP2040-Zero Microcontroller Board costs $7.11, is Pico compatible, and connects over USB-C with 2MB of flash. It gives you modern hardware for the lowest price of the three.
Price and what you get for it
Price is close across the three, so do not pick on price alone. The RP2040-Zero is $7.11, the UNO R3 is $9.27, and the ESP32-S3 is $10.12. For a few dollars more, the ESP32-S3 adds WiFi and Bluetooth, which is the cheapest way to add wireless to any robot. The RP2040 Pro Micro Development Board costs $8.37 and packs 16MB of flash with USB-C and QMK compatibility, which makes it a strong pick for keyboards and compact builds. Match the board to the job, not to the lowest sticker price.
Power and pins
Arduino boards are simple and forgiving. They run at 5V, tolerate wiring mistakes better than most boards, and have enough pins for a car chassis, a few sensors, and a servo or two. ESP32 boards are faster, with more memory and more pins, which matters when your robot runs a camera, a display, and several sensors at once. RP2040 sits in the middle, with a fast dual core chip and plenty of pins in a small package. If your robot is a car with two motors and a distance sensor, any of the three works. If it is a robot with a camera, pick the ESP32.
Wireless and cameras
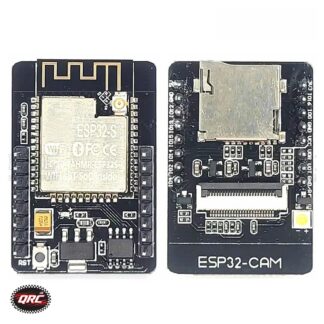
Only the ESP32 family has WiFi and Bluetooth built in. That is the deciding factor for many builds. A robot you drive from your phone, a sensor node that reports to a web page, or a camera that streams video all need the ESP32. The ESP32-CAM Development Board costs $25.99 and adds an OV2640 camera module with 4MB of PSRAM, which is enough to stream video from your robot. Arduino and RP2040 can add wireless with extra modules, but that costs more and adds wiring. If wireless is on your list at all, start with the ESP32-S3.
The most common mistake is buying the most powerful board first. A beginner with an ESP32-S3 and no plan will spend more time fighting WiFi settings than building a robot, while the same robot on a UNO R3 would already be driving. Another mistake is buying a board with no plan for power. A robot car needs a battery box and a way to switch the motors off, and that matters more than which chip is on the board. A third mistake is skipping the tutorials. Every board has official examples that blink a light, read a button, and drive a motor. Run those first, even if they feel too easy. They prove your board, your cable, and your software all work, which saves hours of guessing later. Pick the board that matches the project in front of you, learn it properly, and upgrade when the next project asks for more.
Which dev board for your robot
Pick Arduino when you are learning and want the most tutorials. Pick the ESP32-S3 when your robot needs WiFi, Bluetooth, or a camera. Pick the RP2040-Zero when you want the cheapest capable board for a compact project. Many builders end up owning all three, because each one is under $11 and each one fits a different job. Browse the Microcontrollers category to compare boards side by side, and start with the one that matches your next project, not your last one.
Ships from our secure NY warehouse in the USA
Quality RC Parts is a USA shop, and every order ships from our secure NY warehouse. Orders leave in 1 to 2 business days with tracking sent by email, and shipping is free on orders over $100. No overseas wait, no customs. We are a working repair shop, and we stand behind every part we sell.
A robotics kit for beginners is the fastest way to go from curious to building. You get a chassis, motors, wheels, and the hardware to put it together, instead of hunting down each part on your own. This guide covers what a good starter kit includes, which kit to buy first, and the simple first project that gets your robot rolling the same day it arrives.
What a robotics kit for beginners should include
A good starter kit gives you a complete rolling base. Look for a chassis with motors and wheels already matched to it, a battery box, and the screws and standoffs to assemble it. Speed encoders are a bonus, because they let the robot measure how fast each wheel turns, which is how it learns to drive straight. Avoid kits that are only a bare frame with no motors. You want to build a robot, not shop for missing parts.
Start with a robot car chassis
The best first robot is a car. It is simple to assemble, easy to program, and fun to drive the minute it works. The Smart Robot Car Chassis Kit costs $48.22 and comes with a speed encoder and battery box for Arduino, in 2WD or 4WD. It is a solid first pick because everything you need to roll is in the box. If you want something that moves differently, the Mecanum Wheel 4WD Robot Car Chassis Kit costs $47.11. It is built from aluminum alloy with 60mm omni wheels, so the robot can slide sideways and spin in place, which a normal car chassis cannot do.
Add a robot arm once the car drives
A robot arm is the best second project. The 4-DOF Acrylic Robot Arm Kit with Claw costs $18.00 and comes unassembled, with SG90 servos and UNO and rocker options. Four degrees of freedom means the arm can reach, lift, rotate, and grab with its claw. Mount it on your car chassis and you have a mobile robot that picks things up. Building the arm also teaches you how servos work, which is a skill every robot project uses.
Select options
This product has multiple variants. The options may be chosen on the product page
The board that runs your robot
A chassis needs a brain. The UNO R3 Compatible Development Board costs $9.27 and uses the ATmega328P chip with a CH340G USB connection. It is the classic first board for Arduino projects, and most beginner tutorials are written for it. If you want wireless control later, the ESP32-S3 Development Board DevKitC-1 costs $10.12 and adds WiFi and Bluetooth, with a 44 pin layout and a Type-C USB connection. Start with the UNO R3, and move to the ESP32-S3 when you want to drive the robot from your phone.
Your first build, step by step
Build the chassis first and test the motors before you add anything else. Mount the board, connect the motor wires, and load a simple example sketch that drives forward for two seconds and stops. When that works, add the battery box and test it rolling on the floor. Then mount the arm, connect the servos one at a time, and test the claw. Working in small steps means you always know which part broke if something stops. That habit will save you hours on every project after this one.
Programming your first robot
You do not need to know how to code before you start. The free Arduino software comes with example programs, called sketches, that already drive motors, read sensors, and move servos. Open an example, read the comments, and change one number to see what happens. Change the motor speed from 100 to 200 and the robot goes faster. Change a delay from 1000 to 200 and the robot turns sooner. That is programming: small changes, tested one at a time. There are thousands of free tutorials written for the UNO R3, and most of them assume you have never written a line of code. Pick one tutorial, follow it exactly, and only change things after it works.
What to buy first
If you are buying one robotics kit for beginners, start with the Smart Robot Car Chassis Kit and a UNO R3 board. Add the robot arm kit next, then a set of jumper wires and a small screwdriver set if you do not own them already. You can browse the full Robotics category and the Microcontrollers category to plan your next build. Buy the kit, build it the day it arrives, and learn by driving it.
Ships from our secure NY warehouse in the USA
Quality RC Parts is a USA shop, and every order ships from our secure NY warehouse. Orders leave in 1 to 2 business days with tracking sent by email, and shipping is free on orders over $100. No overseas wait, no customs. We are a working repair shop, and we stand behind every part we sell.