
Pull-Up Pull-Down Resistors: Why Floating Pins Misbehave
A floating pin reads randomly because nothing drives it, and the fix is one resistor. A pull-up resistor ties the pin to the supply voltage, so it reads high. A pull-down resistor ties the pin to ground, so it reads low. The value for a button is 10 kOhm, and microcontrollers have a pull-up you can turn on with INPUT_PULLUP.
What is a floating pin?
A digital input pin has a very high input impedance, in the range of hundreds of megaohms, so it draws almost no current and only senses voltage. When nothing is connected to the pin, or when a button connected to it is open, the pin voltage is undefined. That state is called floating. The pin acts like a small antenna: it picks up noise from nearby wires, the mains field and your hand as it approaches, and the reading flips between high and low dozens of times per second.
On an Arduino Uno at 5 V, the ATmega328P treats anything above 3.0 V, or 60 percent of VCC, as a definite high, and anything below 1.5 V, or 30 percent of VCC, as a definite low. The region between 1.5 V and 3.0 V is undefined, and a floating pin wanders through it. The result is an LED that lights without a button press, a counter that increases randomly, or an interrupt that fires constantly. None of that means the board is broken. It means the pin has no default level.
You can see it yourself. Connect a loose jumper wire to digital pin 2 with no button, upload a sketch that prints digitalRead to the serial monitor, and touch the end of the wire. The readings flicker. That flicker is the floating pin picking up your body as an antenna.
Pull-up pull-down resistors: how does a pull-up resistor work?
A pull-up resistor connects the input pin to the supply voltage, VCC, through a resistor, typically 10 kOhm, while the button connects the pin to ground. With the button open, almost no current flows through the pin, so there is no voltage drop across the resistor, and the pin sees VCC, which reads high. When you press the button, the pin connects directly to ground, which reads low. A small current flows through the resistor at that moment: by Ohm law, current equals voltage divided by resistance, so 5 V divided by 10 kOhm is 0.5 mA.
The resistor also prevents a short circuit. If you connected the pin directly to VCC instead of through a resistor, pressing the button would short the supply to ground. The resistor limits that current to 0.5 mA, which is safe. A pull-up makes the logic active low: released reads high, pressed reads low. That trips beginners up at first, but it is the most common arrangement, because most microcontrollers have built in pull-ups and a button to ground is the simplest wiring.
How does a pull-down resistor work?
A pull-down resistor is the mirror image. The resistor connects the pin to ground, and the button connects the pin to VCC. With the button open, the pin is tied to ground through the resistor and reads low. When you press the button, the pin connects directly to VCC and reads high. The same 10 kOhm value applies, and the same 0.5 mA flows while the button is held at 5 V.
Pull-down logic is active high: released reads low, pressed reads high. That reads more naturally in code, because pressed equals true. The trade off is that most microcontrollers have built in pull-ups but no built in pull-downs, so a pull-down usually needs an external resistor, while a pull-up often needs only one line of code. The ESP32 is an exception: most of its GPIO pins have both internal pull-ups and internal pull-downs.
Why is 10 kOhm the standard value?
The value is a trade off between current waste and noise rejection. Too low a value wastes current: a 100 Ohm pull-up at 5 V draws 50 mA while the button is held, which is wasteful and can exceed the resistor rating. Too high a value is too weak: a 1 MOhm pull-up lets noise overcome it, and the pin is slow to return to high because of its own capacitance. The range of 4.7 kOhm to 10 kOhm is the sweet spot for buttons: 5 V divided by 10 kOhm is 0.5 mA when pressed, and the pull is strong enough to reject noise.
A CMOS input pin draws almost no current, so the pull-up value is set by noise and speed, not by the pin impedance: a stronger pull rejects more noise and pulls the line high faster, at the cost of more current while the button is held. For I2C buses, the value is lower, typically 4.7 kOhm, because the bus must rise fast enough for the clock speed. For a long wire or a noisy environment, use 4.7 kOhm instead of 10 kOhm for a stronger pull.
How do internal pull-ups work?
Most microcontrollers include switchable pull-up resistors inside the chip. On an Arduino, you turn one on with a single line in setup: pinMode with INPUT_PULLUP. The ATmega328P internal pull-up is 20 kOhm to 50 kOhm, which is weaker than an external 10 kOhm resistor but strong enough for a button on a short wire. The ESP32 internal pull-ups are similar, and the ESP32 also offers INPUT_PULLDOWN on most GPIO pins. The Raspberry Pi Pico offers both pull-up and pull-down through its GPIO configuration.
Internal pull-ups have two limits. First, GPIO 34 to 39 on the original ESP32 are input only and have no internal pull resistors at all, so a button on those pins needs an external resistor. Second, a long wire picks up more noise than a weak internal pull-up can reject, so a button at the end of a 3 foot cable needs an external 4.7 kOhm or 10 kOhm resistor. Use the internal pull-up for a button on the breadboard next to the board, and an external resistor for a button on a long cable or in a noisy robot.
What about I2C pull-ups?
I2C needs pull-up resistors on both lines, SDA and SCL, because the bus is open drain: devices pull the line low, and only the resistor pulls it high. Without pull-ups, the bus floats and no device answers. The typical value is 4.7 kOhm to the logic voltage, and many breakout boards include them already. If two boards on the same bus each include pull-ups, the parallel combination halves the resistance, which is usually still fine, but three or more boards with pull-ups can make the pull too strong for a weak device to pull low.
The same rule applies to any open drain signal, including a one wire bus and some interrupt lines. A push pull output, such as a normal GPIO output or an SPI line, does not need a pull-up, because the driver actively drives the line high and low. When in doubt, read the device datasheet: it states whether the output is open drain or push pull, and what pull-up value it expects.
How do you debounce a button?
A mechanical button bounces: its contacts open and close several times in a few milliseconds when pressed, and each bounce looks like a separate press to a fast microcontroller. A pull-up resistor does not fix bounce. Debouncing does, and the simplest fix is a short delay in code: when the pin changes, wait 20 ms to 50 ms and read it again. If it still reads the same value, accept the press.
A hardware debounce uses a capacitor across the button, typically 0.1 uF, which smooths the bounces into one transition. A software debounce is cheaper and more common in Arduino code, and the Bounce2 library implements it cleanly. Debounce after you fix the floating pin: a floating pin with a debounce delay still reads randomly, because the pin never settles.
Code: button with internal pull-up
The sketch below reads a button on digital pin 2 with the internal pull-up, and it prints the state to the serial monitor. It uses the Arduino core and it runs on an Uno, a Nano or an ESP32 with the pin number changed. It was not compiled in this draft, and the compile result is logged as code not compiled in the header.
// Button with internal pull-up, active low
// Wiring: button between digital pin 2 and ground. No external resistor.
const int buttonPin = 2;
const int ledPin = 13;

void setup() {
  pinMode(buttonPin, INPUT_PULLUP); // Enable the internal pull-up resistor
  pinMode(ledPin, OUTPUT);
  Serial.begin(115200);
}

void loop() {
  bool pressed = digitalRead(buttonPin) == LOW; // Pressed reads LOW with a pull-up
  digitalWrite(ledPin, pressed ? HIGH : LOW);
  Serial.println(pressed ? "Pressed" : "Released");
  delay(100);
}
For the UNO pins in these examples, see the Arduino UNO R3 pinout guide.
FAQ
What value resistor do I need for a pull-up?
10 kOhm is the standard value for a button. Use 4.7 kOhm for a stronger pull on a long wire or a noisy environment, and for I2C buses. The range of 4.7 kOhm to 10 kOhm covers most button and sensor work.
Can I use INPUT_PULLUP instead of a resistor?
Yes, for a button on a short wire. The internal pull-up on an Arduino is 20 kOhm to 50 kOhm, which is strong enough for a bench test. Use an external 10 kOhm resistor for a long wire, a noisy environment, or a pin with no internal pull-up, such as GPIO 34 to 39 on the ESP32.
Why does my button read pressed when nobody touches it?
The pin is floating. Nothing drives it when the button is open, so noise flips the reading. Add a pull-up resistor, or enable INPUT_PULLUP, and the pin reads a stable high when released.
Should I use a pull-up or a pull-down?
Use a pull-up when your microcontroller has a built in pull-up, which most do, and when a button to ground is the simplest wiring. Use a pull-down when you need pressed to read high, or when the sensor output is open drain to ground.
Do I need a pull-up on every input pin?
Every input pin that can float needs a default level, either from a pull-up, a pull-down, or a device that always drives it. A pin connected to a sensor output that always drives the line does not need one. A pin connected to a button or a switch always does.
Parts used
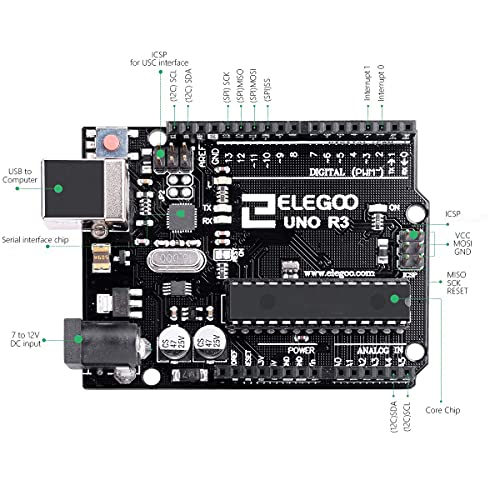
ELEGOO UNO R3 Microcontroller Board: the Arduino board used in the button examples. ELEGOO Dupont Jumper Wire Set, 120-Piece: the jumper wires for the breadboard button wiring.
Sources
- SparkFun pull-up resistor tutorial, 10 kOhm value, internal pull-ups
- Pull-up and pull-down guide, floating input, 10 kOhm value, ATmega328P thresholds
- ATmega328P pinout and limits, Microchip datasheet DS40002061B
- Espressif ESP32 Series Datasheet v5.3
Last updated: 2026-11-21. Search volume: not verified. Product links use the store short link form with the product ID; confirm the product slug at publish time.