
Bluetooth Robot Car with ESP32 BLE and a Phone
Control this Bluetooth robot car from your phone with the ESP32 native Bluetooth Low Energy radio. No HC-05 or HC-06 module is needed, because the ESP32 DevKit V1 already has BLE built in. The car runs a BLE server with one writable characteristic, the phone writes drive commands to it, and the car stops by itself when the phone disconnects.
Quick facts
| Item | Value |
|---|---|
| Radio | ESP32 native BLE 4.2, no extra module |
| Control app | nRF Connect or any BLE scanner app, free |
| Service | One custom service, one writable drive characteristic |
| Commands | Single letters: F, B, L, R, S, plus speed digits 0 to 9 |
| Driver | L298N, 2 A per channel |
| Failsafe | Car stops on BLE disconnect |
Why use ESP32 native BLE instead of a Bluetooth module?
The ESP32 DevKit V1 has a Bluetooth radio on the chip. It supports Bluetooth Classic and Bluetooth Low Energy 4.2. A separate HC-05 module adds a second radio, a second serial port, and a second power draw for no benefit. This build uses the radio that is already on the board.
BLE is not a wireless serial port. It is a tree of named values. The car publishes a service with a characteristic, and the phone writes values to that characteristic. That sounds more complex than serial, but it gives you connection handling for free. The ESP32 knows when the phone connects and when it drops, and the sketch uses that event as the failsafe.
No HC-05 or HC-06 module is stocked for this build, so the design does not spec one. The phone app is a generic BLE scanner, not a custom app. That keeps the build to two parts: the car and the phone you already own.
Bluetooth robot car: how does BLE control work?
The car runs a BLE server. The server holds one service, identified by a UUID, and one characteristic inside it, identified by a second UUID. The characteristic accepts writes and sends notifications. The phone scans, finds the car by its advertised name, connects, and writes a short string to the characteristic.
The string is a drive command. F drives forward, B reverses, L turns left, R turns right, and S stops. A digit after the letter sets the speed from 0 to 9, so F8 means forward at speed 8. The sketch parses the letter and the digit, then drives the L298N the same way the wired car build does. Commands are two characters, far under the default 20-byte BLE payload, so no MTU change is needed.
The UUIDs in the code are examples from the standard BLE tutorial set. Generate your own UUIDs for a finished project, because reused UUIDs can confuse scanner apps when two devices advertise the same service. A free UUID generator online makes a fresh pair in seconds.
How do you drive it from a phone?
Install nRF Connect, a free BLE scanner app, on your phone. Power the car, open the app, and scan. The car advertises as ESP32-Robot-Car. Tap Connect, then open the service and the drive characteristic. Write F8 as text or bytes to drive forward at speed 8, and write S to stop.
nRF Connect is a test tool, not a joystick. Each command is a manual write, so the car holds the last command until you write a new one. That is fine for testing, but it is not smooth driving. A proper control app with buttons or a joystick sends commands continuously, and any app that writes to a BLE characteristic will work with this sketch.
Keep the phone within a few meters of the car for the first test. BLE range in open air is tens of meters, but walls and the metal chassis cut it. If commands lag, move closer before you blame the code.
What happens when the phone disconnects?
The sketch registers server callbacks for connect and disconnect. On disconnect it sets a flag, stops both motors, and restarts advertising so the phone can reconnect. That is the failsafe. A car that kept its last command after the phone died would drive until it hit a wall.
Test the failsafe on purpose. Drive forward, then switch the phone Bluetooth off or walk out of range. The car should stop within a second. If it keeps driving, the disconnect callback is not running, so check that the callbacks are set before the service starts.
The sketch also stops the car if no command arrives for 2 seconds while connected. That covers the case where the app is open but stops sending. Both timers together mean the car never runs away from a dead link.
Wiring
Wire the build with the power off. Check every connection in the table before you connect any battery or USB cable.
| From | To | Notes |
|---|---|---|
| Battery box positive | L298N 12 V terminal | Motor supply, 6 V from 4 AA cells |
| Battery box negative | L298N GND and ESP32 GND | Common ground is required |
| L298N OUT1, OUT2 | Left TT motor | Swap these two wires to fix a reversed wheel |
| L298N OUT3, OUT4 | Right TT motor | Swap these two wires to fix a reversed wheel |
| ESP32 GPIO 25 | L298N ENA | Remove the ENA jumper; PWM speed, left motor |
| ESP32 GPIO 27 | L298N IN1 | Left motor direction A |
| ESP32 GPIO 14 | L298N IN2 | Left motor direction B |
| ESP32 GPIO 26 | L298N ENB | Remove the ENB jumper; PWM speed, right motor |
| ESP32 GPIO 12 | L298N IN3 | Right motor direction A; keep low at boot |
| ESP32 GPIO 13 | L298N IN4 | Right motor direction B |
| USB 5 V or battery 5 V | ESP32 USB port | Logic supply only; motor current never passes through USB |
Power budget
The motors run from 4 AA cells at about 6 V into the L298N, which drops about 2 V, so each TT motor sees about 4 V. Two TT motors draw about 1 to 2 A together at full load. The ESP32 runs from USB 5 V or a separate 5 V supply and draws about 80 to 160 mA with BLE advertising and connected.
BLE uses less power than Wi-Fi, but the car still needs its motors on a separate supply. Never power the motors from the ESP32 5 V pin. The L298N logic draws only a few milliamps from its onboard regulator when the 5 V jumper is fitted at 6 V.
For outdoor driving, a USB power bank powers the ESP32 while the AA box powers the motors. Keep both supplies separate except for the shared ground between the battery negative, the L298N ground, and the ESP32 ground.
Build steps
- Assemble the chassis kit, fit the TT motors and wheels, and mount the L298N and the ESP32 on the top plate.
- Wire the L298N and the motors from the wiring table. Leave the 5 V jumper on for a 6 V pack.
- Remove the ENA and ENB jumpers. Wire the six control pins and join the battery negative to the ESP32 ground.
- Upload the sketch below to the ESP32 DevKit V1. No extra library is needed, because BLE ships with the core.
- Install nRF Connect on your phone. Power the car and scan for ESP32-Robot-Car.
- Connect, open the drive characteristic, and write S to confirm the link. Then write F5 and confirm both wheels spin forward.
- Lift the car first, then set it on the floor. Test the disconnect failsafe by switching the phone Bluetooth off while driving.
Code
Libraries: none beyond the ESP32 Arduino core (BLE ships with the core). Board: ESP32 DevKit V1. The sketch uses the core 4.0.0 BLE API (BLE.h handles, BLEProperty/BLEPermission) and will not compile on core 2.x/3.x, whose BLEDevice pointer API was removed in 4.0. The UUIDs below are the standard tutorial pair; generate your own for a finished project.
// Bluetooth robot car: ESP32 native BLE server + L298N
// Board: ESP32 DevKit V1. Library: BLE (ships with the core).
// Requires Arduino ESP32 core 4.0.0 or later (ESP-IDF 6.1.1).
// The core 2.x/3.x BLEDevice pointer API does not compile on 4.0.
#include

static const BLEUUID SERVICE_UUID("4fafc201-1fb5-459e-8fcc-c5c9c331914b");
static const BLEUUID CHARACTERISTIC_UUID("beb5483e-36e1-4688-b7f5-ea07361b26a8");

const int ENA = 25;  // Left motor PWM (remove the ENA jumper)
const int IN1 = 27;
const int IN2 = 14;
const int ENB = 26;  // Right motor PWM (remove the ENB jumper)
const int IN3 = 12;
const int IN4 = 13;

bool deviceConnected = false;
unsigned long lastCommandMs = 0;
const unsigned long COMMAND_TIMEOUT_MS = 2000;  // Stop if silent for 2 s

void driveMotor(int pwmPin, int inA, int inB, int speed) {
  if (speed >= 0) {
    digitalWrite(inA, HIGH);
    digitalWrite(inB, LOW);
    analogWrite(pwmPin, speed);
  } else {
    digitalWrite(inA, LOW);
    digitalWrite(inB, HIGH);
    analogWrite(pwmPin, -speed);
  }
}

void drive(int left, int right) {
  driveMotor(ENA, IN1, IN2, left);
  driveMotor(ENB, IN3, IN4, right);
}

void stopCar() {
  analogWrite(ENA, 0);
  analogWrite(ENB, 0);
}

// Command format: letter plus speed digit 0 to 9.
// F8 = forward speed 8, L5 = left speed 5, S = stop.
void handleCommand(String cmd) {
  if (cmd.length() < 1) return;
  char dir = cmd.charAt(0);
  int level = 5;  // Default speed level
  if (cmd.length() > 1 && isDigit(cmd.charAt(1))) {
    level = cmd.charAt(1) - '0';
  }
  int speed = map(level, 0, 9, 0, 255);
  lastCommandMs = millis();
  if (dir == 'F') drive(speed, speed);
  else if (dir == 'B') drive(-speed, -speed);
  else if (dir == 'L') drive(-speed, speed);
  else if (dir == 'R') drive(speed, -speed);
  else if (dir == 'S') stopCar();
}

void setup() {
  Serial.begin(115200);
  pinMode(ENA, OUTPUT); pinMode(IN1, OUTPUT); pinMode(IN2, OUTPUT);
  pinMode(ENB, OUTPUT); pinMode(IN3, OUTPUT); pinMode(IN4, OUTPUT);
  stopCar();
  BLE.begin("ESP32-Robot-Car");
  BLEServer server = BLE.createServer();
  server.onConnect([](BLEServer &s, const BLEConnInfo &conn) {
    deviceConnected = true;
    lastCommandMs = millis();
  });
  server.onDisconnect([](BLEServer &s, const BLEConnInfo &conn, uint8_t reason) {
    deviceConnected = false;
    stopCar();  // Failsafe: halt on disconnect
  });
  server.advertiseOnDisconnect(true);
  BLEService svc = server.createService(SERVICE_UUID);
  BLECharacteristic chr = svc.createCharacteristic(
    CHARACTERISTIC_UUID,
    BLEProperty::Read | BLEProperty::Write | BLEProperty::Notify,
    BLEPermission::ReadWriteOpen);
  // Notify auto-creates the CCCD on core 4.0; no BLE2902 descriptor needed.
  chr.onWrite([](BLECharacteristic &c, const BLEConnInfo &conn) {
    handleCommand(c.getStringValue());
  });
  server.start();
  BLE.getAdvertising().addServiceUUID(SERVICE_UUID);
  BLE.startAdvertising();
  Serial.println("BLE car advertising as ESP32-Robot-Car");
}

void loop() {
  // Stop if connected but silent for 2 seconds.
  if (deviceConnected && millis() - lastCommandMs > COMMAND_TIMEOUT_MS) {
    stopCar();
  }
  delay(50);
}
Test and tune it
Write F5 in nRF Connect and confirm both wheels spin forward while the car is lifted. Write S and confirm they stop. If nothing moves, check that the characteristic accepts writes and that the command letter is uppercase.
Write R5 and confirm the car turns right. If it turns left, swap the left and right motor wiring as a pair, or swap the L and R cases in handleCommand().
Switch the phone Bluetooth off while driving forward. The car should stop within a second. If it keeps driving, the disconnect callback is not registered, so check that onDisconnect is registered before server.start().
FAQ
Do I need an HC-05 module for Bluetooth on an ESP32?
No. The ESP32 DevKit V1 has Bluetooth Classic and BLE built in. This build uses native BLE, so no extra module is fitted and no second serial port is needed.
What phone app controls the car?
Any BLE scanner app that can write to a characteristic works. nRF Connect is free and shows the service, the characteristic, and the write box. A custom app with buttons is smoother, but it is not needed to test the build.
Why does the car stop when my phone locks?
Many phones drop BLE connections when the screen locks to save power. Keep the screen on while driving, or reconnect and write a new command after unlocking.
Can BLE and Wi-Fi run at the same time on an ESP32?
Yes, but they share the 2.4 GHz radio, so throughput drops when both are active. This build uses BLE only, so the radio is free for the car link.
How far can the phone control the car?
BLE range in open air is tens of meters, but walls and the metal chassis cut it. Test outdoors in open space, and keep the phone within a few meters for the first run.
Parts used
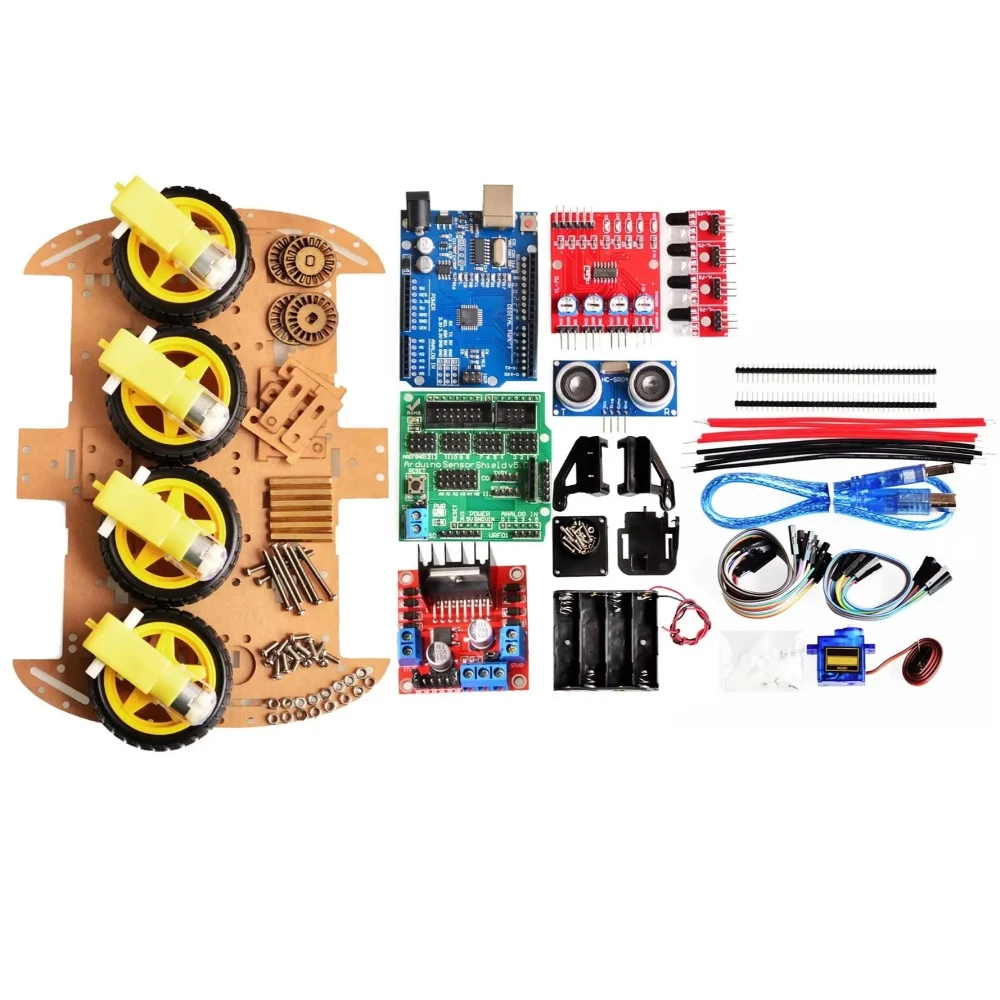
Build it with the ESP32 DevKit V1 Development Board, 30-Pin WROOM-32, the Smart Robot Car Chassis Kit with Speed Encoder and Battery Box for Arduino, 2WD / 4WD, and the L298N Dual H-Bridge Motor Driver Module for Arduino. The wired version is L298N Robot Car: Wire and Drive Two DC Motors, and the no-router radio version is ESP-NOW Joystick Robot Car: Two ESP32 Boards, No Router. For the chip radios behind the choice, see ESP32 vs ESP32-S3 vs ESP32-C3 vs ESP32-C6.
Sources
- Espressif Arduino-ESP32 documentation
- Espressif: The Bluetooth Rewrite in Arduino ESP32 v4.0 (BLE API refactor)
- Arduino-ESP32 BLE migration guide, 3.x to 4.0
- Arduino-ESP32 BLE library (BLE.h, BLEServer, BLECharacteristic)
- ST L298 datasheet
Last updated: 2026-11-21. Search volume: not verified. Product links use the store short link form with the product ID; confirm the product slug at publish time.