Mecanum Wheel Robot Car Build: Omni-Directional Drive
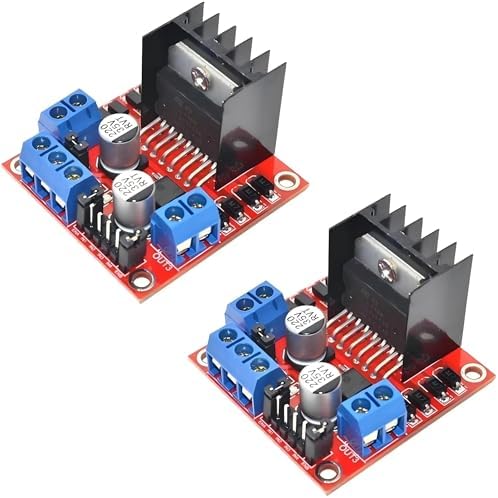
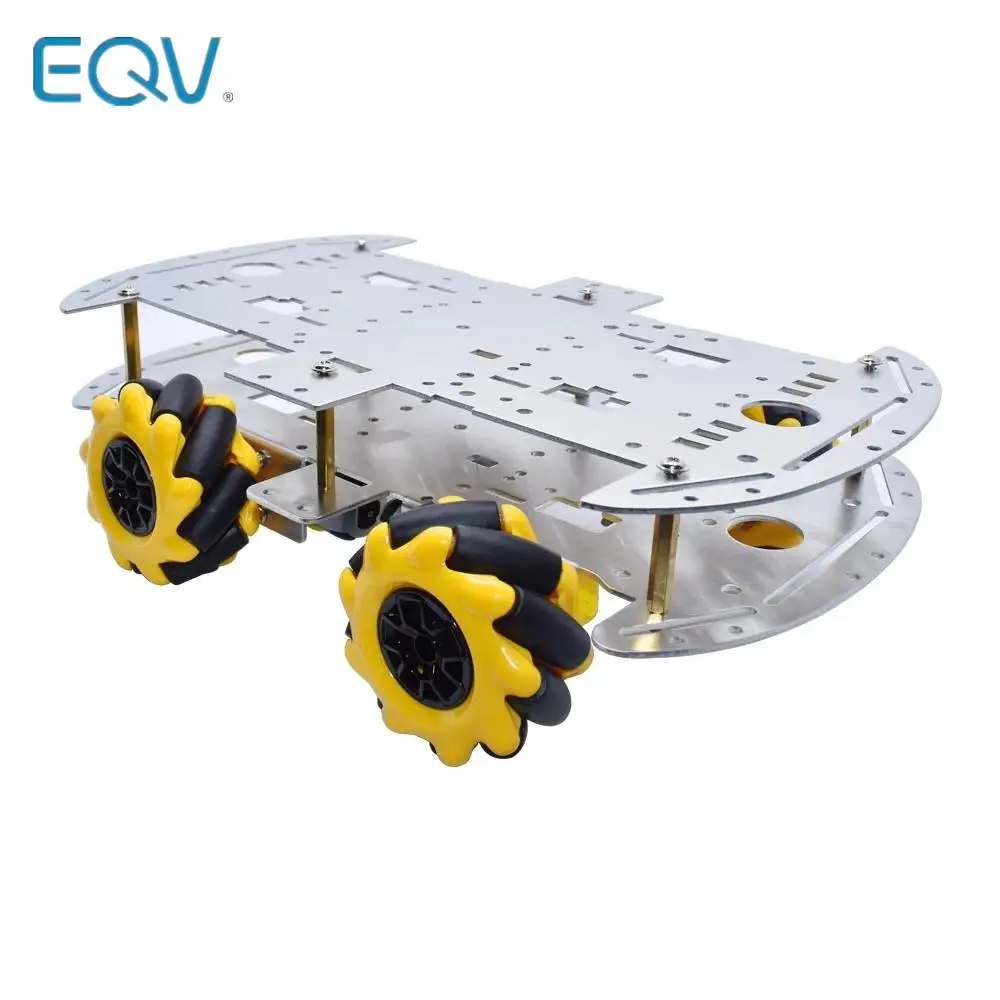
Build a mecanum wheel robot car that drives forward, sideways, and diagonally without turning. Each wheel carries rollers set at 45 degrees, and the four wheels spin in matched patterns to strafe. The build uses two L298N drivers, one per wheel pair, because one L298N drives only two motors and a mecanum car has four.
Quick facts
| Item | Value |
|---|---|
| Chassis | Mecanum 4WD chassis, aluminum alloy, 0.20 feet omni wheels |
| Drivers | 2 x L298N, one per wheel pair |
| Motors | 4 x TT gear motors, 3 to 6 V |
| Controller | ESP32 DevKit V1, 3.3 V logic |
| Roller angle | 45 degrees on each wheel |
| Moves | Forward, back, strafe left, strafe right, rotate, diagonal |
Mecanum wheel robot car: how does a wheel move sideways?
A mecanum wheel has small rollers around its rim, each set at 45 degrees to the wheel axle. When the wheel spins, the roller pushes the car partly forward and partly sideways. One wheel alone would slide diagonally, but four wheels in the right pattern cancel the unwanted parts.
For a strafe left, the front left and rear right wheels spin one way while the front right and rear left spin the other way. The forward parts cancel and the sideways parts add. The car slides left without turning. Reverse the pattern and it strafes right. That is the move a normal car cannot make.
Wheel orientation matters. The rollers on the front left and rear right wheels must angle one way, and the rollers on the front right and rear left must angle the other way, forming an X pattern when viewed from above. If one wheel is fitted backward, the car will crab and spin instead of strafing. Check the X before you wire anything.
Why does this build need two L298N drivers?
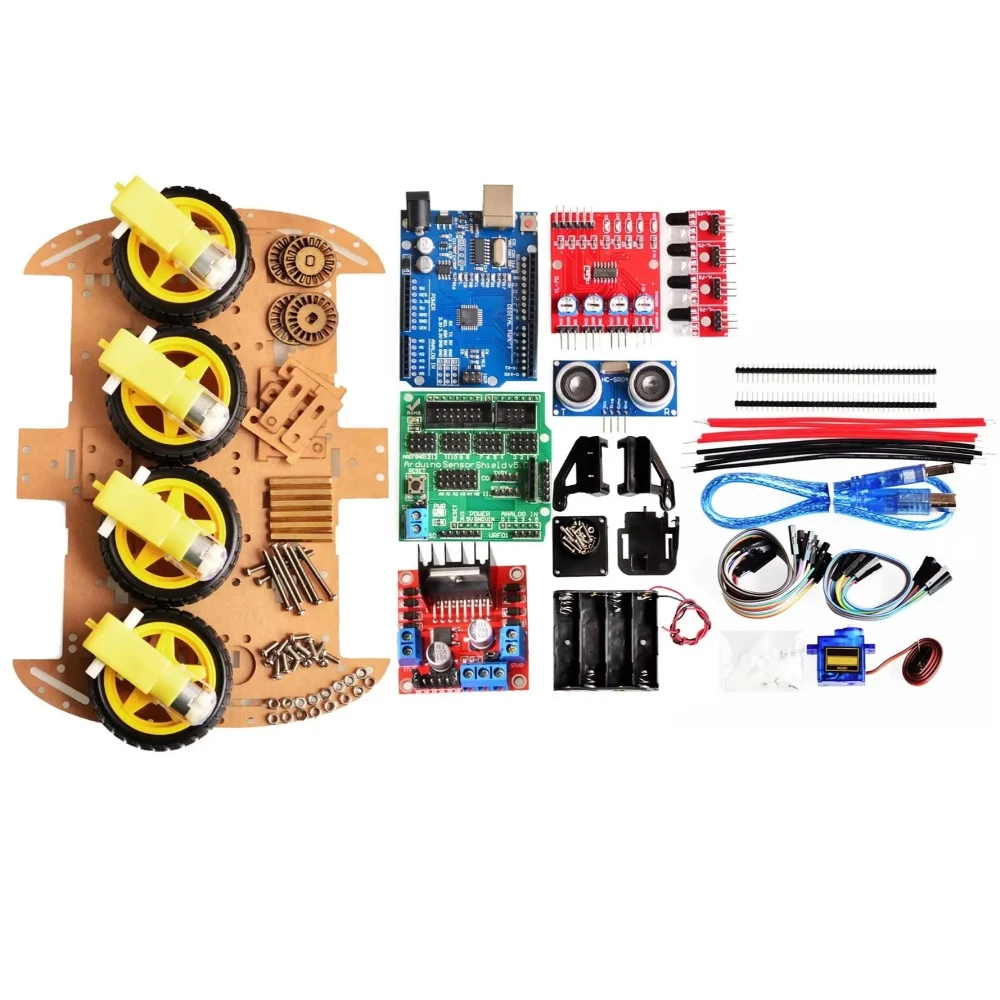
One L298N drives two DC motors. A mecanum car has four motors, so it needs two L298N modules. Each module drives one diagonal pair: the first drives the front left and rear right wheels, and the second drives the front right and rear left wheels. That pairing matches the strafe pattern and keeps the wiring tidy. Buy the 4WD Kit variant of the chassis kit: it ships with 4 TT gear motors and one L298N, so buy one more L298N for the second pair. The Plate Set variants ship with plates and wheels only, no motors or electronics. The 4WD Kit also includes a UNO R3 board and sensor shield; this build uses an ESP32 DevKit V1 in its place.
Each L298N needs its own enable and direction pins, so the build uses 12 control pins on the ESP32. The ESP32 DevKit V1 has enough GPIO pins for that, but a small board such as a SuperMini would not. Check the pinout post for your exact board before you substitute it.
Both L298N modules share one motor battery. Join the battery positive to both 12 V terminals and the battery negative to both grounds and to the ESP32 ground. Keep the 5 V jumper on at 6 V, and remove it above 12 V, on both modules.
How does the drive mix work?
The drive mix takes three inputs: forward speed, strafe speed, and rotation speed. Each wheel speed is a sum of those three with signs that depend on the wheel position. Front left equals forward plus strafe plus rotation. Front right equals forward minus strafe minus rotation. Rear left equals forward minus strafe plus rotation. Rear right equals forward plus strafe minus rotation.
The sketch below implements that mix for serial control. Type f for forward, s for strafe left, d for strafe right, l to rotate left, r to rotate right, and x to stop. Each key sets the four wheel speeds from the mix, clamps them to -255 to 255, and writes them to the two L298N modules.
Test the mix with the car lifted. Strafe left should spin the front left and rear right wheels one way and the other two the opposite way. If one wheel spins the wrong way, swap its two motor wires at its L298N output. Do not fix wheel direction in code, because the wiring is the fault.
What are the limits of a mecanum car?
Mecanum wheels slip more than normal wheels, because the rollers are always partly sliding. The car will not climb as well, will not push as hard, and will drift on smooth floors. It also draws more current, because two wheels fight each other in every strafe. Expect shorter battery life than a normal 4WD car on the same pack.
The rollers also wear faster than a solid tire, and they pick up grit. Keep the floor clean and the rollers free. A stuck roller turns a mecanum wheel into a bad normal wheel, and the car will crab instead of strafing.
For all that, the strafe is worth it on a bench or a small course. A mecanum car can slide sideways into a gap a normal car cannot reach, and it can rotate in place without a turning circle. That is why warehouse robots and camera dollies use the same wheel.
Wiring
Wire the build with the power off. Check every connection in the table before you connect any battery or USB cable.
| From | To | Notes |
|---|---|---|
| Battery box positive | Both L298N 12 V terminals | Motor supply, 6 V from 4 AA cells |
| Battery box negative | Both L298N GND and ESP32 GND | Common ground for both drivers and the logic |
| L298N A OUT1, OUT2 | Front left TT motor | First module, left channel |
| L298N A OUT3, OUT4 | Rear right TT motor | First module, right channel |
| L298N B OUT1, OUT2 | Front right TT motor | Second module, left channel |
| L298N B OUT3, OUT4 | Rear left TT motor | Second module, right channel |
| ESP32 GPIO 25, 27, 14 | L298N A ENA, IN1, IN2 | Front left motor: PWM, direction A, direction B |
| ESP32 GPIO 26, 12, 13 | L298N A ENB, IN3, IN4 | Rear right motor: PWM, direction A, direction B; GPIO 12 is a strapping pin, keep low at boot |
| ESP32 GPIO 32, 33, 15 | L298N B ENA, IN1, IN2 | Front right motor: PWM, direction A, direction B |
| ESP32 GPIO 18, 19, 21 | L298N B ENB, IN3, IN4 | Rear left motor: PWM, direction A, direction B; GPIO 21 is also I2C SDA, so do not add I2C parts to this build |
| Both L298N 5 V pins | Leave unconnected | Jumpers fitted at 6 V; do not feed 5 V in as well |
| USB 5 V | ESP32 USB port | Logic supply only; motor current never passes through USB |
Power budget
Four TT motors draw more than two. At full load the four motors together draw about 2 to 4 A from the 6 V pack, split across two L298N modules at about 1 to 2 A per module. Each L298N drops about 2 V, so each motor sees about 4 V. The heatsinks on both modules will get warm, so give them airflow.
The ESP32 runs from USB 5 V and draws about 80 to 160 mA. Each L298N logic side draws only a few milliamps from its onboard regulator. The motor battery and the logic supply share only a ground wire. Never power the motors from the ESP32 5 V pin.
A 4 AA alkaline pack sags under a 4 A load, so the car will slow during a strafe. A 5-cell NiMH pack (6 V) holds voltage better than alkalines under load. Do not use a 2-cell lithium pack here: 7.4 V nominal is above the TT motor 3 to 6 V rating. Size the pack for the stall total, not the cruise current.
Build steps
- Assemble the mecanum chassis. Fit the four wheels in the X roller pattern: front left and rear right angle one way, front right and rear left the other way.
- Mount the two L298N modules and the ESP32 on the top plate. Label the modules A and B before you wire them.
- Wire the motors to the L298N outputs from the wiring table. Wire both modules to the same battery and to the ESP32 ground.
- Remove all four enable jumpers. Wire the 12 control pins from the wiring table.
- Upload the sketch below to the ESP32 DevKit V1. Lift the car off the floor for the first test.
- Type f, s, d, l, and r in the serial monitor and confirm each wheel spins the right way for each move.
- Set the car on the floor and strafe left and right. If it crabs instead of strafing, one wheel is fitted backward or wired in reverse.
Code
Libraries: none beyond the ESP32 Arduino core. Board: ESP32 DevKit V1. Control from the serial monitor: f forward, b back, s strafe left, d strafe right, l rotate left, r rotate right, x stop.
// Mecanum wheel robot car: 4 motors, 2 x L298N, ESP32
// Board: ESP32 DevKit V1. No extra libraries needed.
// Module A drives front-left (FL) and rear-right (RR).
// Module B drives front-right (FR) and rear-left (RL).
struct MotorPins { int pwm, inA, inB; };
MotorPins FL = {25, 27, 14};  // Module A, channel 1
MotorPins RR = {26, 12, 13};  // Module A, channel 2
MotorPins FR = {32, 33, 15};  // Module B, channel 1
MotorPins RL = {18, 19, 21};  // Module B, channel 2

const int SPEED = 200;  // 0 to 255; TT motors stall below about 80

void driveMotor(MotorPins m, int speed) {
  if (speed >= 0) {
    digitalWrite(m.inA, HIGH);
    digitalWrite(m.inB, LOW);
    analogWrite(m.pwm, speed);
  } else {
    digitalWrite(m.inA, LOW);
    digitalWrite(m.inB, HIGH);
    analogWrite(m.pwm, -speed);
  }
}

void stopAll() {
  driveMotor(FL, 0); driveMotor(FR, 0);
  driveMotor(RL, 0); driveMotor(RR, 0);
}

// Mix: forward, strafe (right is positive), rotation (right is positive).
void mix(int fwd, int strafe, int rot) {
  int fl = constrain(fwd + strafe + rot, -255, 255);
  int fr = constrain(fwd - strafe - rot, -255, 255);
  int rl = constrain(fwd - strafe + rot, -255, 255);
  int rr = constrain(fwd + strafe - rot, -255, 255);
  driveMotor(FL, fl); driveMotor(FR, fr);
  driveMotor(RL, rl); driveMotor(RR, rr);
}

void setup() {
  Serial.begin(115200);
  MotorPins all[4] = {FL, FR, RL, RR};
  for (int i = 0; i < 4; i++) {
    pinMode(all[i].pwm, OUTPUT);
    pinMode(all[i].inA, OUTPUT);
    pinMode(all[i].inB, OUTPUT);
  }
  stopAll();
  Serial.println("Keys: f forward, b back, s strafe left, d strafe right,");
  Serial.println("l rotate left, r rotate right, x stop.");
}

void loop() {
  if (Serial.available() > 0) {
    char c = Serial.read();
    if (c == 'f') mix(SPEED, 0, 0);
    else if (c == 'b') mix(-SPEED, 0, 0);
    else if (c == 's') mix(0, -SPEED, 0);  // Strafe left
    else if (c == 'd') mix(0, SPEED, 0);   // Strafe right
    else if (c == 'l') mix(0, 0, -SPEED);  // Rotate left
    else if (c == 'r') mix(0, 0, SPEED);   // Rotate right
    else if (c == 'x') stopAll();
  }
}
Test and tune it
Lift the car and type s for strafe left. The front left and rear right wheels should spin one way, and the front right and rear left the opposite way. If one wheel is wrong, swap its two motor wires at its L298N output.
Set the car on a hard floor and strafe left 1 foot. The car should slide sideways without turning. If it rotates while strafing, one wheel is fitted backward. Check the X roller pattern from above.
Drive forward 3 feet and mark the end point. Then strafe back to the start. A mecanum car drifts more than a normal car, so expect about 0.25 feet of error. That drift is normal roller slip, not a code fault.
FAQ
Why does my mecanum car need two L298N drivers?
One L298N drives two motors, and a mecanum car has four. Two modules drive one diagonal pair each, which matches the strafe pattern and keeps the wiring tidy.
Why does my mecanum car crab instead of strafing?
One wheel is fitted backward or wired in reverse. Check the X roller pattern from above, then check that each wheel spins the right way for a strafe while the car is lifted.
Why does the car drift sideways when driving forward?
Mecanum rollers always slip a little, and uneven floors make it worse. Small drift is normal. Large drift means one wheel is slower, usually from a loose motor wire or a low battery.
Can I use one driver board with four channels instead?
Yes, if it supplies four independent channels at the motor current. Two L298N modules are the stocked route in this build. A single four-channel MOSFET board is a later upgrade, not a first build change.
How fast can a mecanum car strafe?
Slower than it drives forward, because two wheels fight each other in every strafe and the rollers slip. Keep strafe speed at or below forward speed, and expect shorter battery life than a normal 4WD car.
Parts used
Build it with the Mecanum Wheel 4WD Robot Car Chassis Kit, Aluminum Alloy, 60mm Omni Wheels in the 4WD Kit variant (Single or Double Layer) and one more L298N Dual H-Bridge Motor Driver Module for Arduino (the kit already includes one L298N; one L298N drives two motors, so a four-motor car needs two) and the ESP32 DevKit V1 Development Board, 30-Pin WROOM-32 as the controller. The two-motor version is L298N Robot Car: Wire and Drive Two DC Motors, and the wireless version is ESP-NOW Joystick Robot Car: Two ESP32 Boards, No Router. For the driver comparison, see L298N vs TB6612 vs DRV8833: Which Motor Driver for Your Robot.
Sources
Last updated: 2026-11-21. Search volume: not verified. Product links use the store short link form with the product ID; confirm the product slug at publish time.